Enabling API & App Registration
To allow users to log in to your site with their Google account, you need to create a Google Cloud project and configure the OAuth. Follow steps below to create a configure your Google Cloud project.1. Sing in to continue to Google Cloud Platform
Go to https://console.cloud.google.com/ and sing in to enter the Google Cloud console.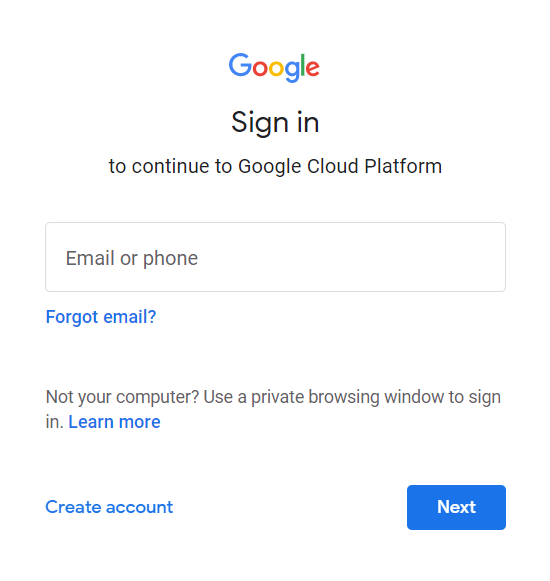
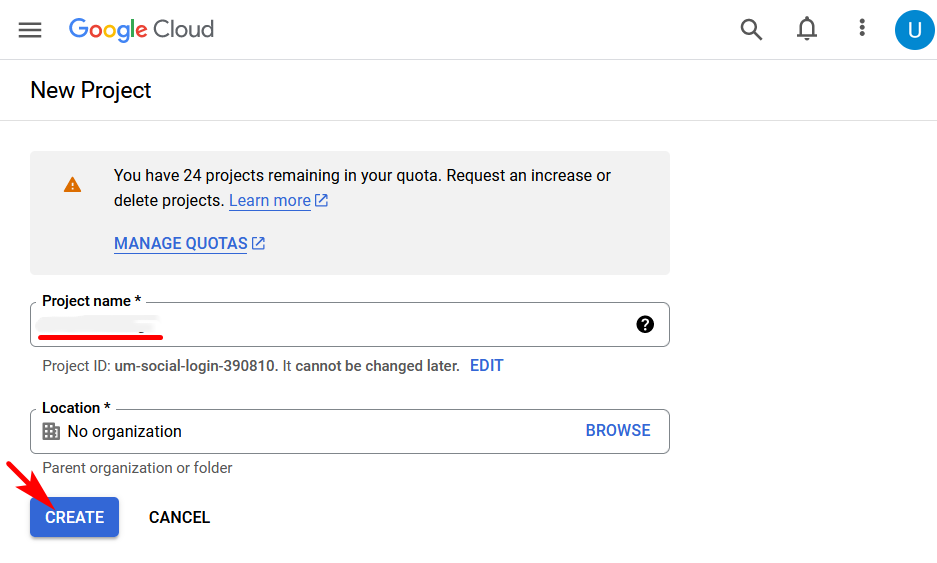
2. Create a project
Click the project button in the top menu and you’ll see the Select a project pop-up. Click the NEW PROJECT button create a project.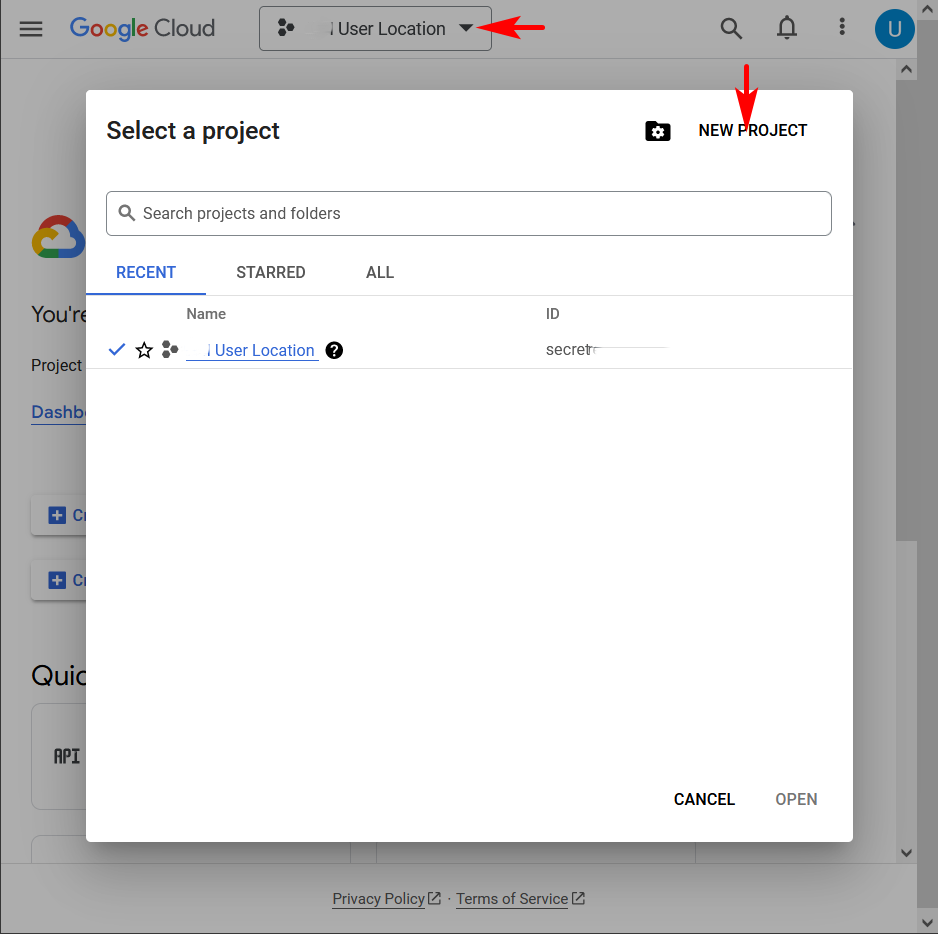
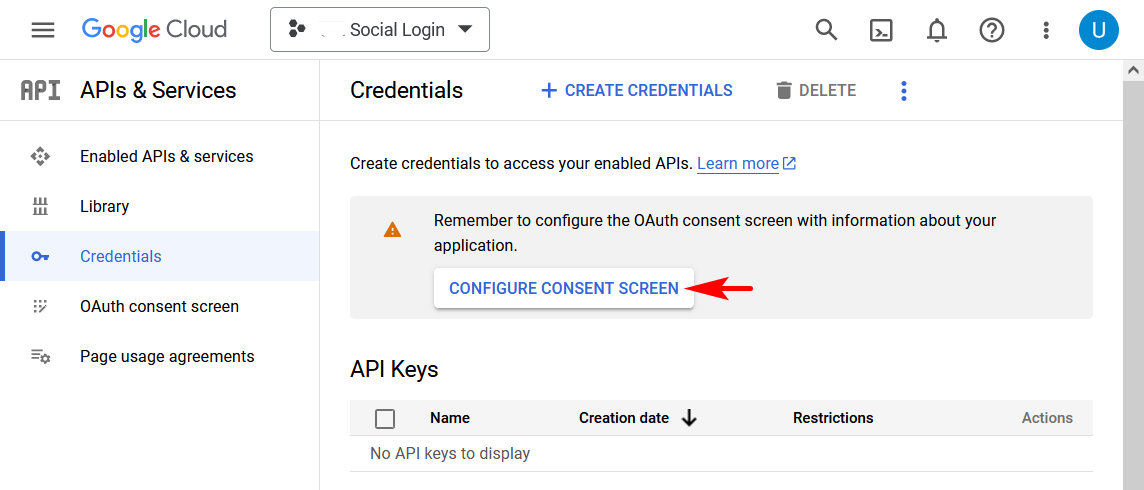
3. Start to configure the OAuth consent screen
Once a project is created, go to APIs & Services. Select Credentials from the left-side menu then click the CONFIGURE CONSENT SCREEN button.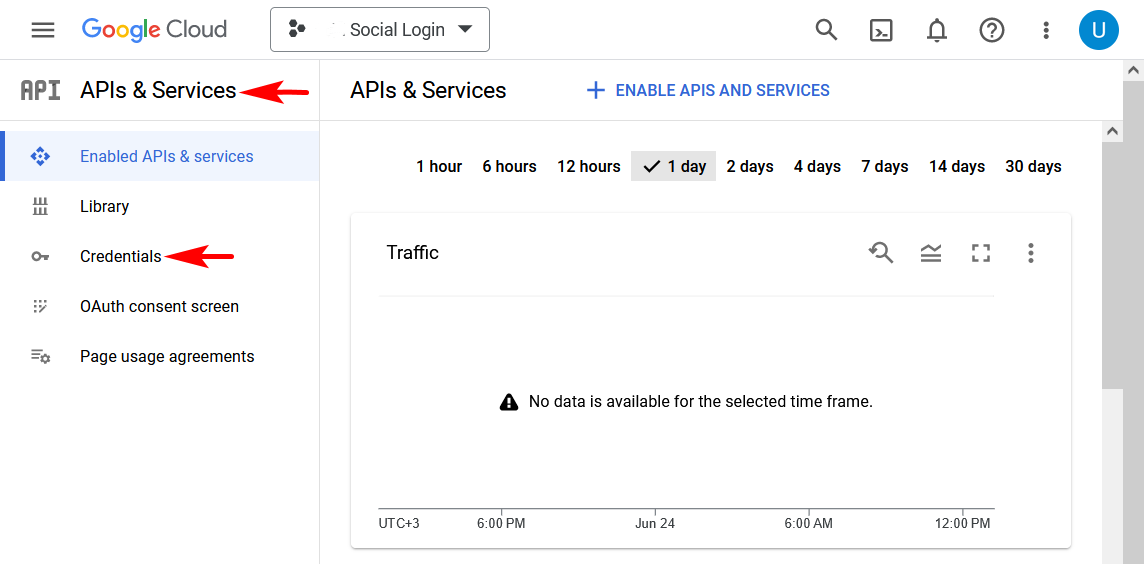
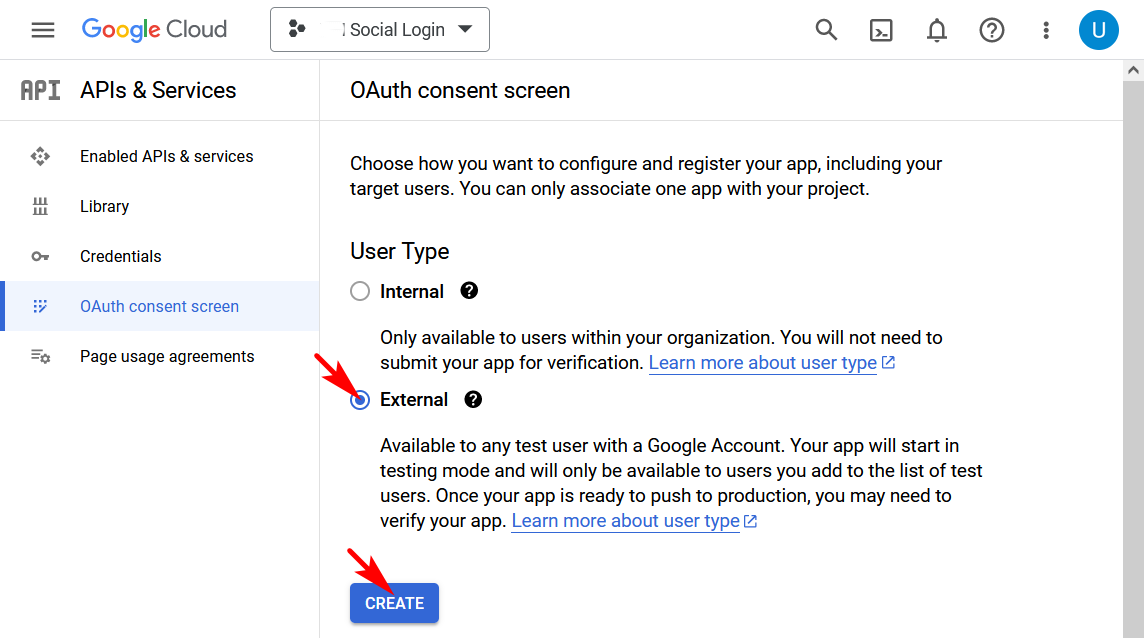
4. Edit app registration
4.1 OAuth consent screen
Enter the App name, User support email, upload App logo. Enter the Application home page, Application privacy policy link, Application terms and service link. Enter your website domain. Enter your contact Email addresses. Continue to the next step by clicking the SAVE AND CONTINUE button.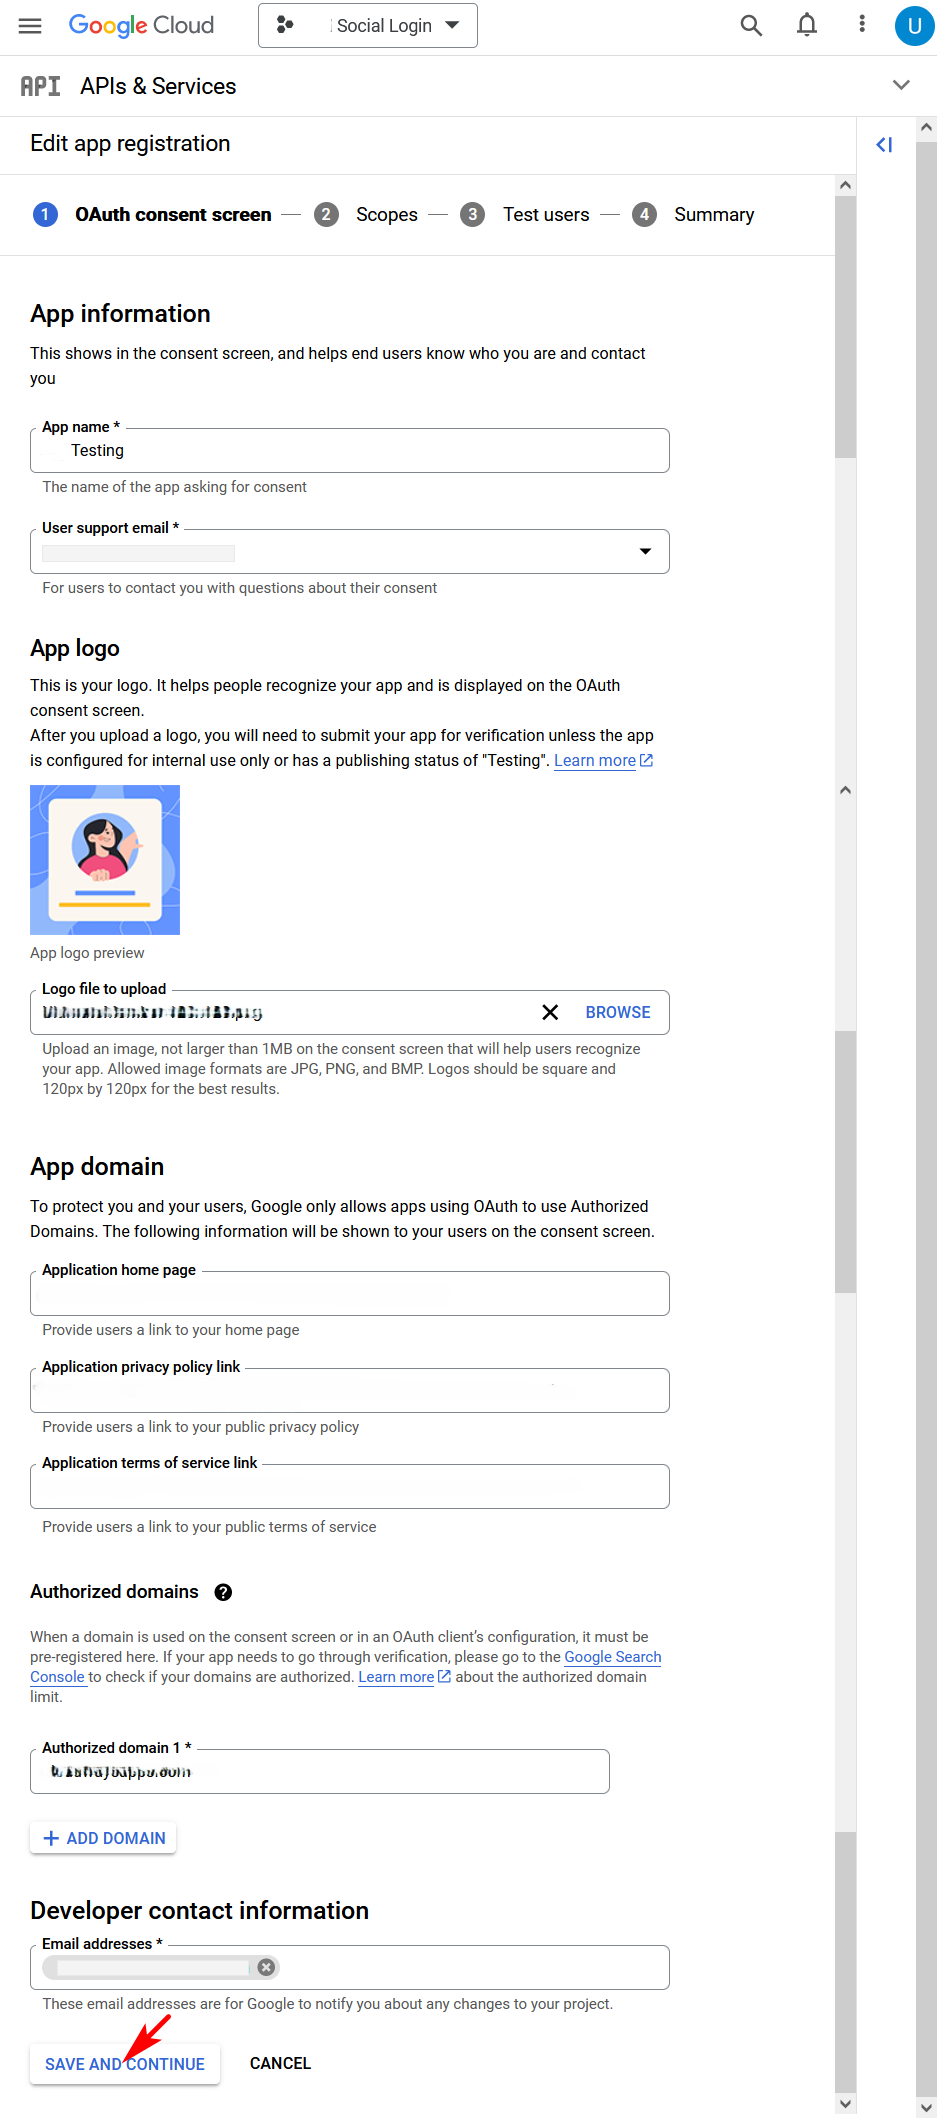
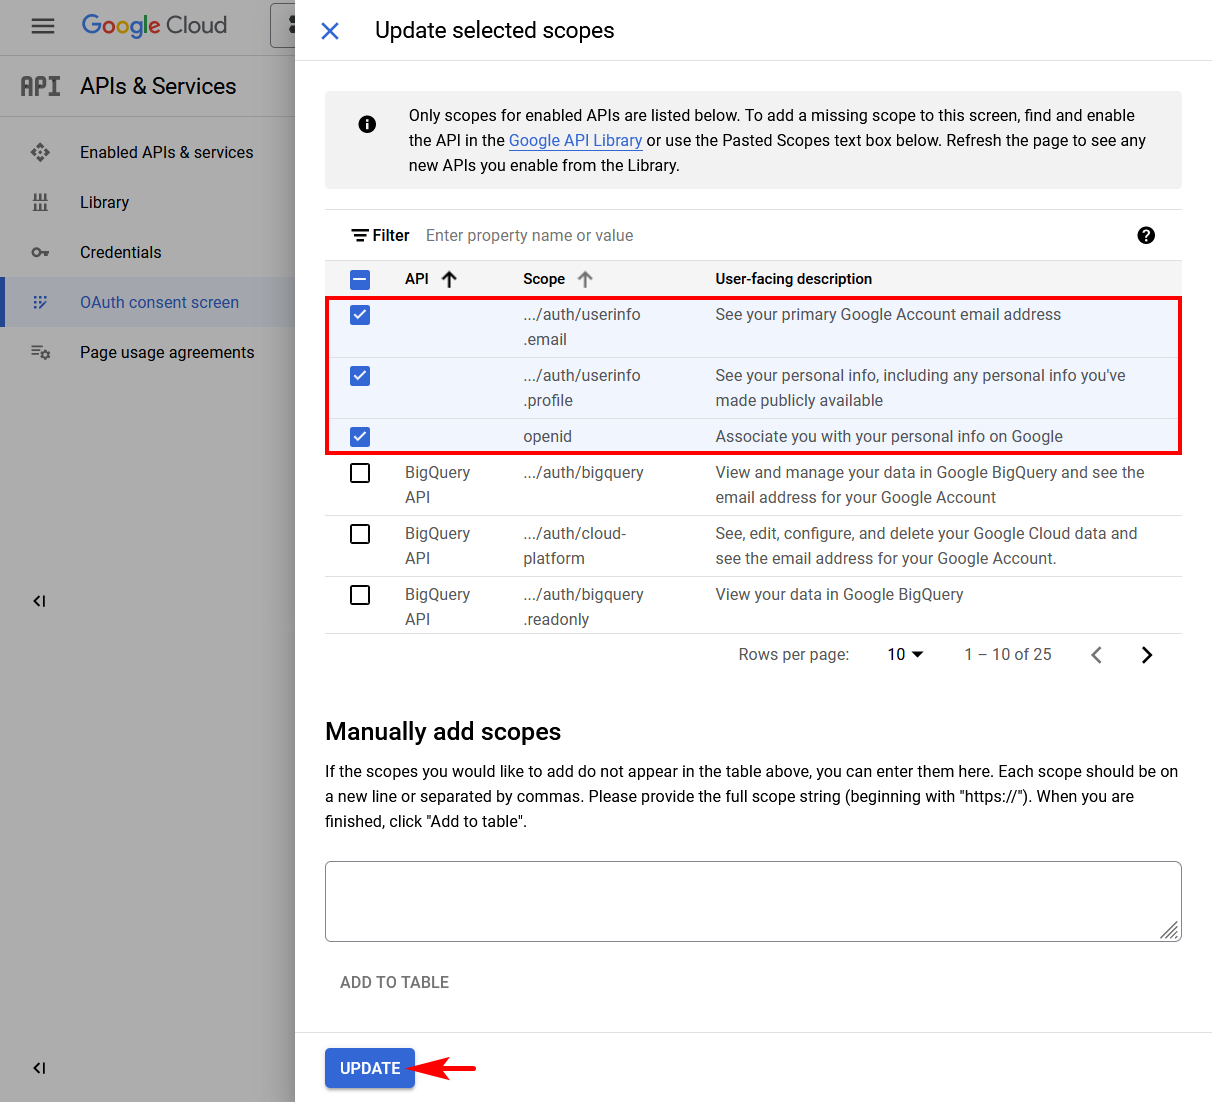
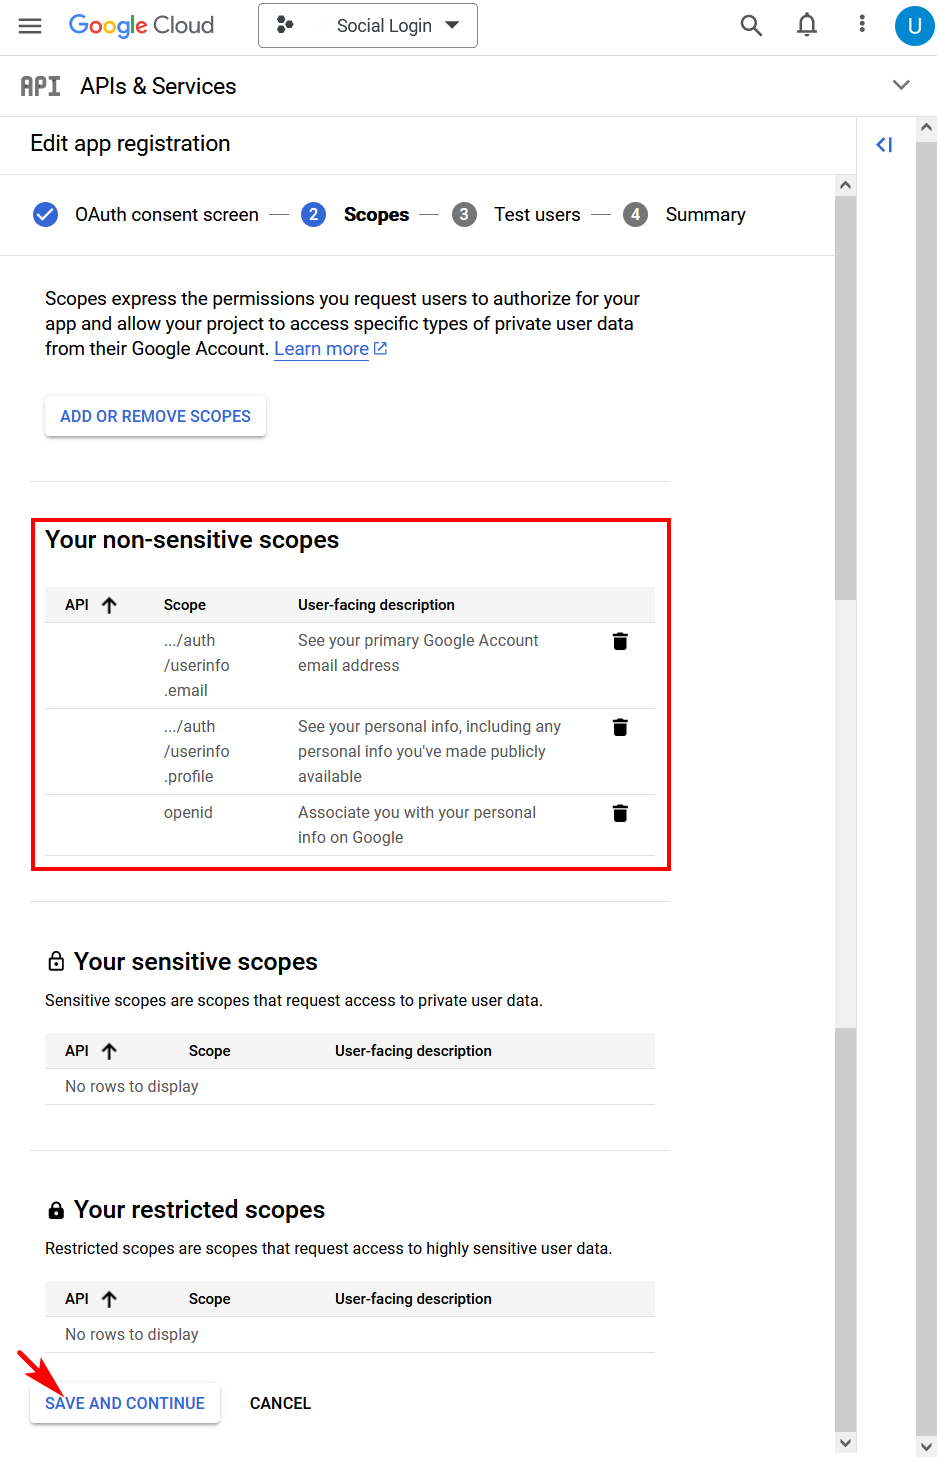
4.2. Scopes
You’ll be on the step Scopes. Click the ADD OR REMOVE SCOPES button to select the scopes.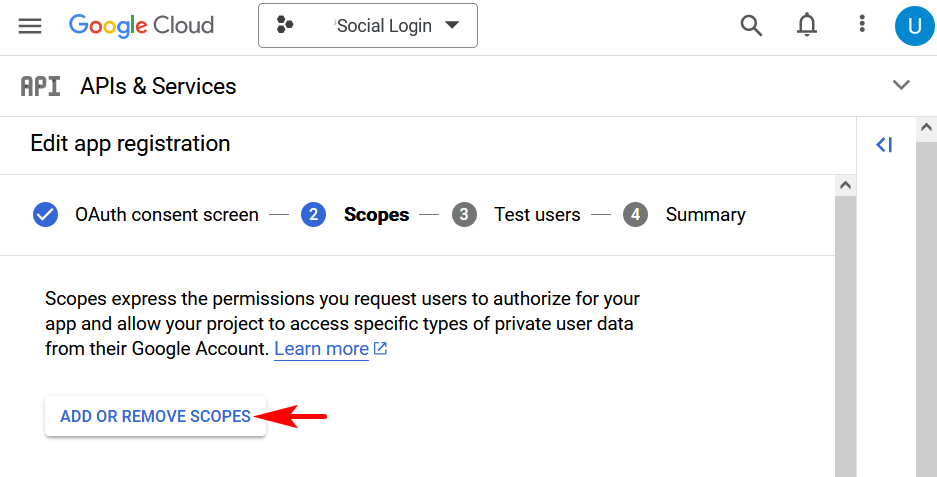
- …/auth/userinfo.email
- …/auth/userinfo.profile
- openid
4.3 Test users
You’ll be on the step Test users. On this step you can add Test users to test the social login, or just continue to the next step by clicking the SAVE AND CONTINUE button.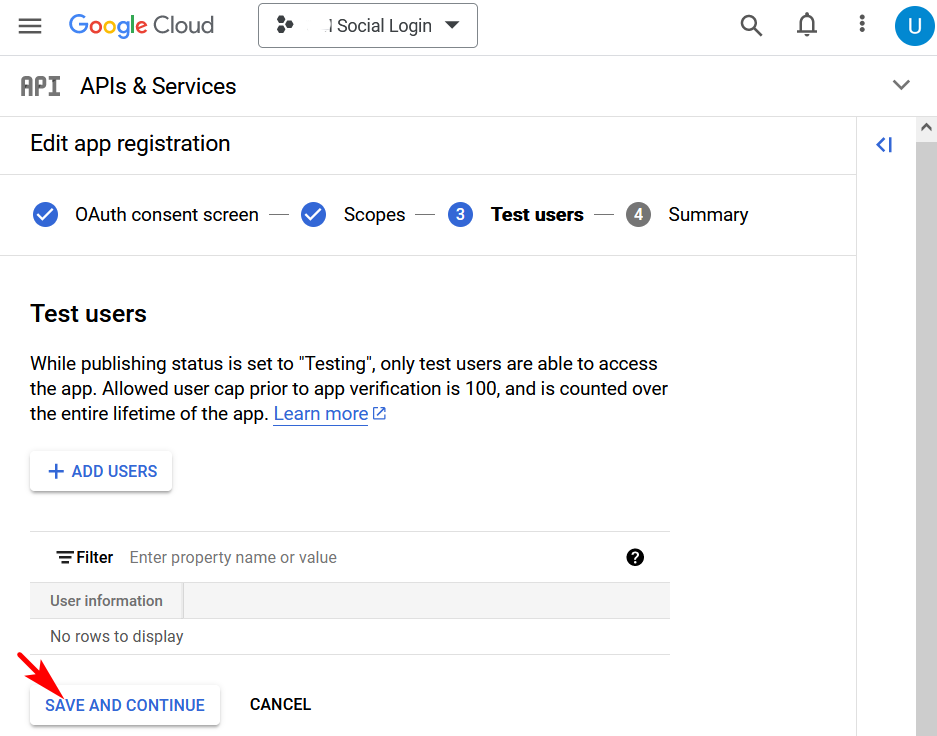
4.4 Summary
You’ll be on the step Summary that shows you the outline of your app registration. Click the BACK TO DASHBOARD button.
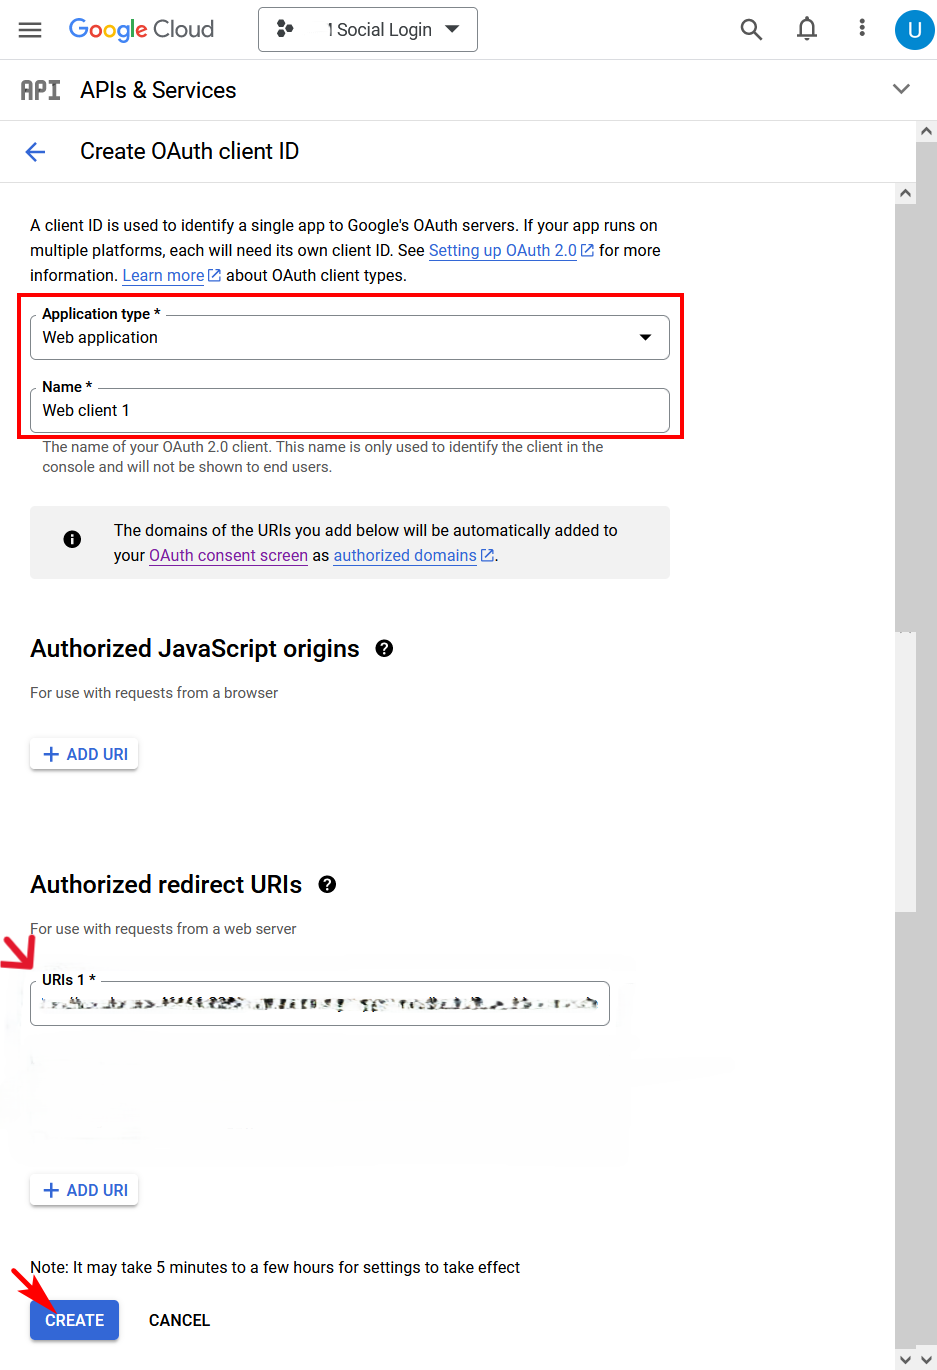
5. Create credentials
Select Credentials from the left-side menu. Click the CREATE CREDENTIALS button and select the OAuth client ID item.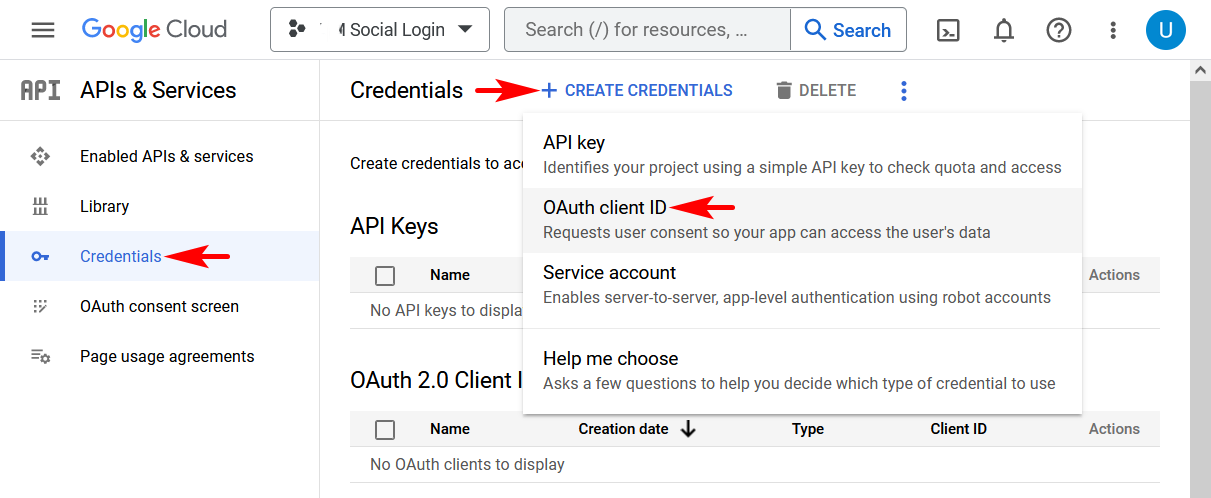
By default, URLs have the ”/” symbol at the end of the path. Remove ”/” before ”?” if your site uses URLs without ”/” at the end of the path.
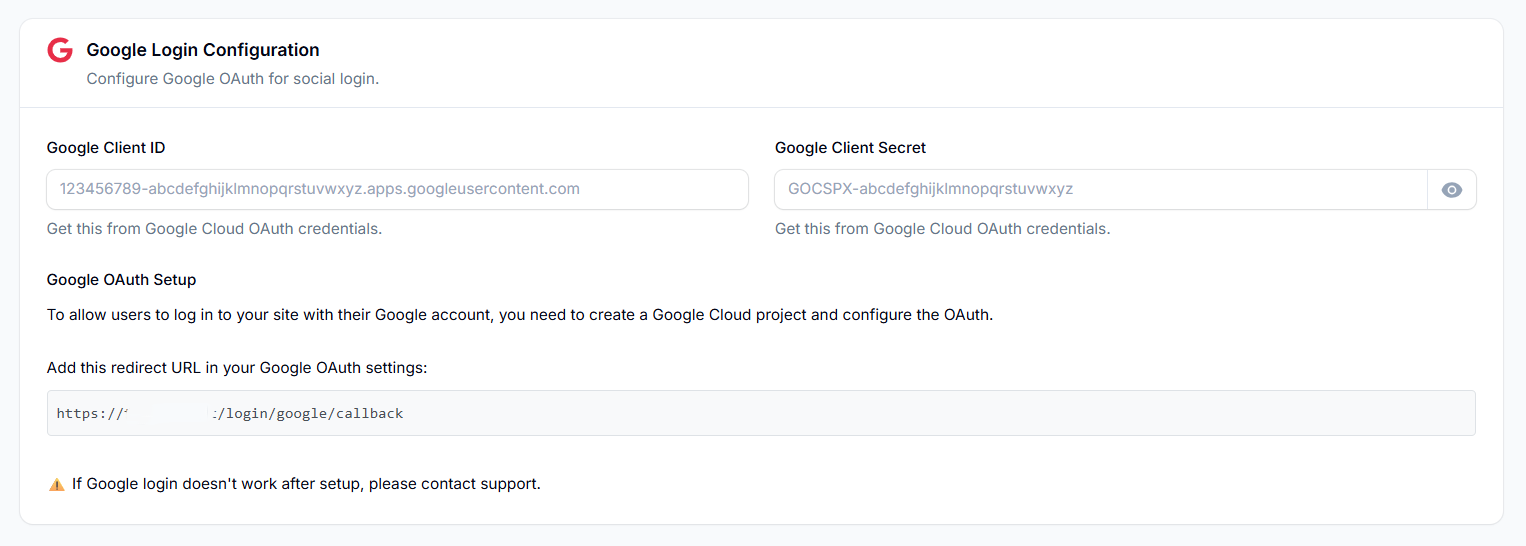
6. Enter your keys
Once you click the button, the OAuth client created pop-up will appear and you’ll see your application keys.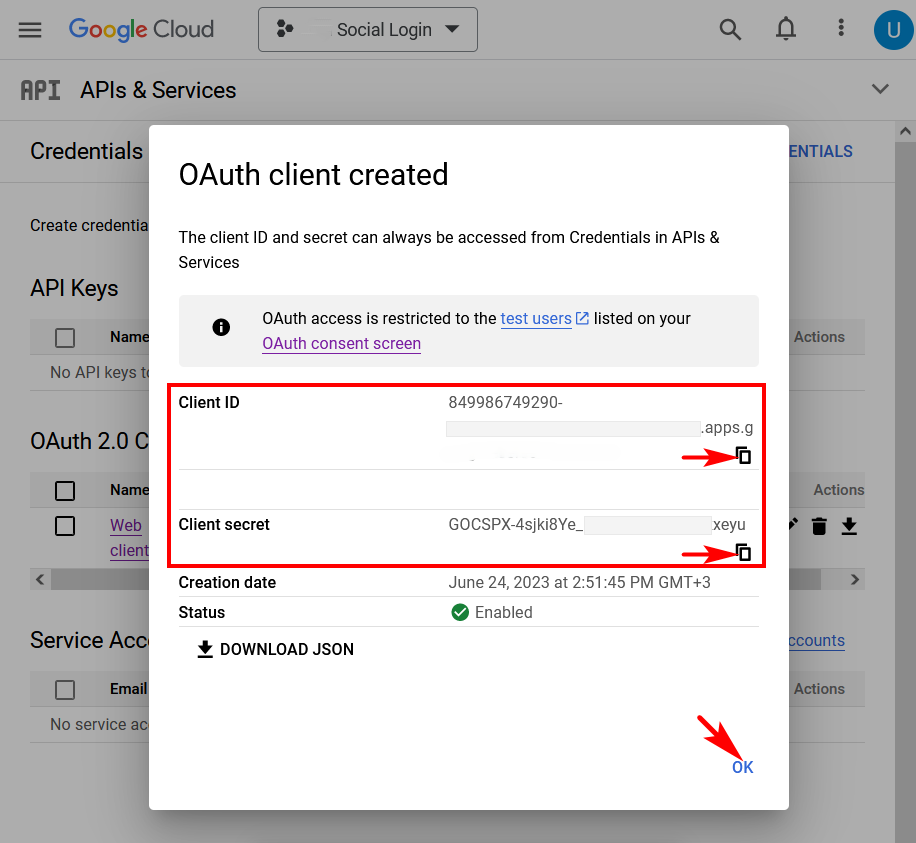
Test
Test the Social Login feature at the Login and Registration pages. If you’re encountering issues, please contact our support team for assistance with any step of the setup process.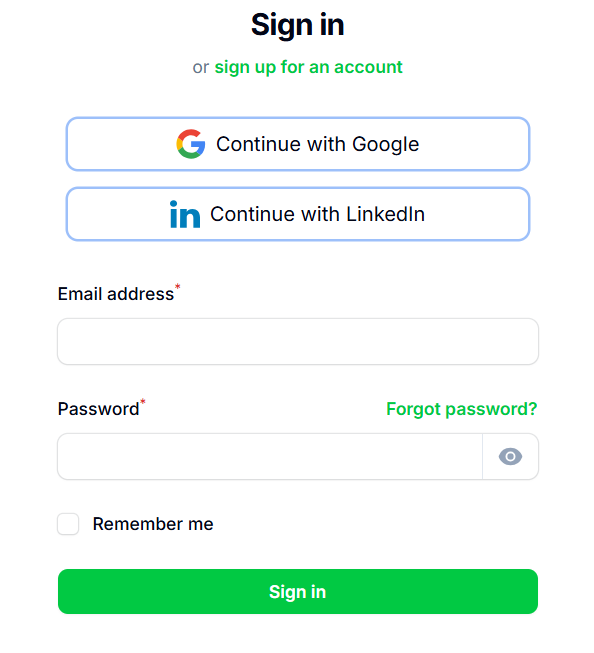
Need help? Contact our support team for assistance with any step of the setup process.