What You’ll Learn
- Setting up post-call email automation with conditional triggers
- Configuring email templates with dynamic content from calls
- Mapping call data and variables to email content
- Creating different email flows based on call success
- Best practices for professional follow-up communication
Prerequisites
- Configured AI assistant with post-call variables and email collection
- Email service integration (Gmail)
- Understanding of post-call webhook automation
- Access to call testing functionality
Step 1: Create Post-Call Email Automation
We’ll create an automation that triggers after phone calls and sends personalized emails based on call outcomes.- Navigate to Automation Platform
- Create a new flow from scratch
- Search for your calling platform in triggers
- Select “Phone Call Ended” trigger
- This captures data from all completed calls to your selected assistant
Step 2: Configure Assistant and Load Data
- Select your target assistant
- Each assistant supports only one post-call automation
- All calls to this assistant will trigger this email flow
- Click “Load Data” to set up the webhook and load sample call data
- This automatically configures the webhook on your assistant
- Sample data from your recent calls will be loaded for use in the next steps
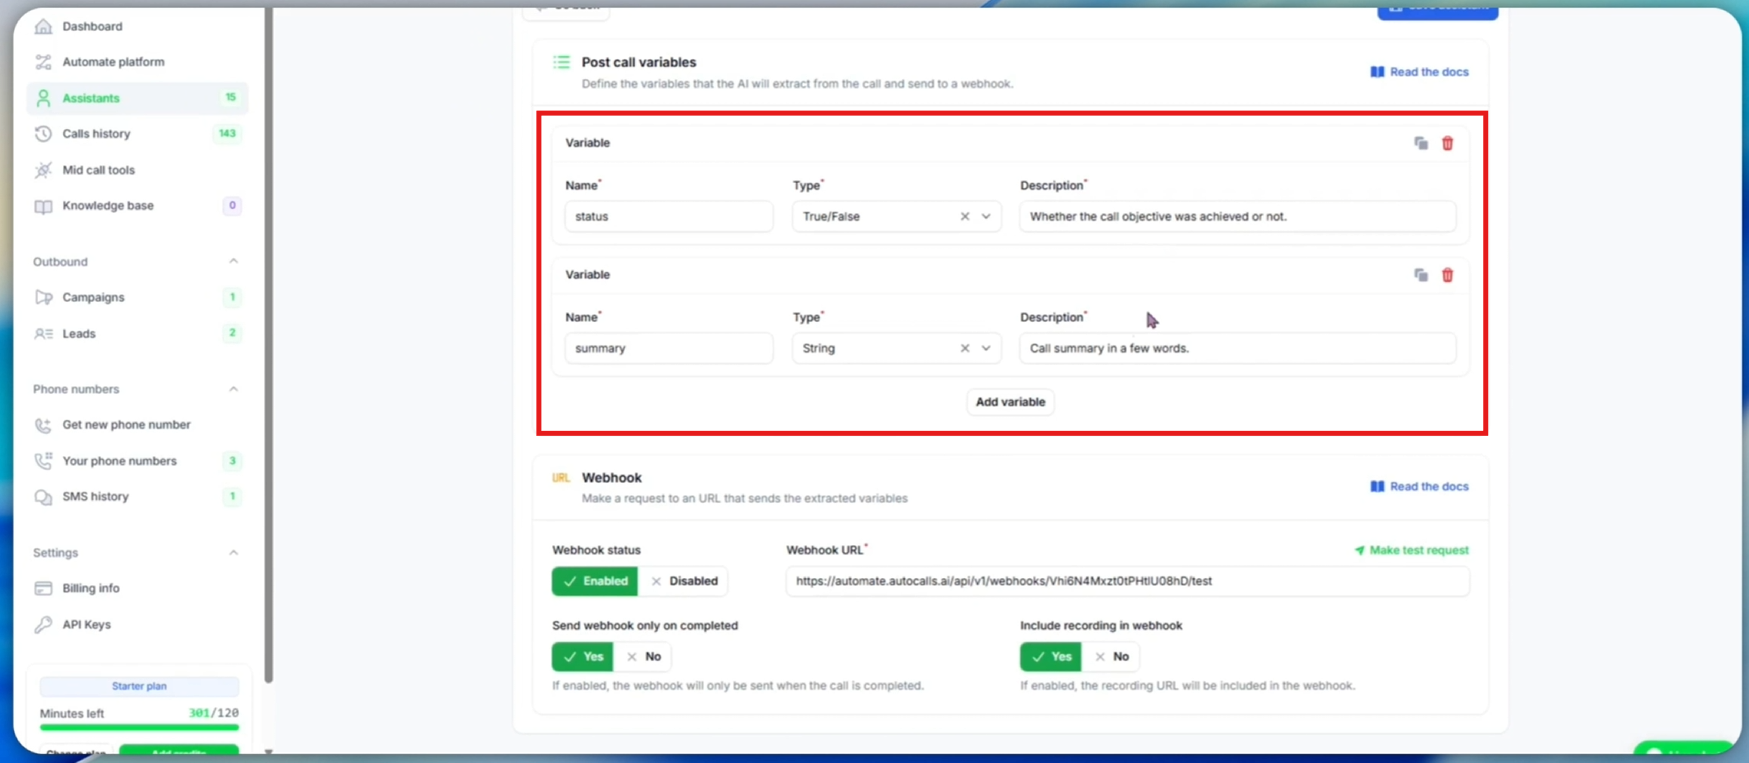
Step 3: Verify Assistant Variables
Before proceeding, make sure your assistant has the right variables configured:- Check post-call variables in your assistant’s “Post-call Actions” tab:
- status: Boolean indicating call success
- email: Customer email address
- Add any other variables you want to use in your email
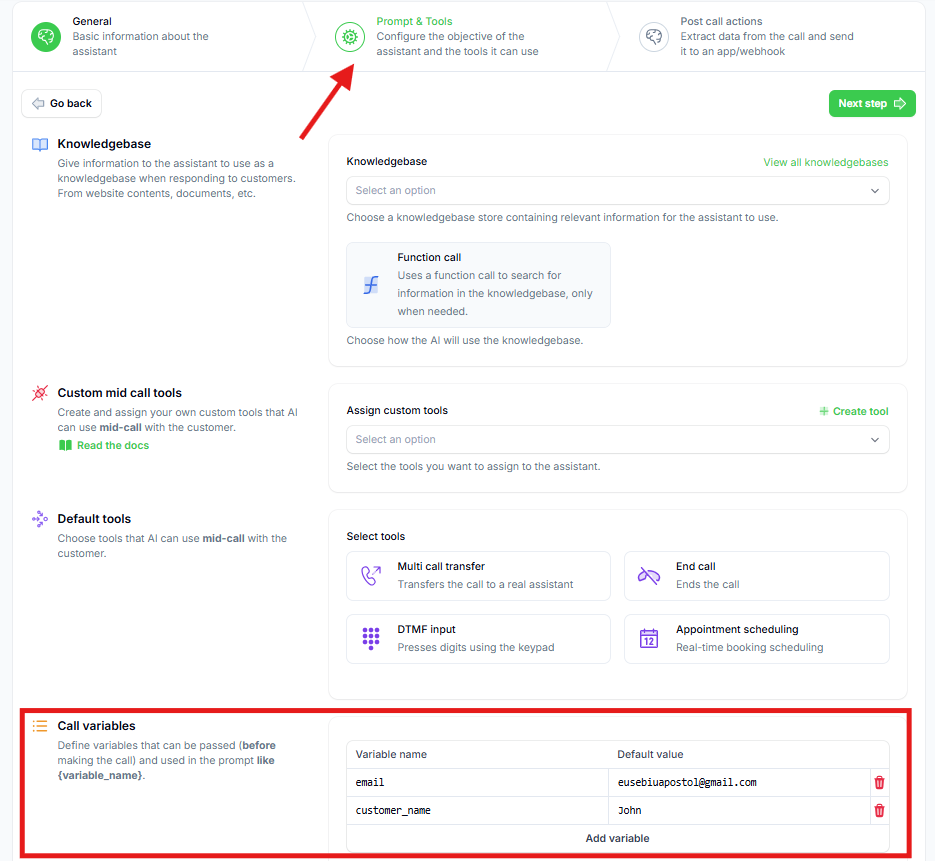
- Check input variables in your assistant’s “Prompt & Tools” tab:
- Ensure
emailvariable is defined so the assistant collects it during calls
- Ensure
Adding New Post-Call Variables
If you add a new post-call variable after creating the automation:- Define the new variable in your assistant’s “Post-call Actions” tab and save
- Return to your automation and click “Load Data” again to refresh the available fields
- Re-evaluate an existing call if needed to extract the new variable from past calls
Step 4: Configure Conditional Email Logic
We only want to send emails when the call objective was achieved.- Click the ”+” sign to add a step
- Search for “Branch” in control flow
- Select Branch to create conditional logic
- Configure the branch condition:
- Select
statusvariable from call data - Choose “Boolean is true”
- This creates two paths: True (qualified) and False (not qualified)
- Select
Step 5: Set Up Email Service Integration
- On the True branch, click ”+”
- Search for your email service (Gmail, Outlook, SMTP, etc.)
- Select “Send Email” action
- Create email service connection:
- Authorize with your email provider
- Configure SMTP settings if using custom email
- Save the connection for future use
Step 6: Configure Email Content and Recipients
-
Configure recipient:
- Click on “To” email field
- Select customer email from call variables
- Ensure the email address is properly mapped
-
Set email subject:
- Use dynamic content: “Thank you for your time,
{customer_name}!” - Include company name or call reference
- Keep subject professional and relevant
- Use dynamic content: “Thank you for your time,
- Compose email body with dynamic content:
- Click on the “Body” field to start writing your email
- Type your email content with placeholders for variables
- Example email template:
- Add dynamic variables to your email:
- To replace
{customer_name}:- Click where you want the variable in your email text
- A popup will appear with available variables
- Search for and select “customer_name” from call variables
- Click “Insert” to add the variable
- To replace
{formatted_transcript}:- Click where you want the transcript in your email text
- Navigate to “Post Call Variables” in the popup
- Select the “formatted_transcript” variable
- Click “Insert” to add the variable
- To replace
Step 7: Advanced Email Templates
You can create more professional emails by using HTML formatting:- Select “HTML” as body type in your email action
- In the body field, add HTML code for enhanced formatting
- Use dynamic variables the same way as in plain text emails
Step 8: Test Email Automation
- Click “Test Step” to send test email
- Verify successful delivery in test results
- Check your email inbox:
- Verify email was received
- Check that dynamic content populated correctly
- Review formatting and professionalism
Step 9: Publish and Monitor
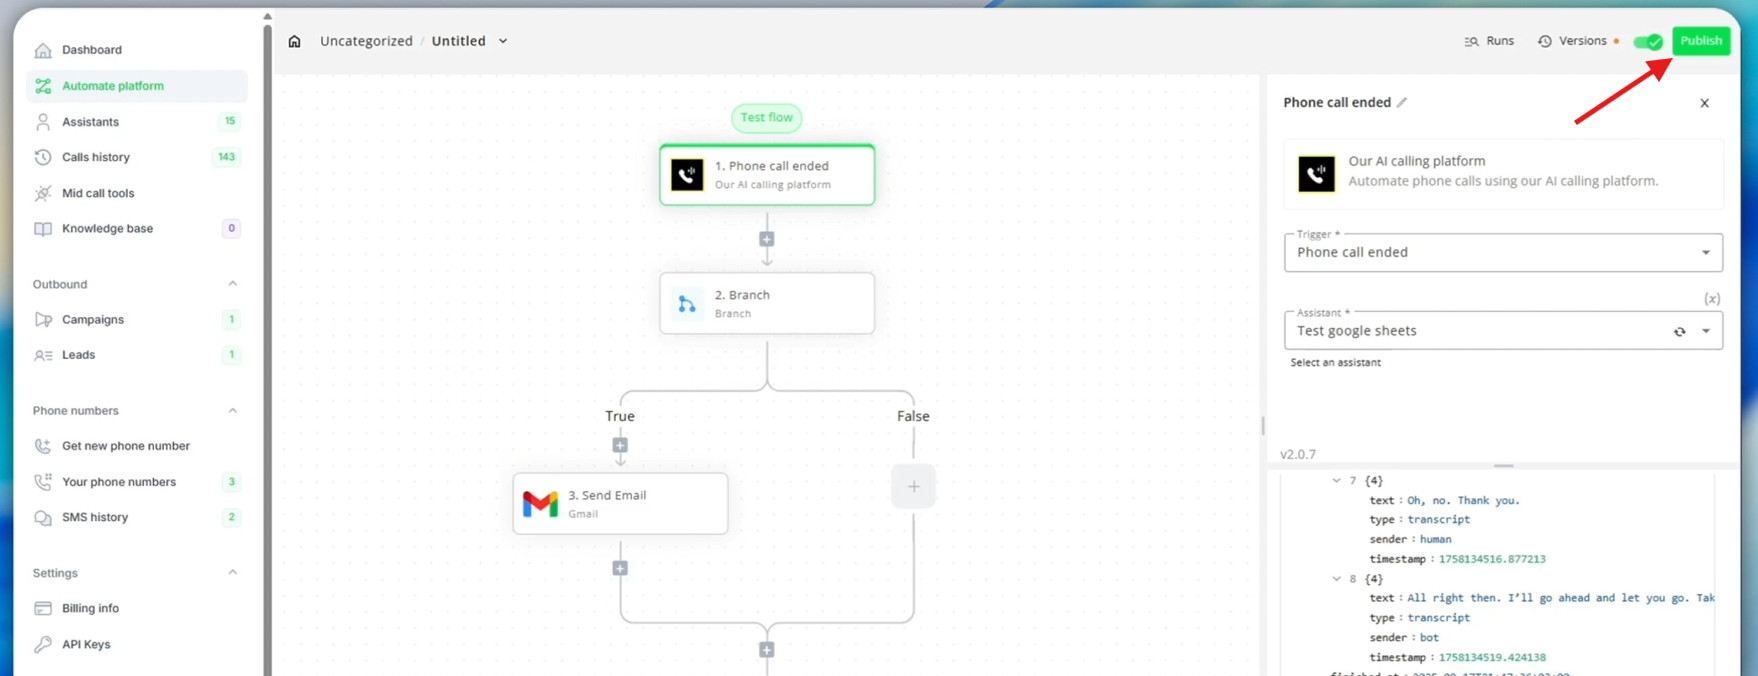
- Click “Publish” to activate your email automation
- Monitor automation runs for successful email delivery
Best Practices
Email Content
- Professional tone appropriate for your industry
- Clear subject lines that indicate purpose
- Personalized content using call data effectively
- Clear call-to-action for next steps
Troubleshooting
Common Issues
Emails not sending:- Verify email service connection and authorization
- Check that customer email addresses are valid
- Confirm email action is on correct conditional branch
- Verify automation is published and active
- Check variable mapping in email template
- Verify post-call variables are being extracted correctly
- Ensure call variables contain email data
- Test with various call scenarios