Transfer data between users on your platform. This tool allows you to copy or move assistants, phone numbers, knowledgebases, custom tools, widgets, and automation flows from one user to another.
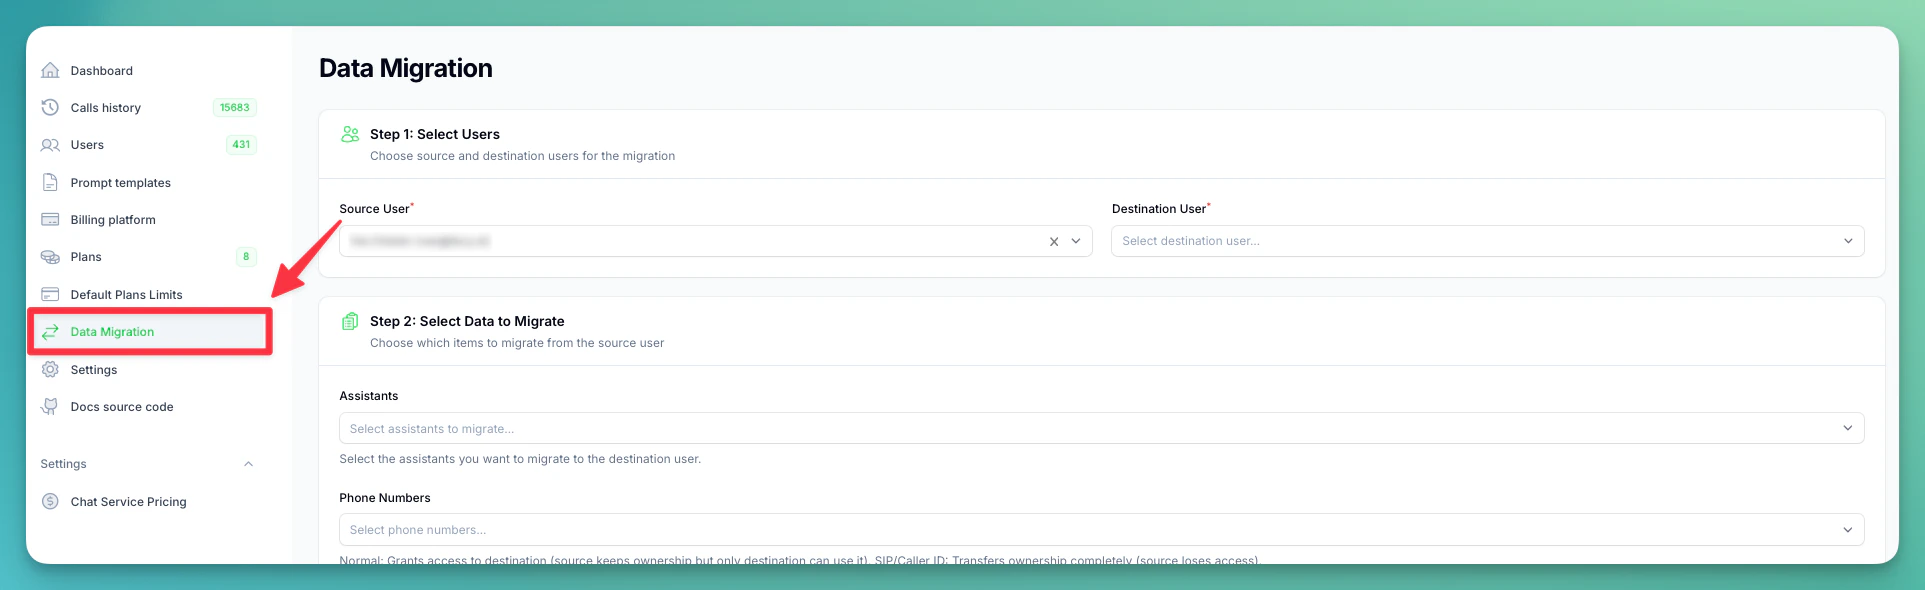
Accessing Data Migration
- Open your Administration Panel
- Navigate to Data Migration in the sidebar
Step 1: Select Users
Choose the Source User (migrate FROM) and the Destination User (migrate TO). All users in your platform are listed by name and email.
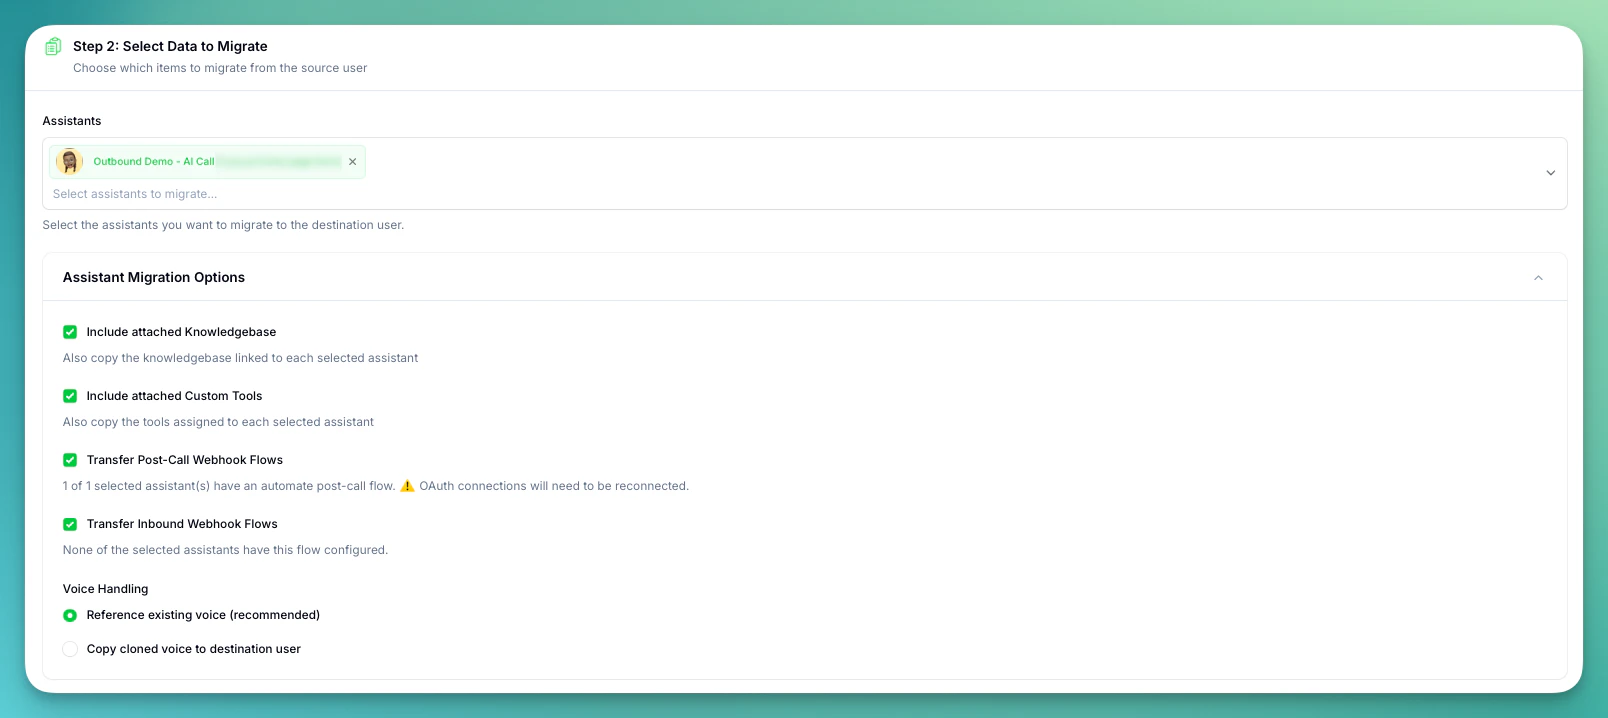
Step 2: Select Data to Migrate
After selecting a source user, you can pick which items to migrate. All fields are searchable multi-select dropdowns.
Assistants
Select the assistants you want to migrate. Each assistant is shown with its avatar and name.
When assistants are selected, an Assistant Migration Options section appears with these settings:
- Include attached Knowledgebase (default: on) — also copy the knowledgebase linked to each selected assistant
- Include attached Custom Tools (default: on) — also copy the tools assigned to each selected assistant
- Transfer Post-Call Webhook Flows (default: on) — transfer automate flows connected as post-call webhooks
- Transfer Inbound Webhook Flows (default: on) — transfer automate flows connected as inbound webhooks
- Voice Handling:
- Reference existing voice (recommended) — destination user uses the original voice reference
- Copy cloned voice to destination user — creates a separate copy of the voice
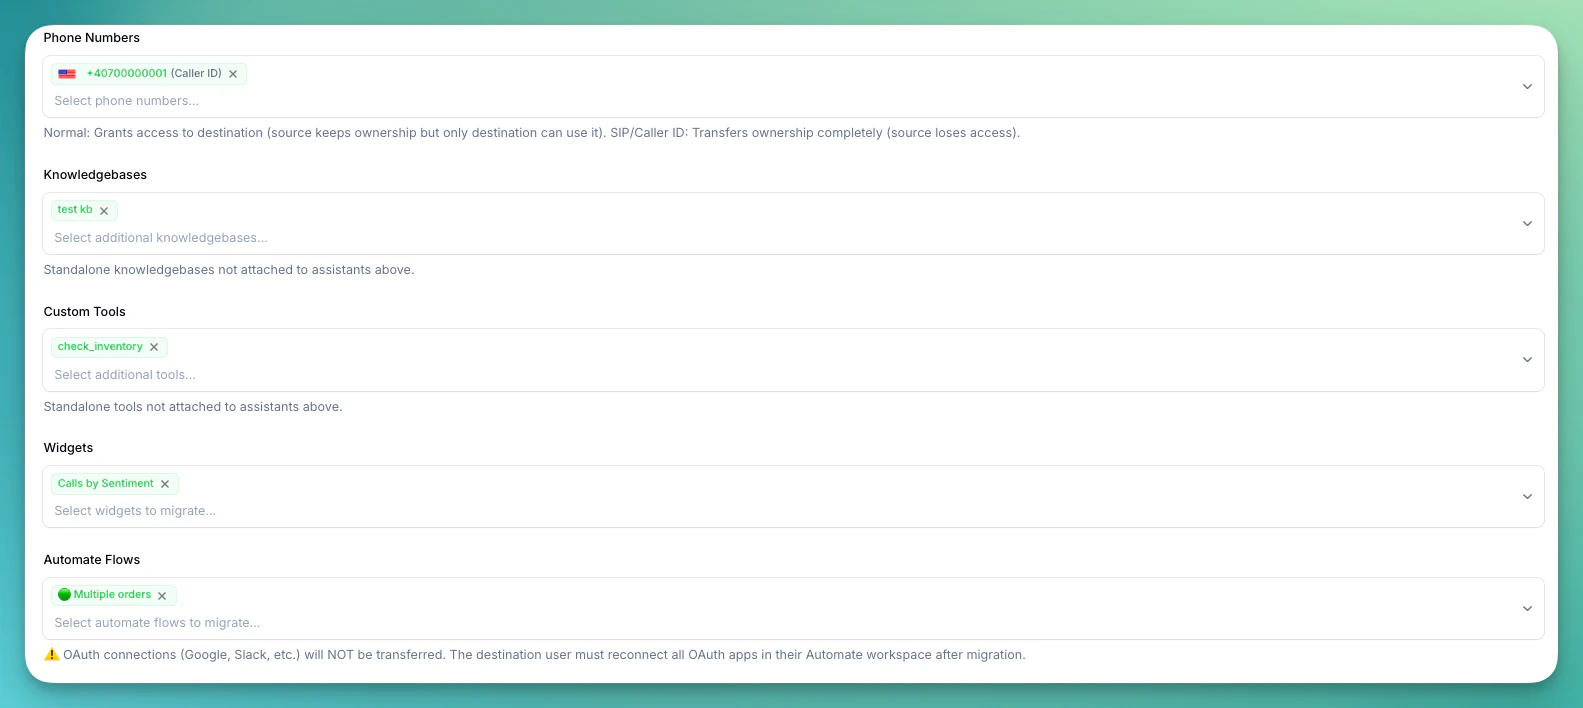
Phone Numbers — behavior depends on the type:
- Normal (subscribed numbers) — Grant access: the source user keeps ownership but only the destination user can use it
- SIP / Caller ID — Full transfer: ownership moves completely to the destination user
Knowledgebases, Custom Tools, Widgets — select standalone items not already attached to the assistants selected above. Items attached to selected assistants are migrated automatically if the corresponding option is enabled.
Automate Flows — select automation flows to migrate. Each flow shows its status (enabled/disabled).
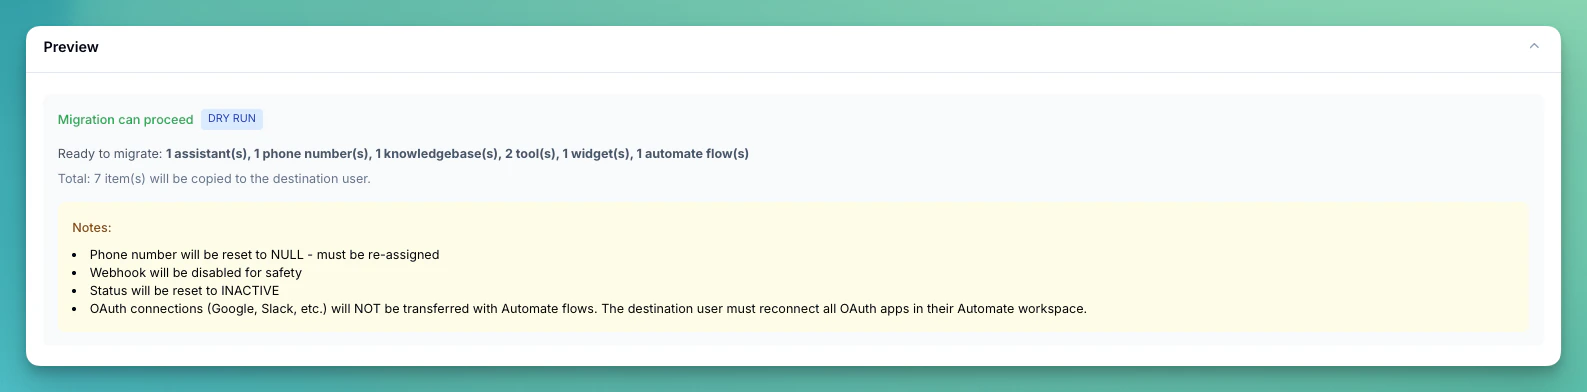
OAuth connections (Google, Slack, etc.) will NOT be transferred. The destination user must reconnect all OAuth apps in their Automate workspace after migration.
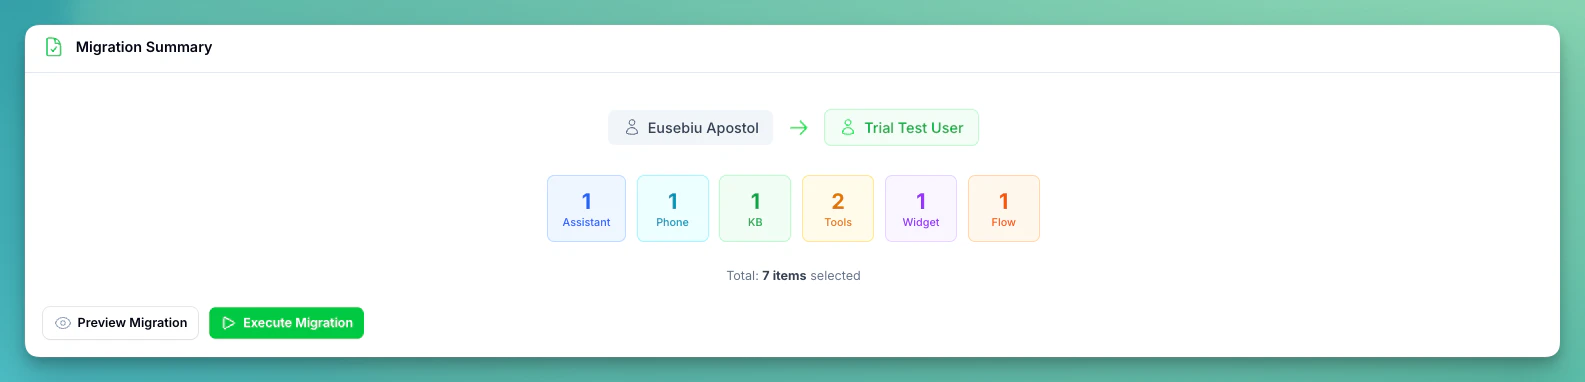
Step 3: Preview & Execute
Once you have selected items, a Migration Summary section appears showing the total count of items to be migrated.
- Preview Migration — performs a dry run to show what would happen, including any warnings
- Execute Migration — runs the actual migration after a confirmation prompt
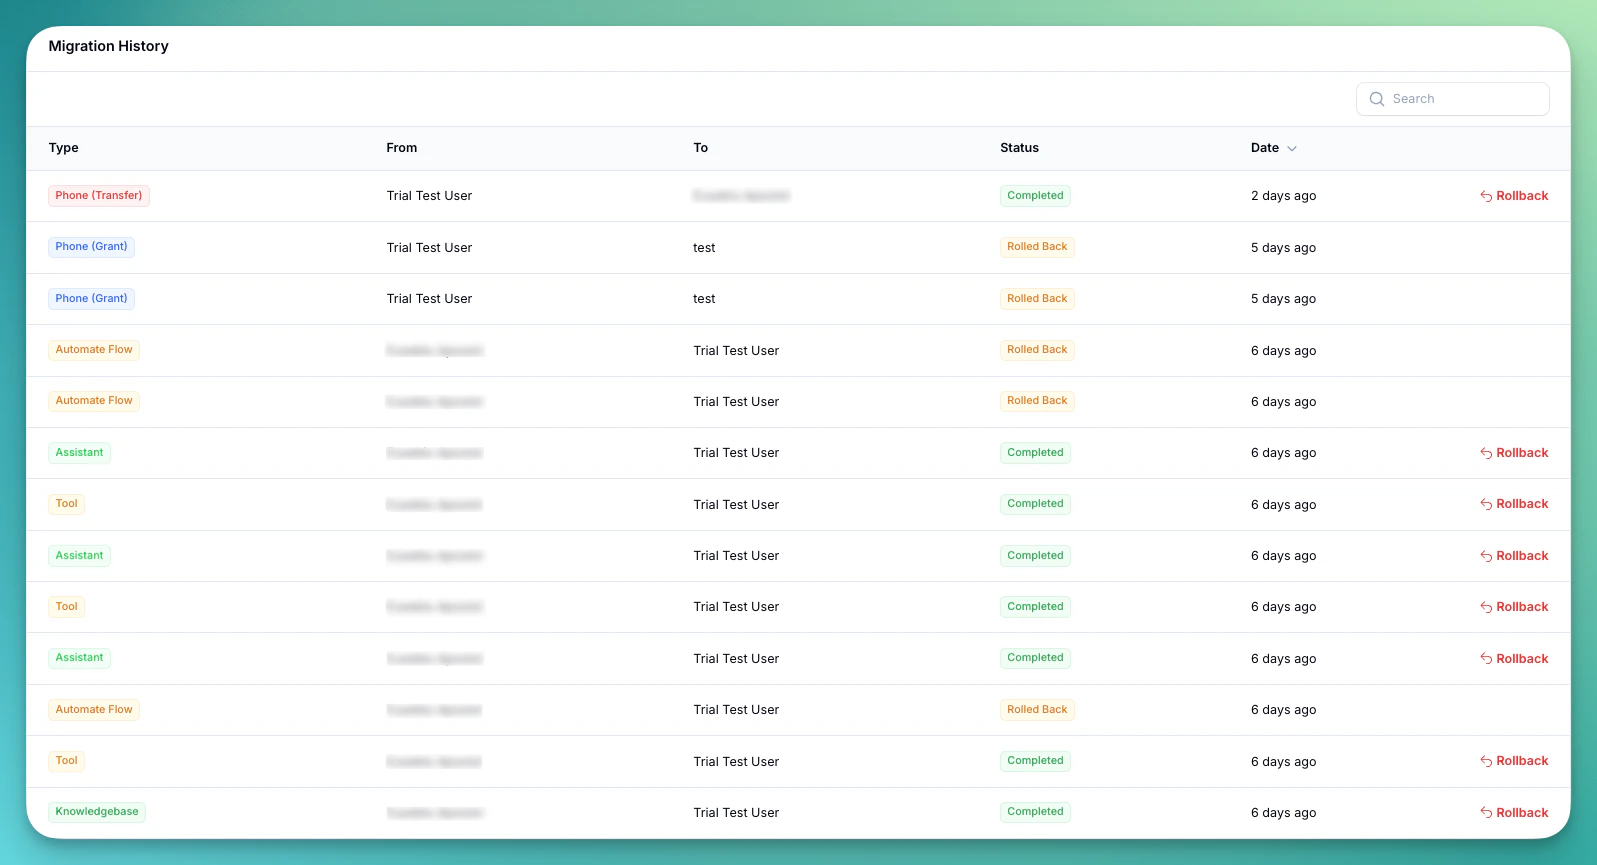
Migration History
Below the migration form, a Migration History table shows all past migrations with:
| Column | Description |
|---|
| Type | Entity type — Assistant, Knowledgebase, Tool, Phone (Grant), Phone (Transfer), Widget, Automate Flow |
| From | Source user name |
| To | Destination user name |
| Status | Pending, In Progress, Completed, Failed, or Rolled Back |
| Date | When the migration was executed |
Rollback
Completed migrations can be rolled back using the Rollback button on each row. This deletes the migrated entity from the destination user.
Rollback cannot be undone. If a migrated assistant is currently attached to campaigns, it cannot be rolled back until removed from those campaigns.