Setup
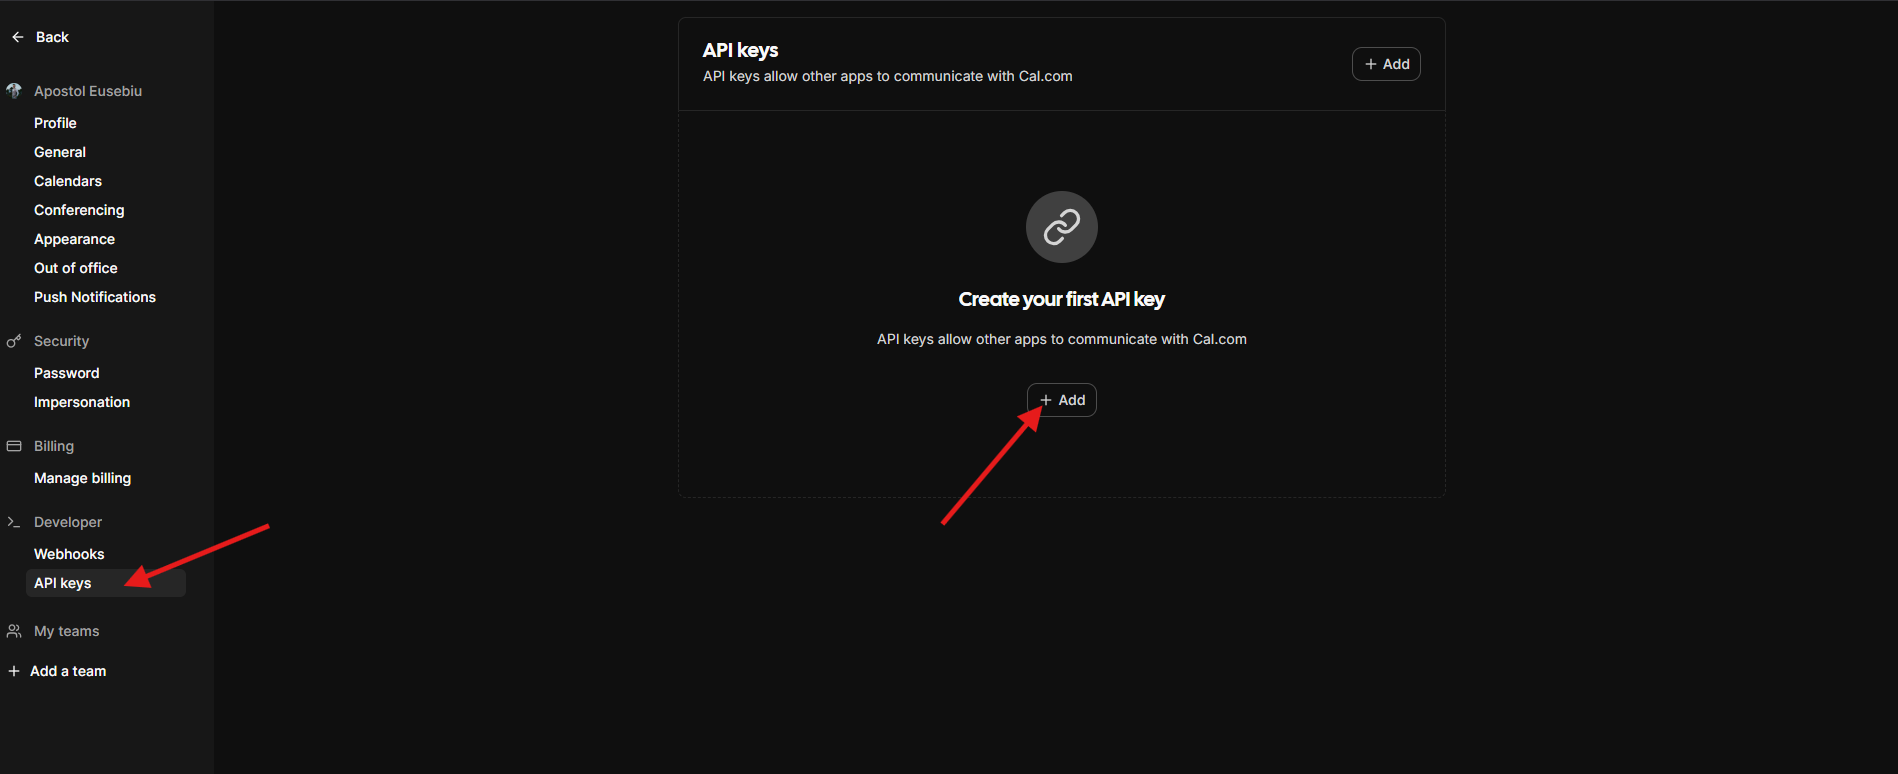
1. Get API Key
- Log in to Cal.com
- Go to Settings → Developer → API Keys
- Create a new API key and copy it
2. Select Your Region
Cal.com offers different API regions. Choose the one that matches your Cal.com account:
Select your region in the Cal.com configuration panel before connecting. If you’re unsure, the US endpoint is the default.
3. Connect Cal.com
- In your assistant settings → Tools tab → Appointment Scheduling
- Select Cal.com from calendar type
- Choose your API region
- Paste your API key
- Select an event from the dropdown
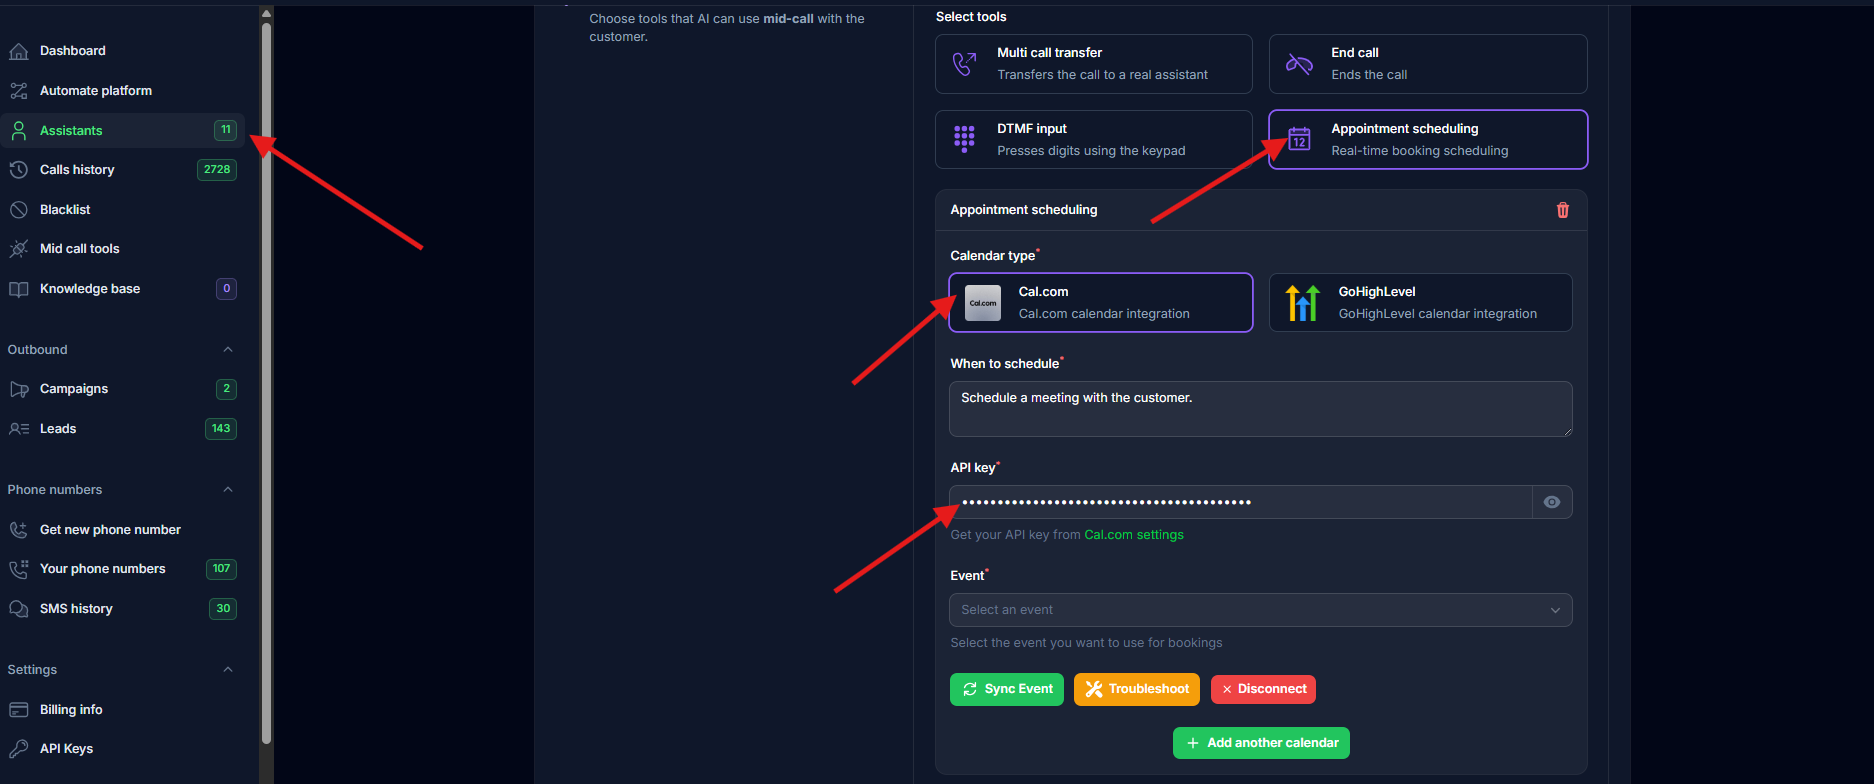
4. Sync Event
Click the “Sync Event” button to automatically configure booking fields.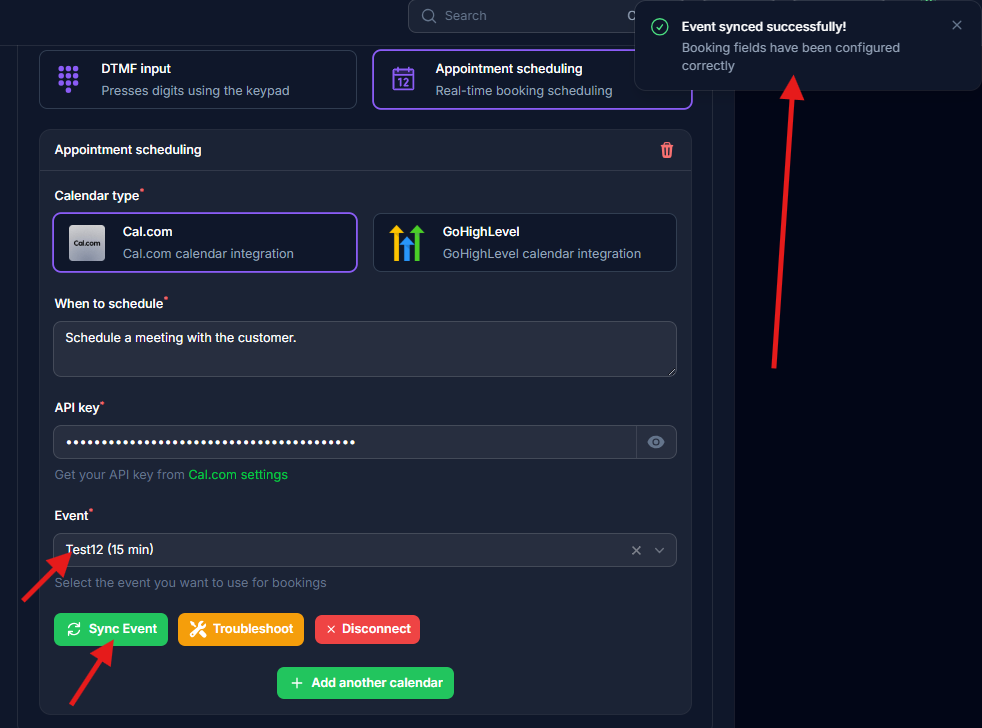
The sync automatically reads your event type’s custom fields and configures them for the AI assistant. Name, email, and phone are set as required. All other custom booking fields are imported automatically.
Event Types
Personal Events
Select from your personal event types (e.g., 15-minute intro call, 30-minute consultation).Team Events
You can also book into team event types. When your API key has access to team calendars, team events appear in the event dropdown grouped separately from personal events.Dynamic Booking Fields
When you sync an event, the system automatically reads all custom booking fields configured on that event type in Cal.com. This means:- No manual field configuration — fields are fetched directly from your Cal.com event type
- Custom fields supported — any custom fields you add to your Cal.com event type are automatically available
- Auto-refresh on sync — click “Sync Event” again if you change your Cal.com event’s booking fields
Multiple Calendars
Click ”+” next to Appointment Scheduling to add more calendars (e.g., 15min, 30min meetings).Email Setup
For calendar invites to work:- Define
emailin assistant input variables - Pass customer email when creating leads
Backward Compatibility
If you already have a Cal.com integration configured, your existing settings continue to work without changes. The region defaults to US, and existing field configurations are preserved. You can optionally re-sync to take advantage of dynamic booking fields.Troubleshooting
Invalid API Key: Verify it’s active in Cal.com settings and includescal_live_ prefix
Sync Failed: Click “Troubleshoot” button to reset fields
No Invites Sent: Ensure email variable is defined and passed with leads
Field Errors: Use “Troubleshoot” to reset. Only name, email, phone should be required.
Wrong Region: If you get authentication errors, check that you selected the correct region (EU accounts must use the EU endpoint).
For detailed troubleshooting, see Cal.com Issues.
Testing
- Make a test call and request a meeting
- Verify booking appears in Cal.com
- Check calendar invitation email was received