Custom Mid-Call Tools let your AI assistant interact with external systems
during calls. Whether checking inventory, verifying customer data, or fetching
real-time information, these tools make your AI more powerful and connected.
Overview
Custom Mid-Call Tools enable your AI assistant to:- Make real-time API calls during conversations
- Fetch or submit data to your systems
- Make informed decisions based on live data
- Provide accurate, up-to-date information to callers
Key Benefits
- No coding required - just configure the API endpoint and parameters - AI automatically knows when and how to use the tools - Real-time data access during calls - Seamless integration with your existing systems
Mid-call tools and MCP servers both live under the
Mid call tools / MCP page in the sidebar. Use a mid-call tool for a single
HTTP endpoint you define by hand, and an MCP server to connect a remote server
that exposes many tools at once.
Tool types
When you create a tool you choose one of two types:HTTP request
Call your own API directly. You set the URL, method, headers, parameters
and (optionally) a static body. Best when you already have an endpoint.
Automation Platform
Autocalls creates a linked flow for you in the
Automation Platform. The tool’s endpoint
is generated and locked automatically — you just build the logic in the flow
and end with a Return Response step. Best for no-code, multi-step logic.
Setting Up Your Tool
1. Basic Configuration
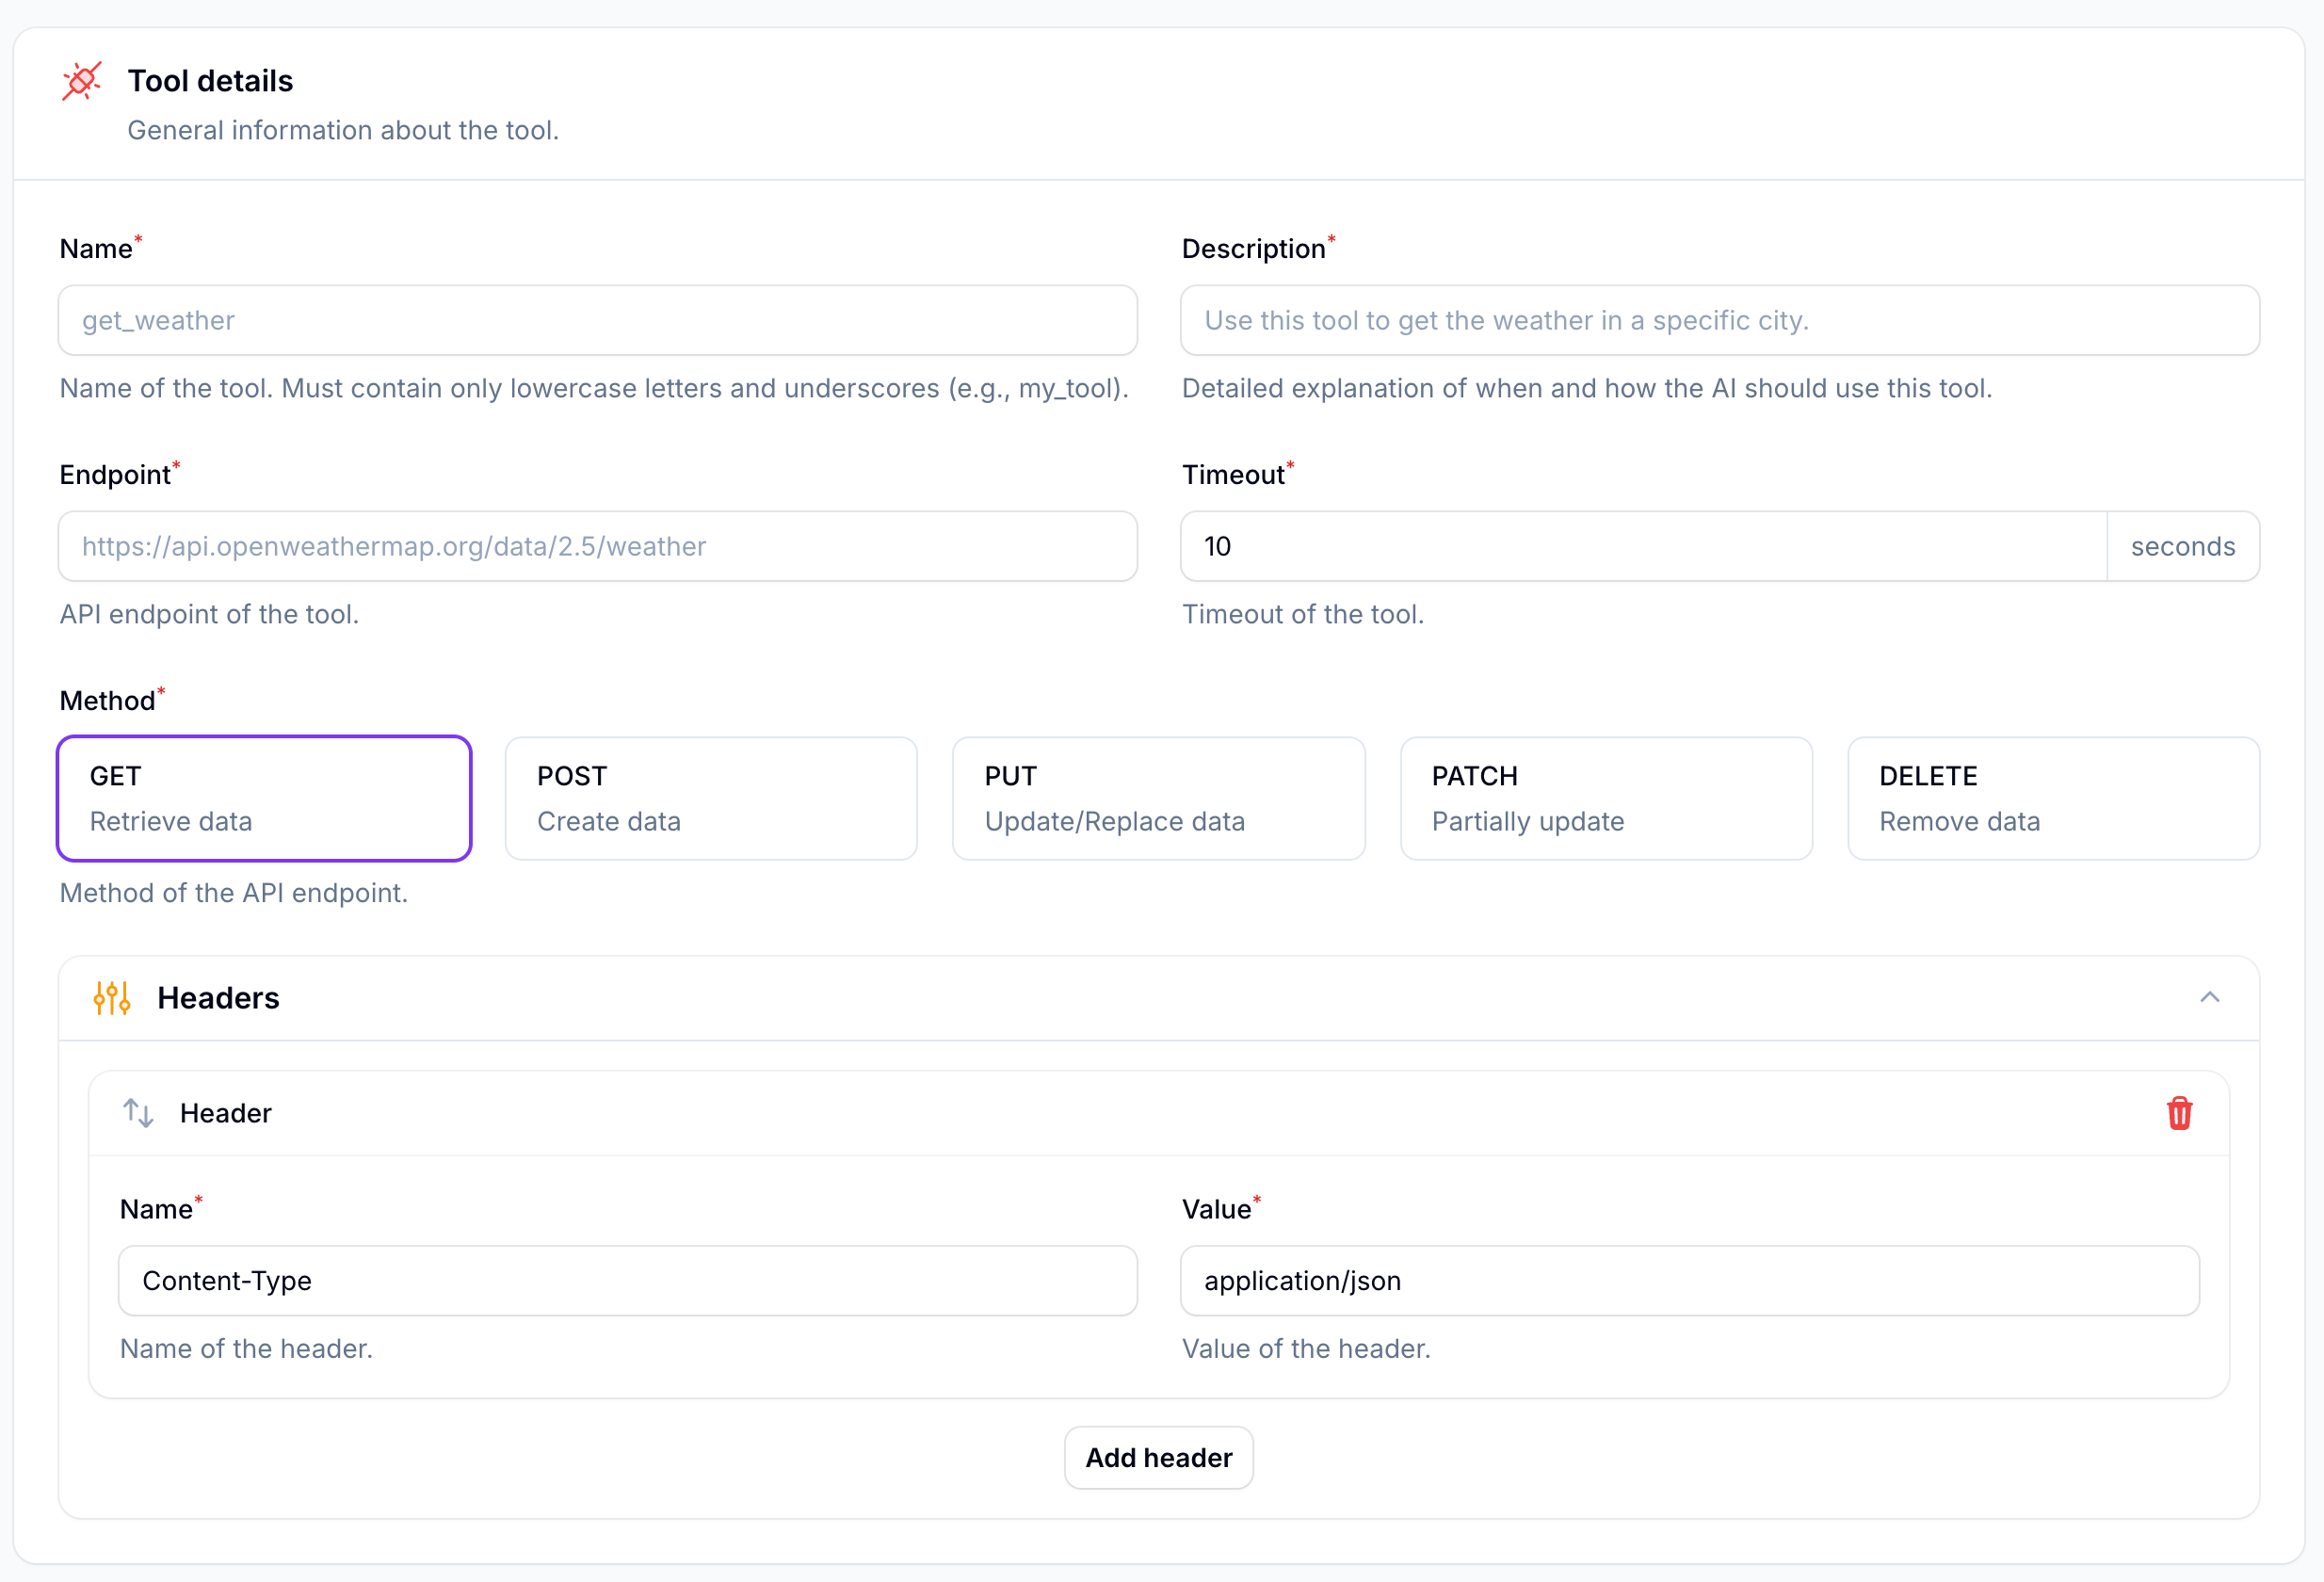
Configure Main Settings
Fill in the essential details:
- Name: Letters, numbers and underscores, starting with a letter or underscore (up to 64 characters, e.g.,
check_order_status) - Description: Explain when and how the AI should use this tool
- Endpoint: Your API URL (e.g.,
https://api.yourcompany.com/orders) - Timeout: How long to wait for responses (1–30 seconds)
- Method: Choose GET, POST, PUT, PATCH, or DELETE
- Body format: For write methods (POST/PUT/PATCH), send the body as JSON (default) or form-encoded (
application/x-www-form-urlencoded)
2. Variable Configuration
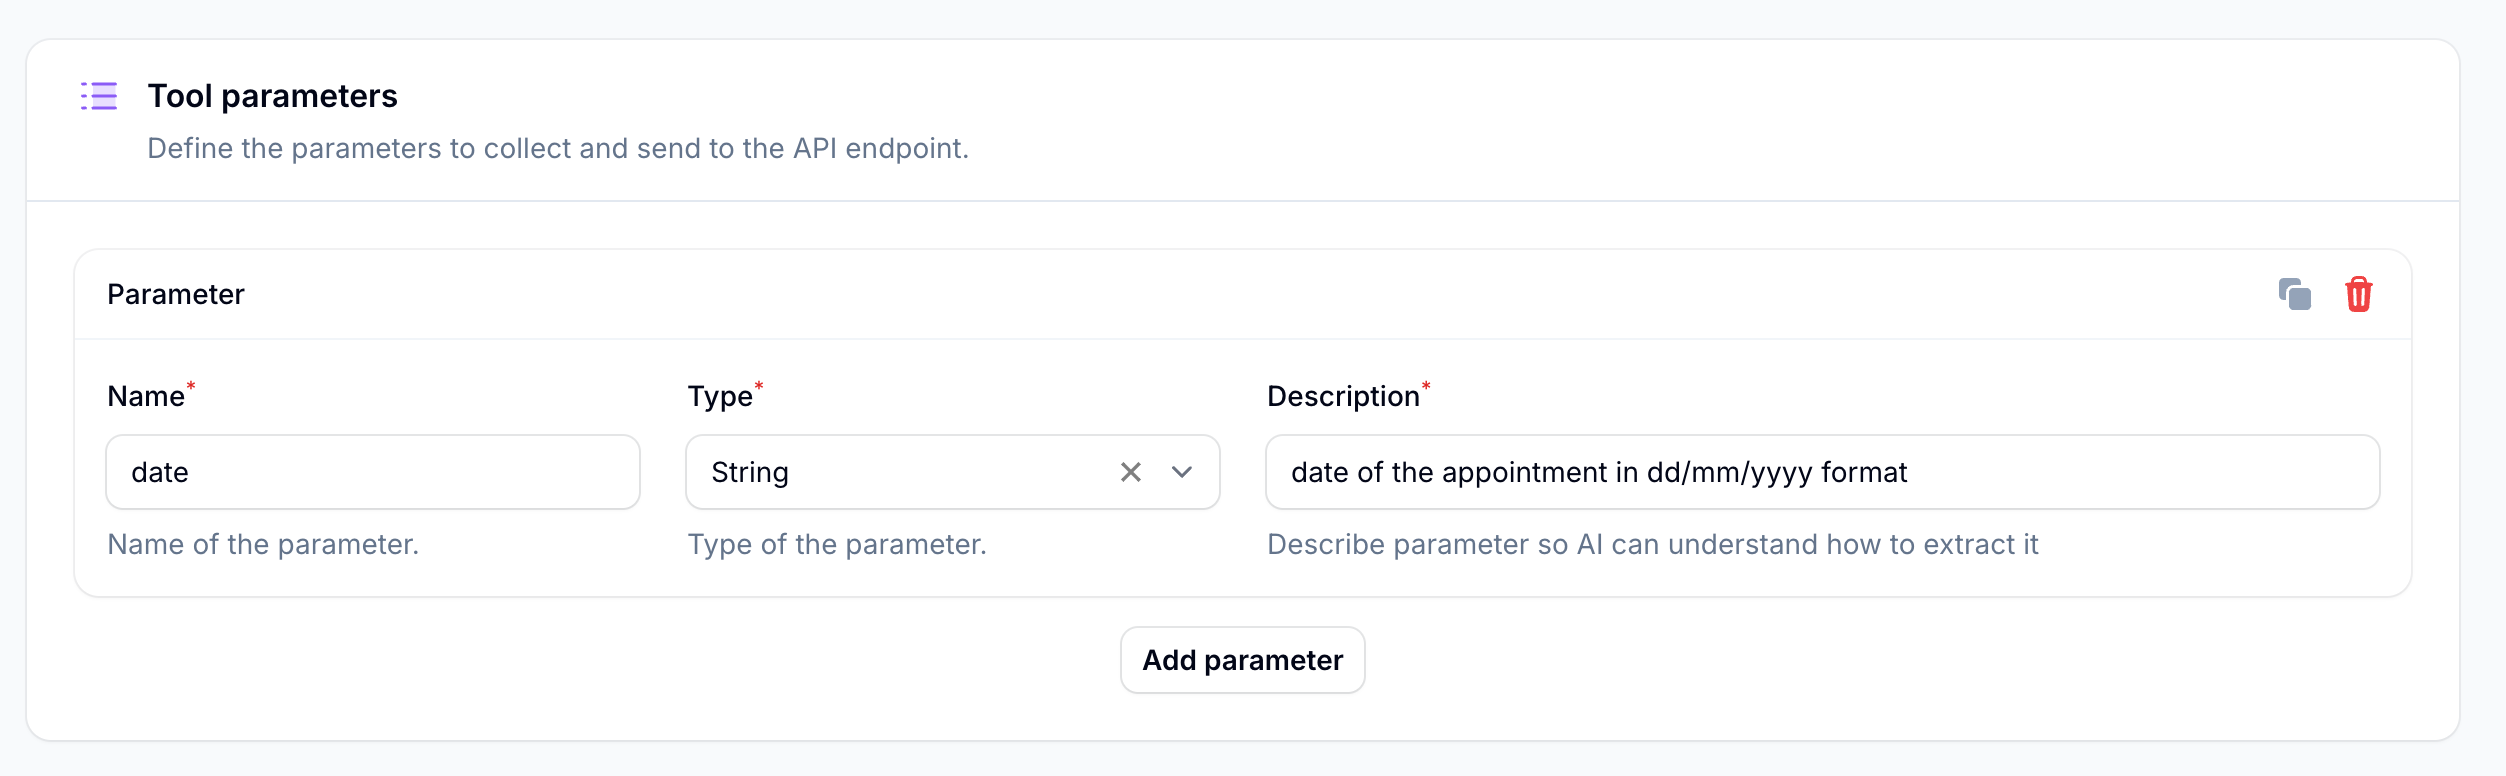
Understanding Parameter Types
String
Text values like names, addresses, or reference numbers
Number
Whole numbers like quantities or IDs
Float
Decimal numbers like prices or amounts
Boolean
True/false values for yes/no situations
Each parameter can be marked required or optional. Optional parameters are
only sent when the AI actually collected a value, so your endpoint won’t receive
empty fields. Add format hints in the description (e.g.
"Date in dd/mm/yyyy",
"Phone without spaces").Static fields
Static fields are fixed key/value pairs that are always sent with every request — the AI never changes them. Use them for constants like a tenant id, a channel, or a source tag.caller to {{customer_phone}}).
System variables & dynamic values
There are two ways to inject dynamic data into your tool:AI-extracted parameters
Wrapped in single braces
{param}. Replaced with the value the AI
collected during the conversation. Used in the URL path/query.System & account variables
Wrapped in double braces
{{variable}}. Filled in automatically by the
platform at call time. Usable in the URL, header values, and
static field values.| Variable | Value |
|---|---|
{{customer_phone}} | The other party’s phone number (caller for inbound, callee for outbound). Empty on web/chat. |
{{assistant_phone}} | The assistant’s own phone number, if it has one. |
{{assistant_id}} | The assistant’s unique ID. |
{{assistant_name}} | The assistant’s name. |
{{current_date}} | Current date in the assistant’s timezone (e.g. 2026-06-15). |
{{current_time}} | Current time in the assistant’s timezone (e.g. 14:30). |
Any custom account variables you define are also available as
{{name}} and
can be used the same way.Dynamic Endpoints
You can make your endpoints dynamic using variables:{order_id} with the actual value collected during the conversation.
Testing Made Easy
Automatic Testing
Click Test tool to fire a real request with realistic sample data:
- String parameters:
"Sample data" - Number parameters:
42 - Float parameters:
19.99 - Boolean parameters:
true - System variables like
{{customer_phone}}are filled with realistic placeholders (e.g.+1234567890, the assistant name/id)
Automation Platform tools don’t have a Test tool button — you test them by
running the linked flow inside the Automation Platform.
Automation Platform tools
Need more complex logic? Create an Automation Platform tool and Autocalls
builds and links the flow for you — no manual webhook setup required.
Create the tool
Choose the Automation Platform type, give the tool a name, description and
parameters. On save, the linked flow is created automatically.
Open the flow
On the tool’s edit page, the connection card shows the flow status
(Live/Disabled) and an Open flow in Automation Platform button.
The flow starts from a webhook trigger and ends with a Return Response
step.
Build your logic
Add steps between the trigger and the response — API calls, CRM updates,
branching, data transforms — then keep a Return Response step so the AI
receives a result.
- Transform data before/after API calls
- Make multiple API calls in sequence
- Apply complex business logic
- Handle errors gracefully
Real-World Examples
Order Lookup System
Order Lookup System
- Ask for the order number
- Fetch the status
- Explain delivery dates and status to the customer
Appointment Availability
Appointment Availability
- Ask about the desired service
- Get preferred date
- Show available time slots
Customer Verification
Customer Verification
- Collect contact details
- Verify against your CRM
- Proceed based on verification status
Configuring Your AI
The AI needs clear instructions in its system prompt to effectively use your
custom tools.