Step 1: Create Elastic SIP Trunking
- Log in to your Twilio Console
- In the search bar at the top of the dashboard, type “Elastic SIP Trunking” and click the result Alternatively, click the ”…” menu on the left sidebar for All Products & Services, then scroll down and click Elastic SIP Trunking
-
Click Create new SIP Trunk and give it a Friendly name (e.g.,
autocalls)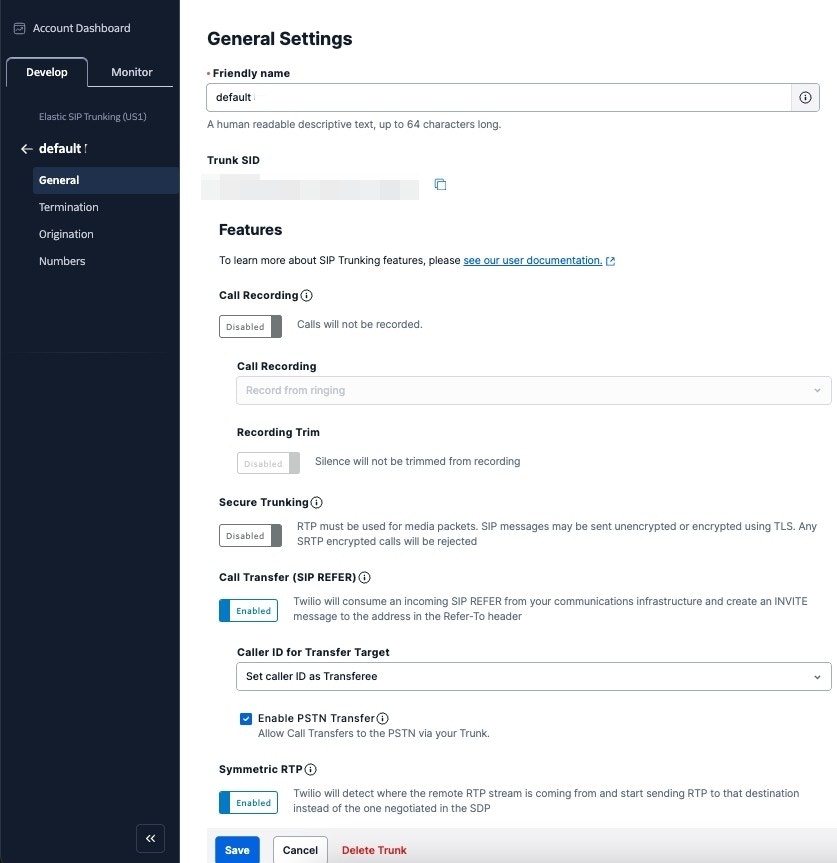
Configure Termination (for outbound calls)
- In the left sidebar, click Termination
-
In the Termination SIP URI field, enter only a unique name — for example,
yourcompanyTwilio automatically appends.pstn.twilio.com, so your full URI will be:yourcompany.pstn.twilio.com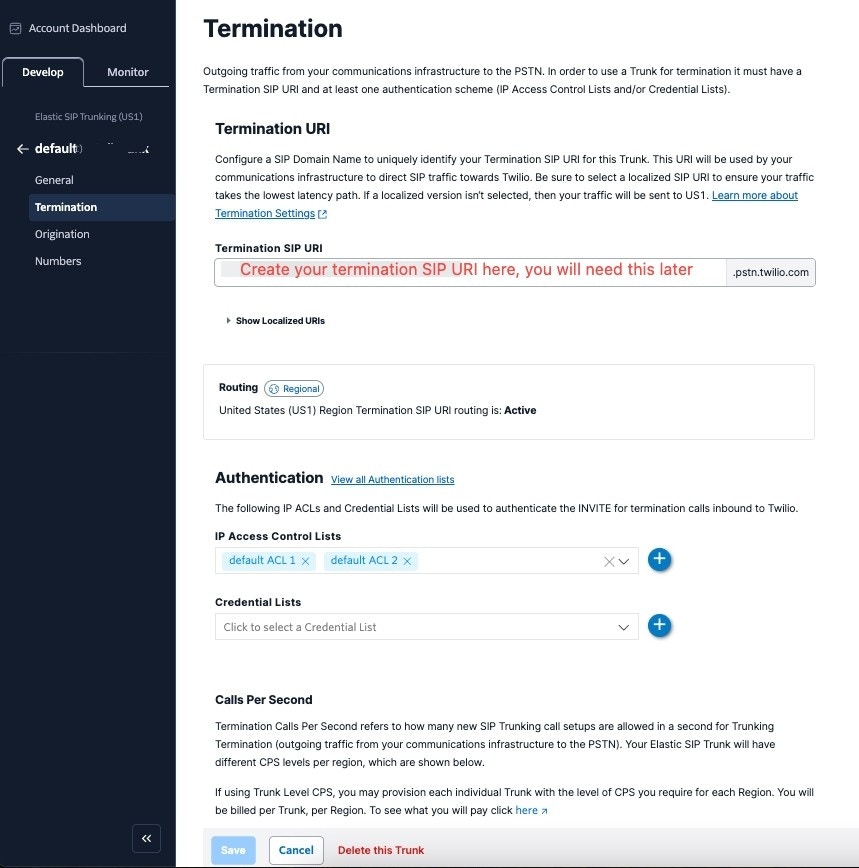
Save this URI — you will need the full Termination SIP URI (
yourcompany.pstn.twilio.com) later when importing the number in Step 3.-
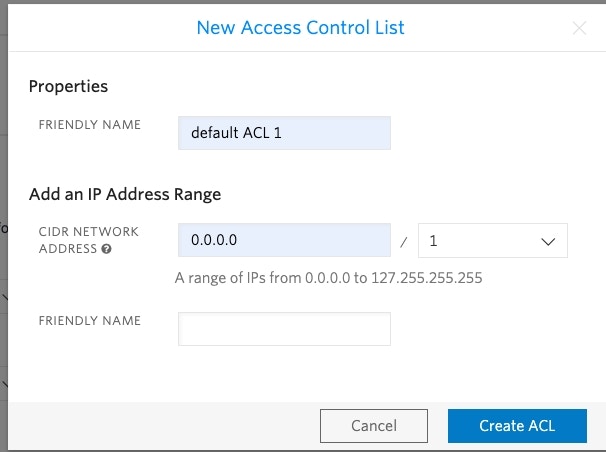
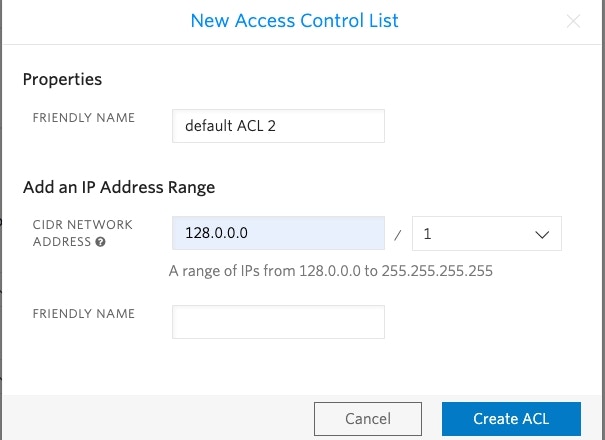
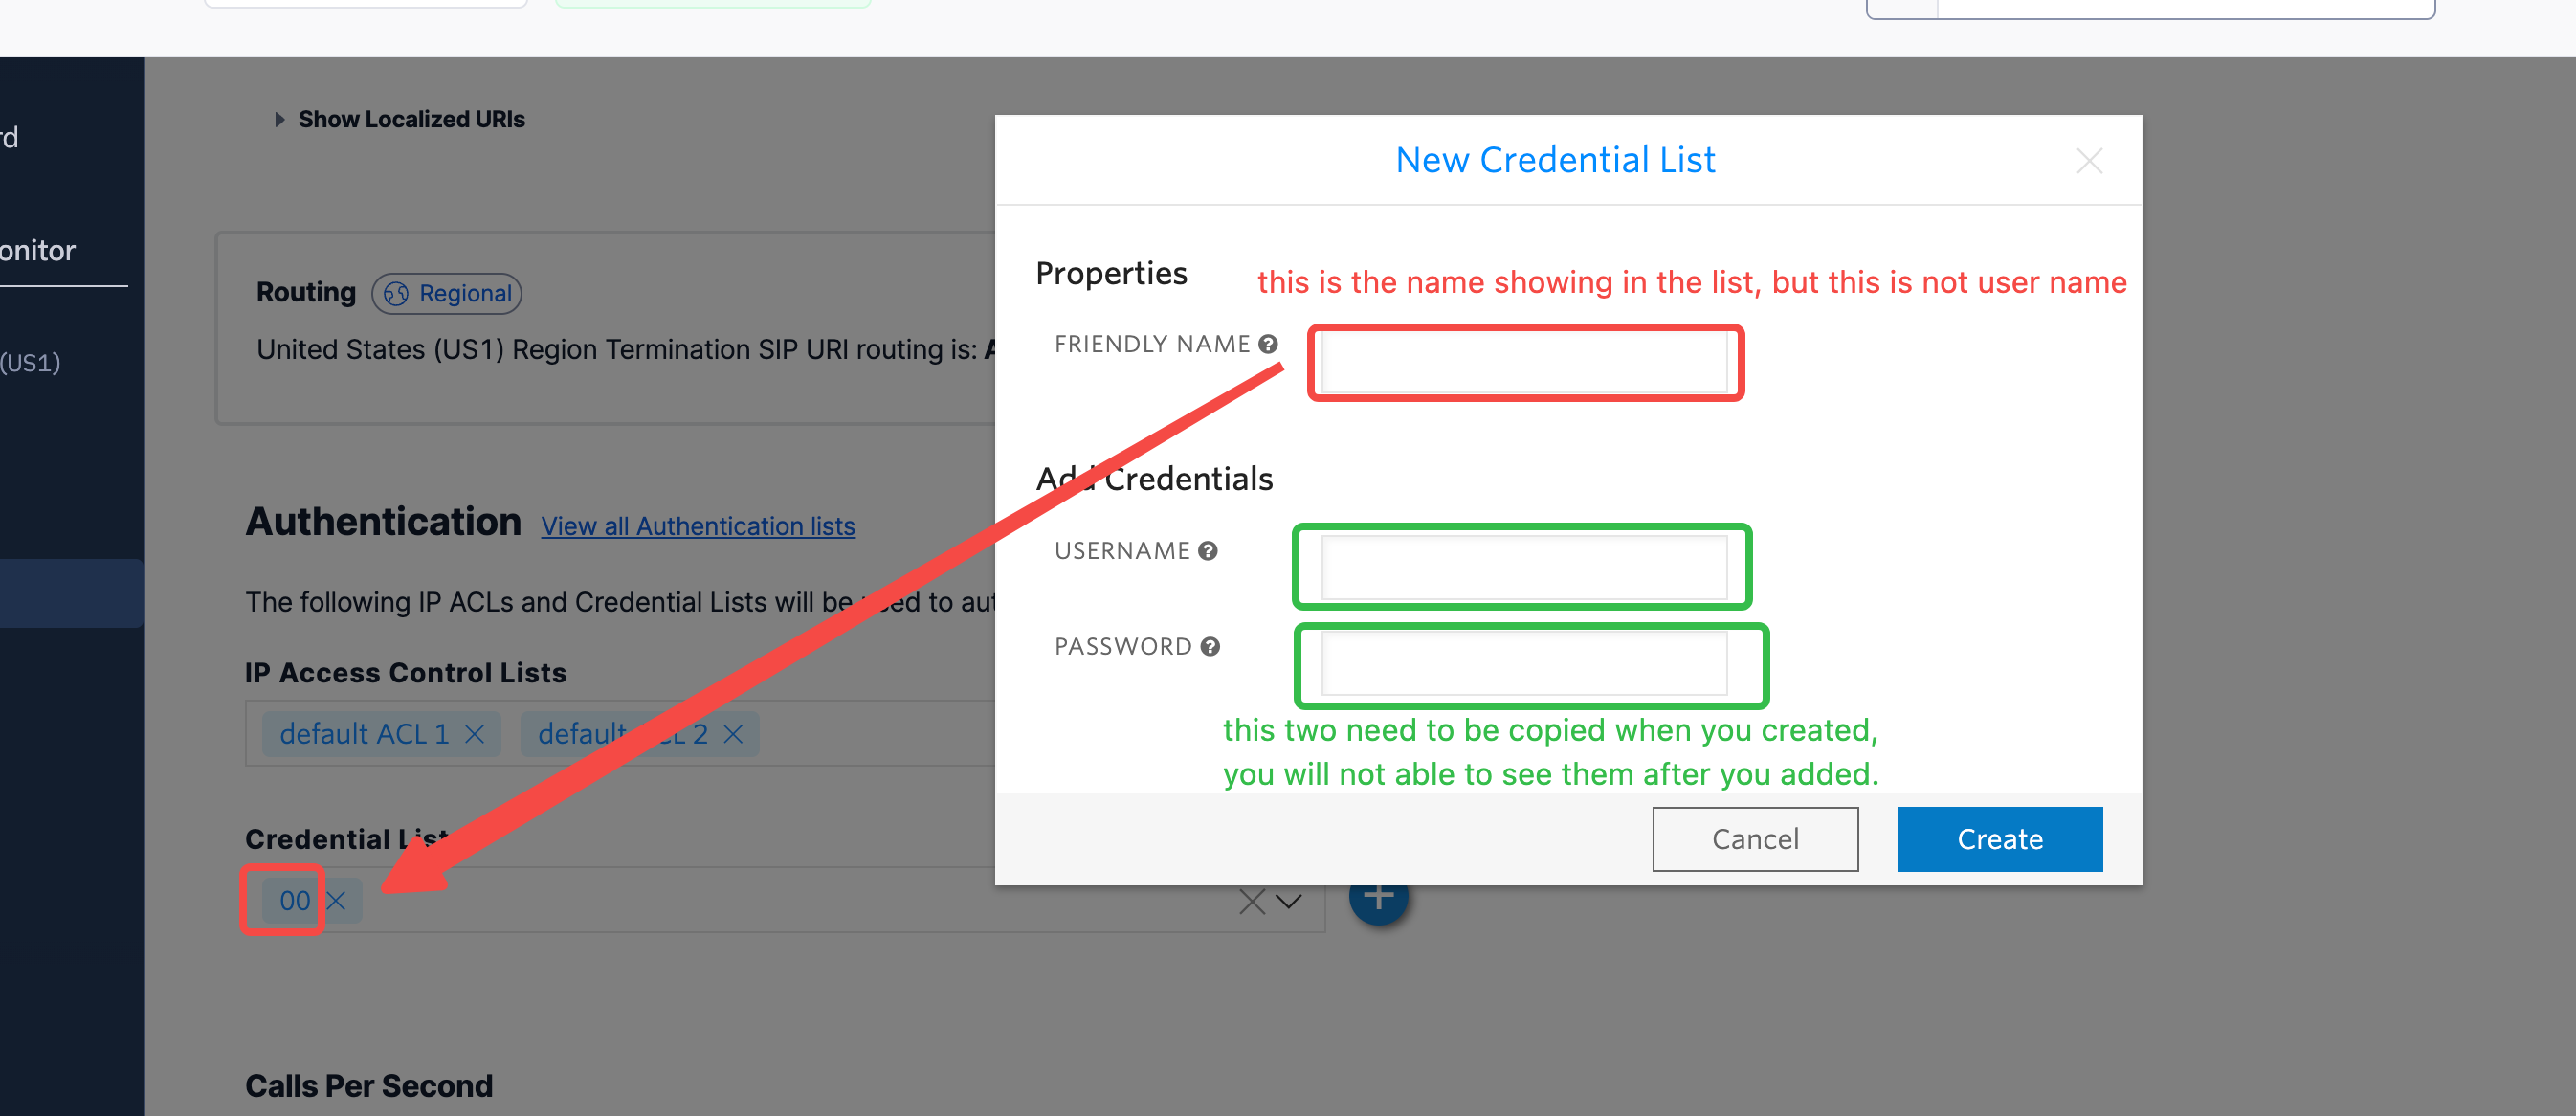
For your SIP trunk to accept outbound requests, you need to set up authentication. Scroll down to Authentication and configure IP Access Control Lists:
Currently the SIP server does not have a static IP, so you need to whitelist all the IP addresses in the range:
Configure Origination (for inbound calls)
- In the left sidebar, click Origination
-
Click Add new Origination URI and enter the SIP server address:

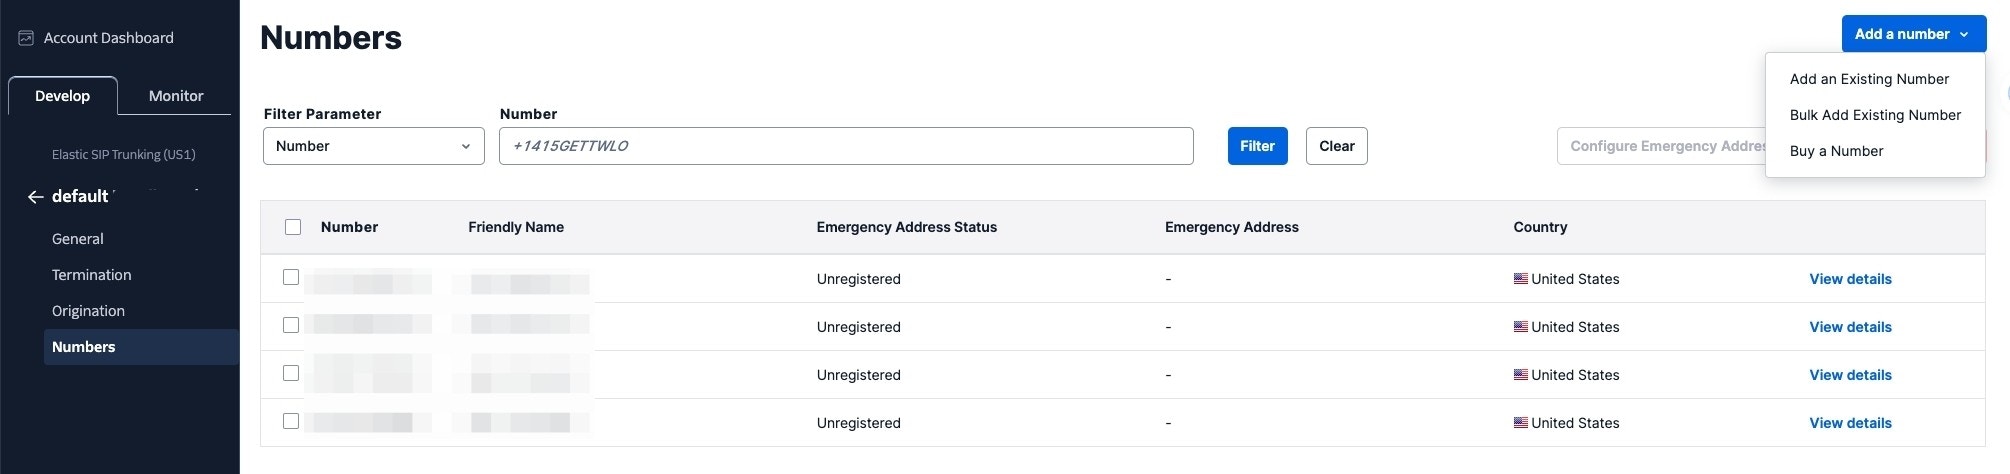
Step 2: Assign Numbers to Your SIP Trunk
Now assign your Twilio phone numbers to the trunk you just created.- In your SIP trunk, click Numbers in the left sidebar
-
Click Add a Number and select the phone number(s) you want to use
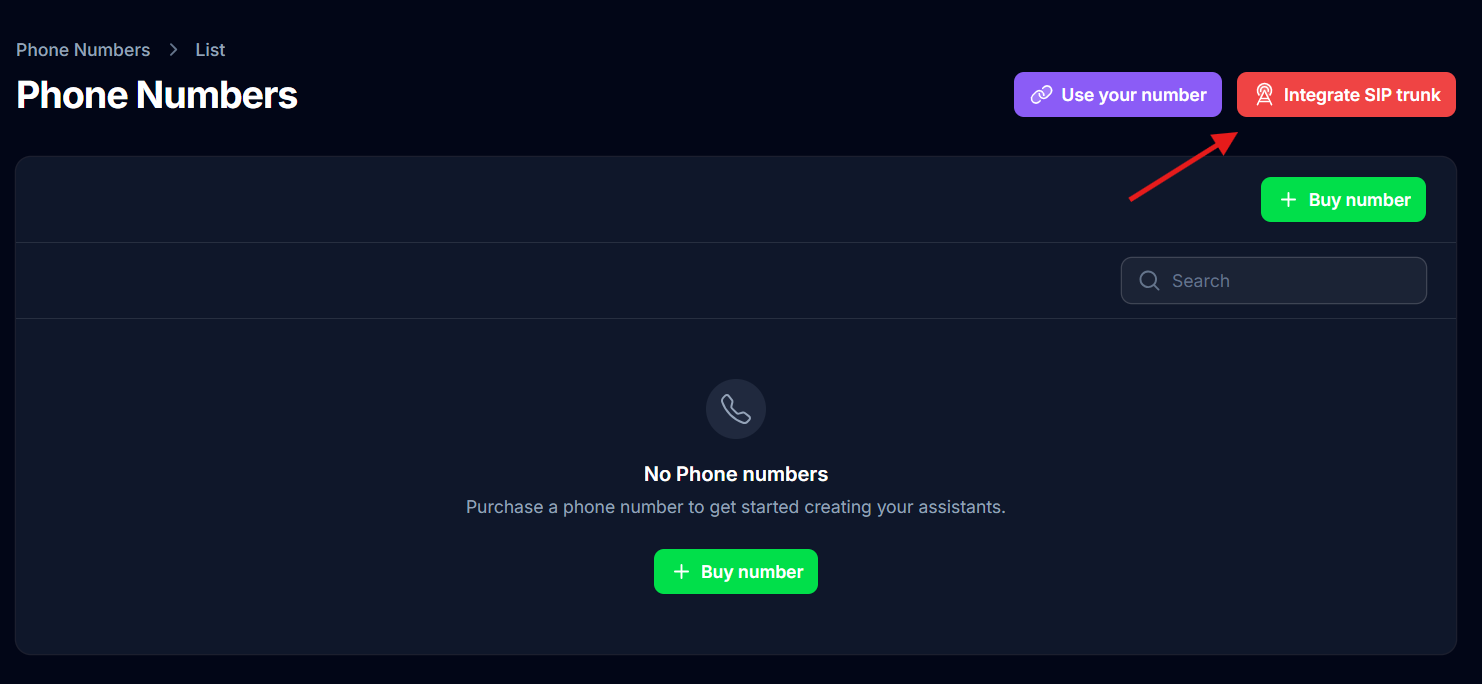
Step 3: Import Numbers to the Platform
Now import the number so the platform knows how to route calls.- Go directly to the Phone Numbers page in your dashboard: https://app.autocalls.ai/phone-numbers If it takes you to the login page, log in first — it will automatically redirect you to the Phone Numbers page.
-
Click “Integrate SIP trunk” (top-right corner of the page)
-
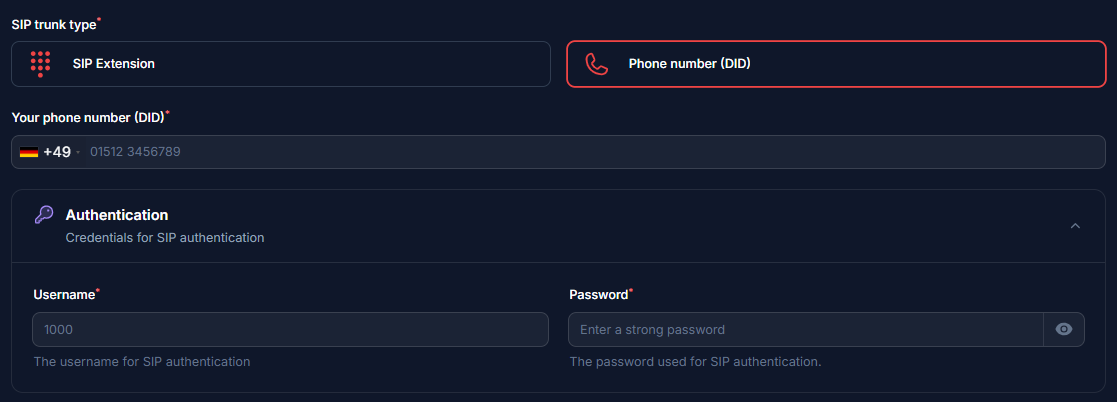
Fill in your phone number and SIP credentials:
-
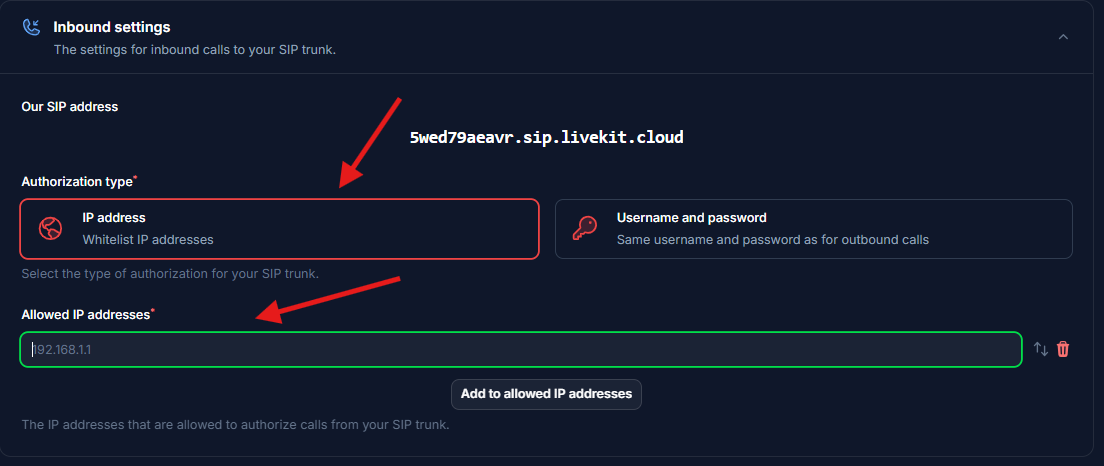
Enter the Termination SIP URI you created in Step 1:

-
Select the Authorization type. If you configured IP-based authentication in Step 1, select IP and add these addresses:
-
Select the country where your SIP trunk is located.

Step 4: Verify Setup
After configuration:- Make a test call to your number
- Check that the AI assistant answers
- Use the test call feature to verify outbound calling
Security Requirements
Your SIP credentials need to be secure:- Username: Your extension number or provider-supplied username
- Password must have:
- 12 or more characters
- Numbers
- Upper and lowercase letters
- Special characters recommended
Common Issues
Do I need to set up Elastic SIP Trunking for every new number?
Do I need to set up Elastic SIP Trunking for every new number?
No. You only create the Elastic SIP Trunk once (Step 1). For each new number, simply assign it to your existing trunk (Step 2) and import it into the platform (Step 3).
After connecting, inbound works but outbound does not work?
After connecting, inbound works but outbound does not work?
- Check your Termination SIP URI — make sure there are no spaces and it reads correctly (e.g.,
yourcompany.pstn.twilio.com). Verify you only entered the name part in Twilio and didn’t accidentally include a localized URI or duplicate the.pstn.twilio.comsuffix. - Check your username and credentials — the username is not the same as the “Friendly name” in the credential list. Double-check you entered the actual username.
How do I set up dialing to international countries?
How do I set up dialing to international countries?
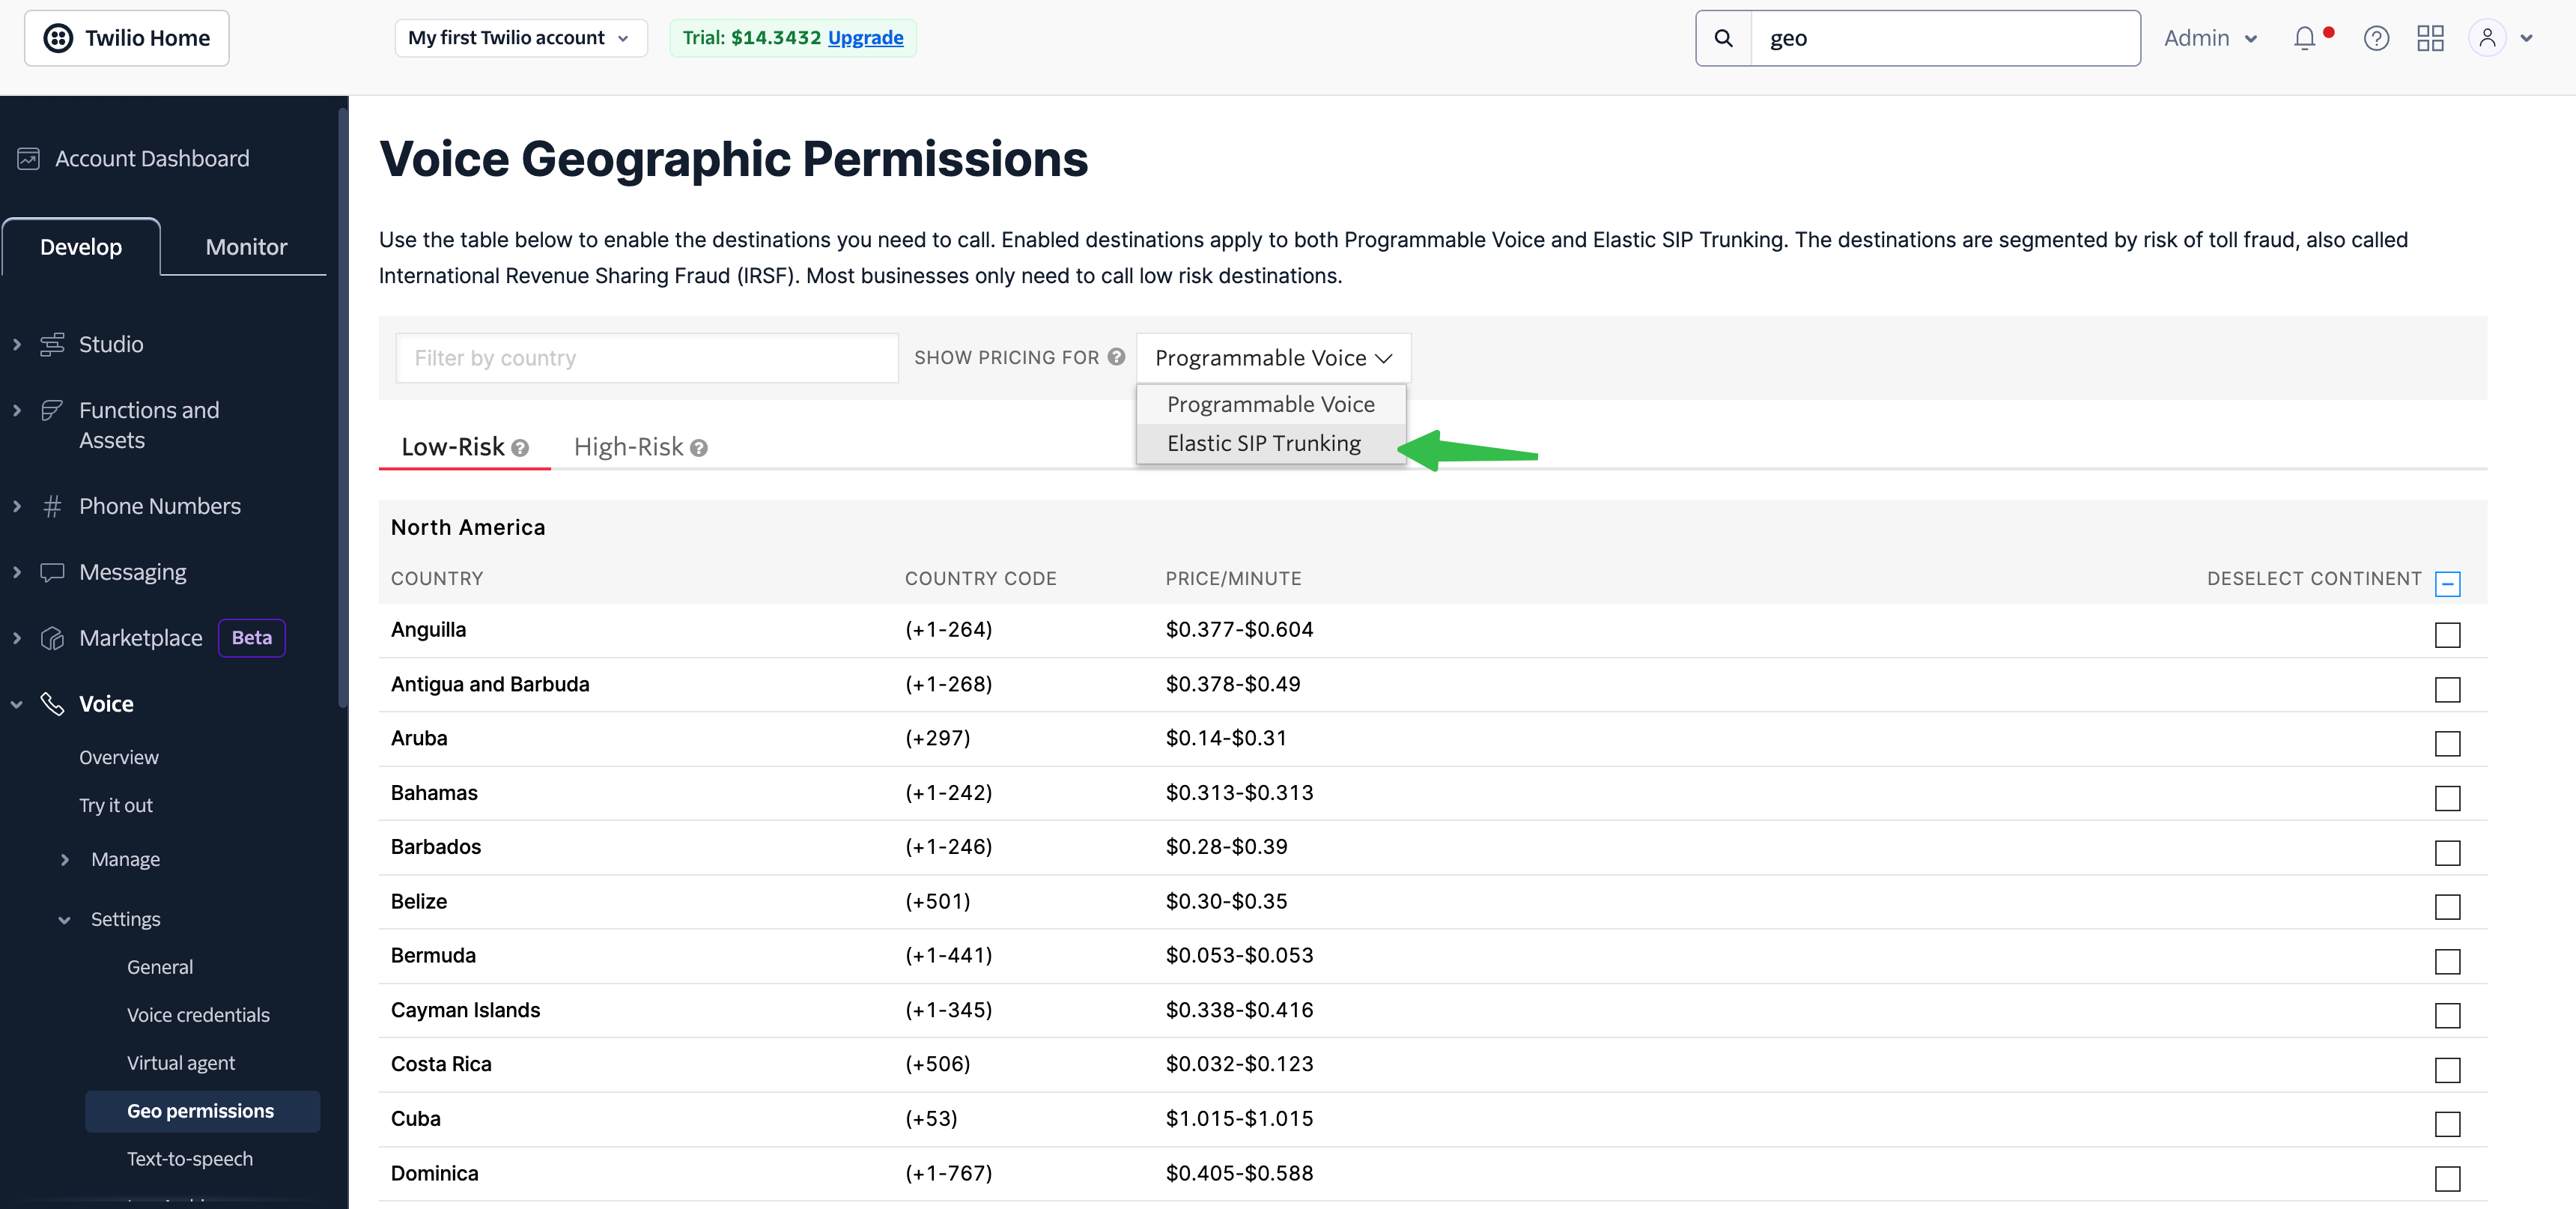
- In the Twilio Console search bar, search for “geo” to find Voice Geographic Permissions.
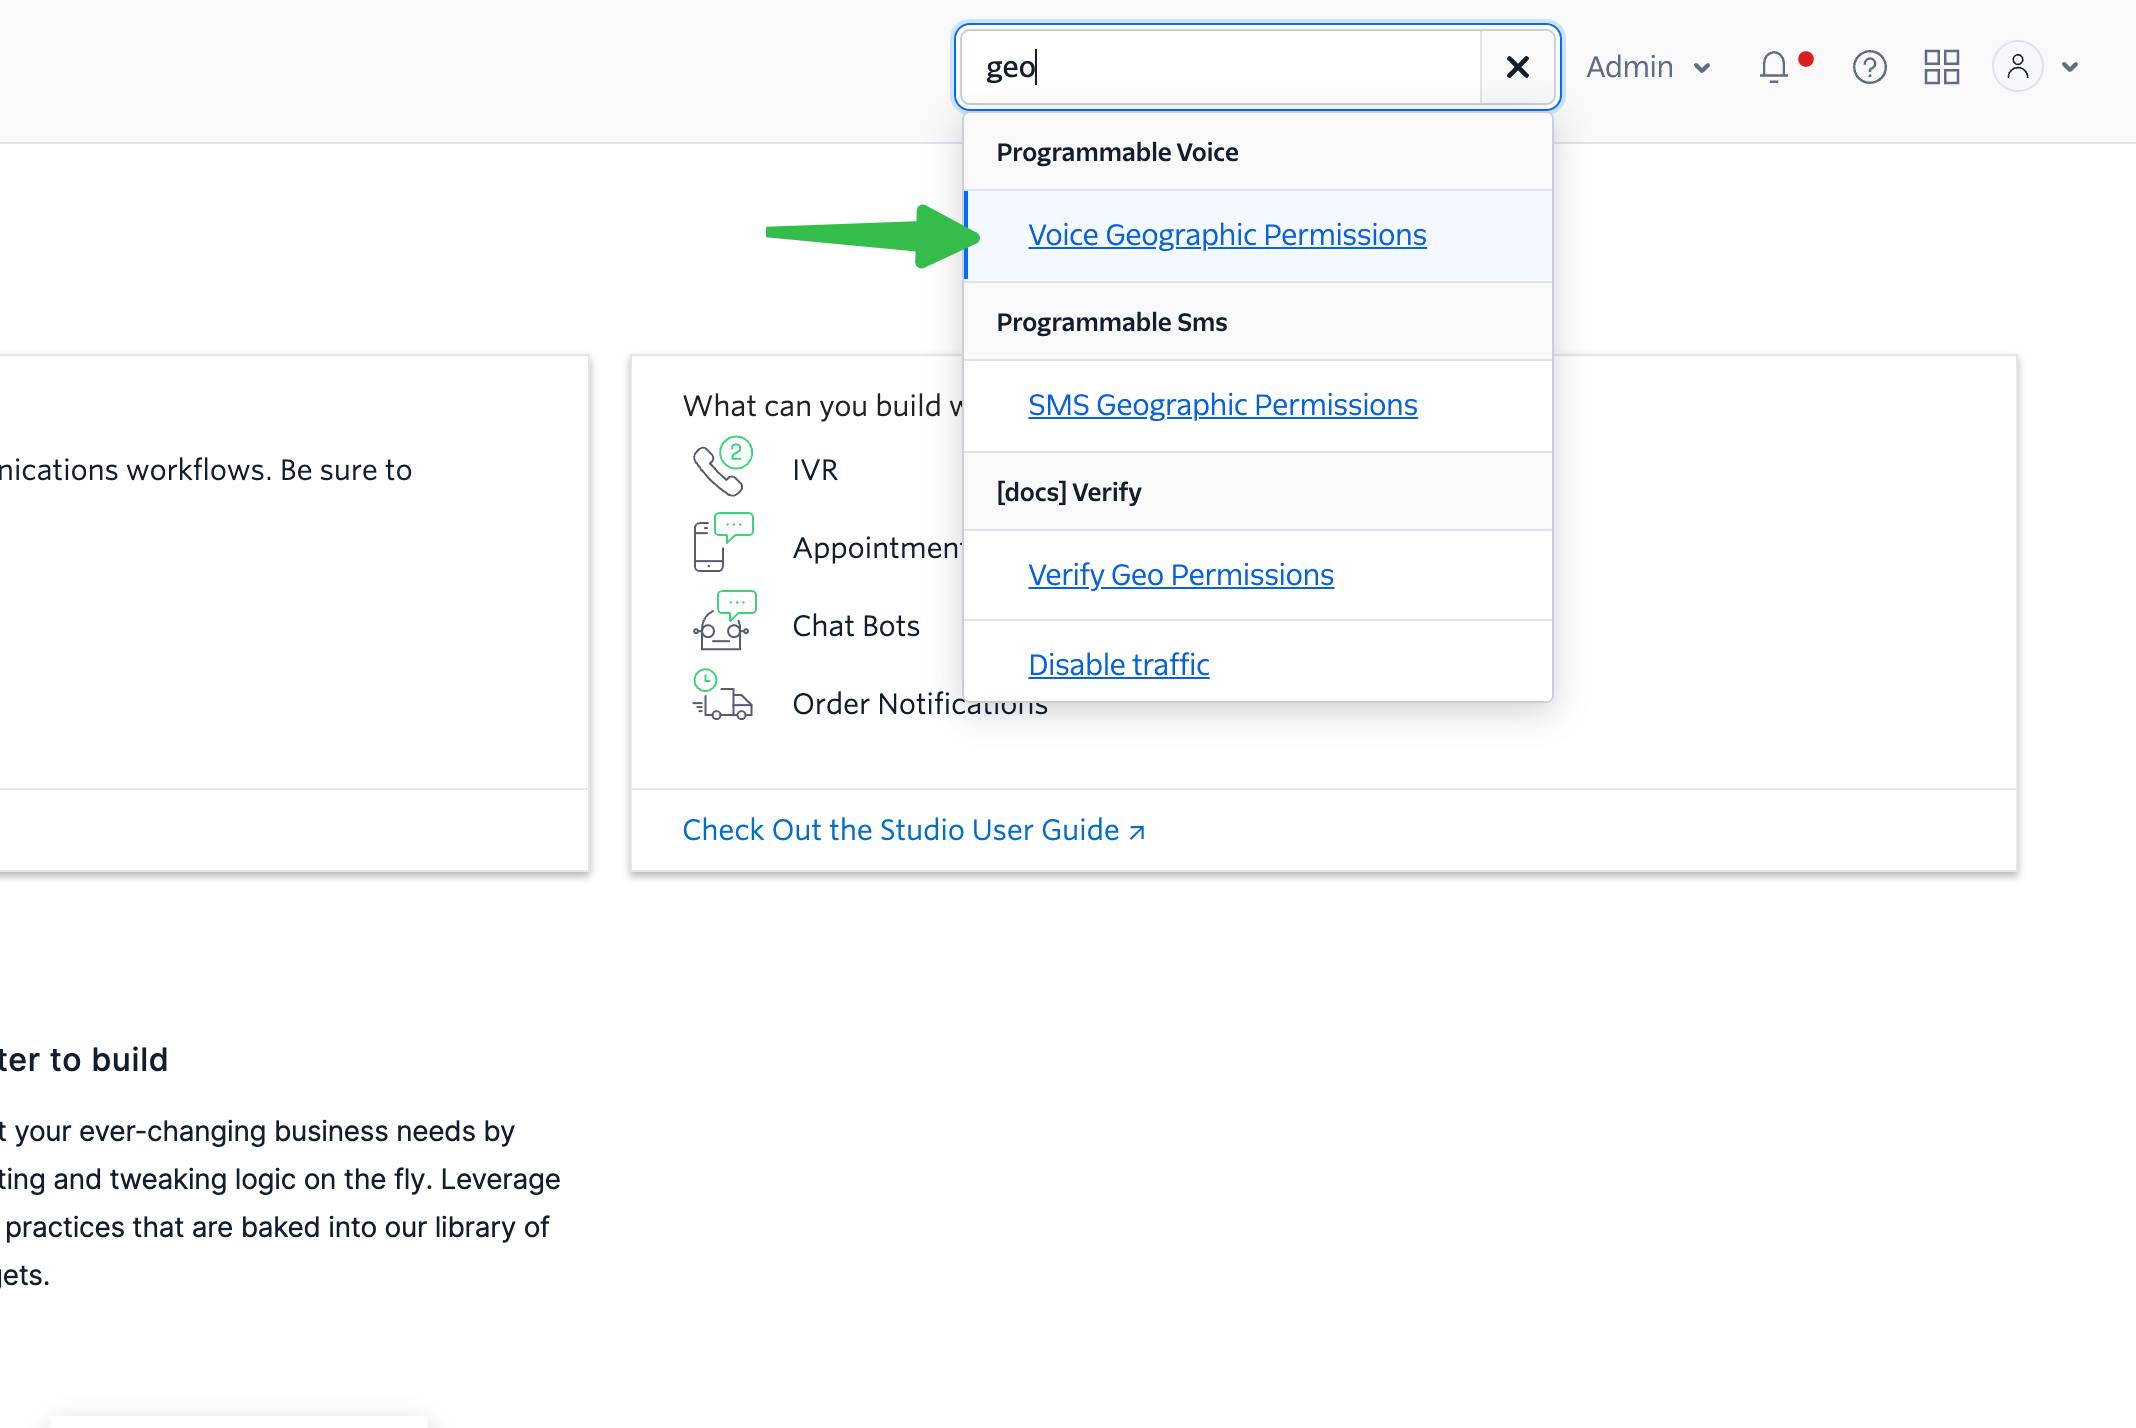
- Choose “Elastic SIP Trunking” in the selector, then select the countries you want to dial.
Need help setting up? Our support team specializes in helping customers
integrate their phone systems. We’ll guide you through the entire process,
ensuring a smooth setup with your specific phone system configuration.