- PBX
- SIP Direct
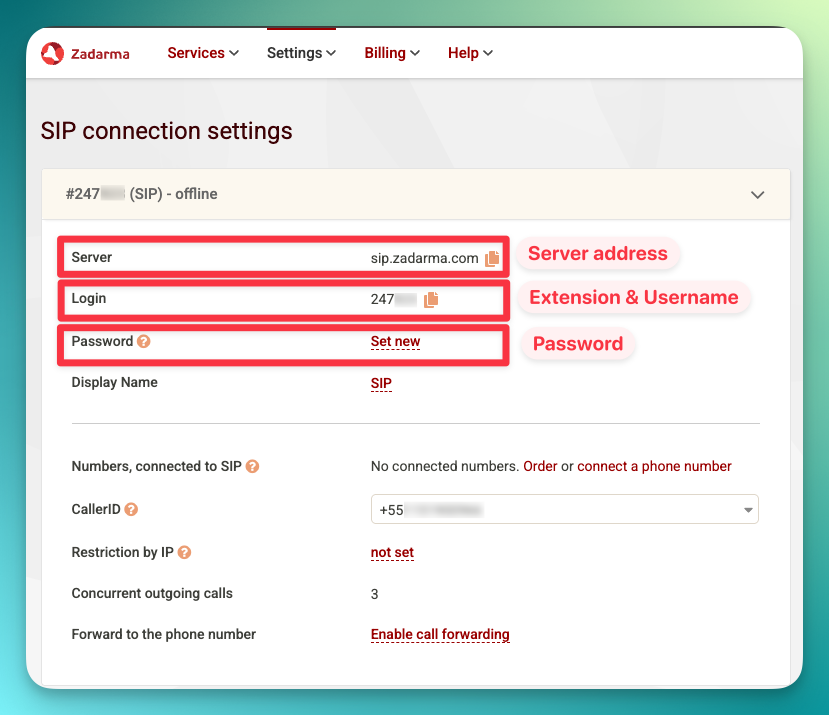
Step 1: Gather Your SIP Credentials
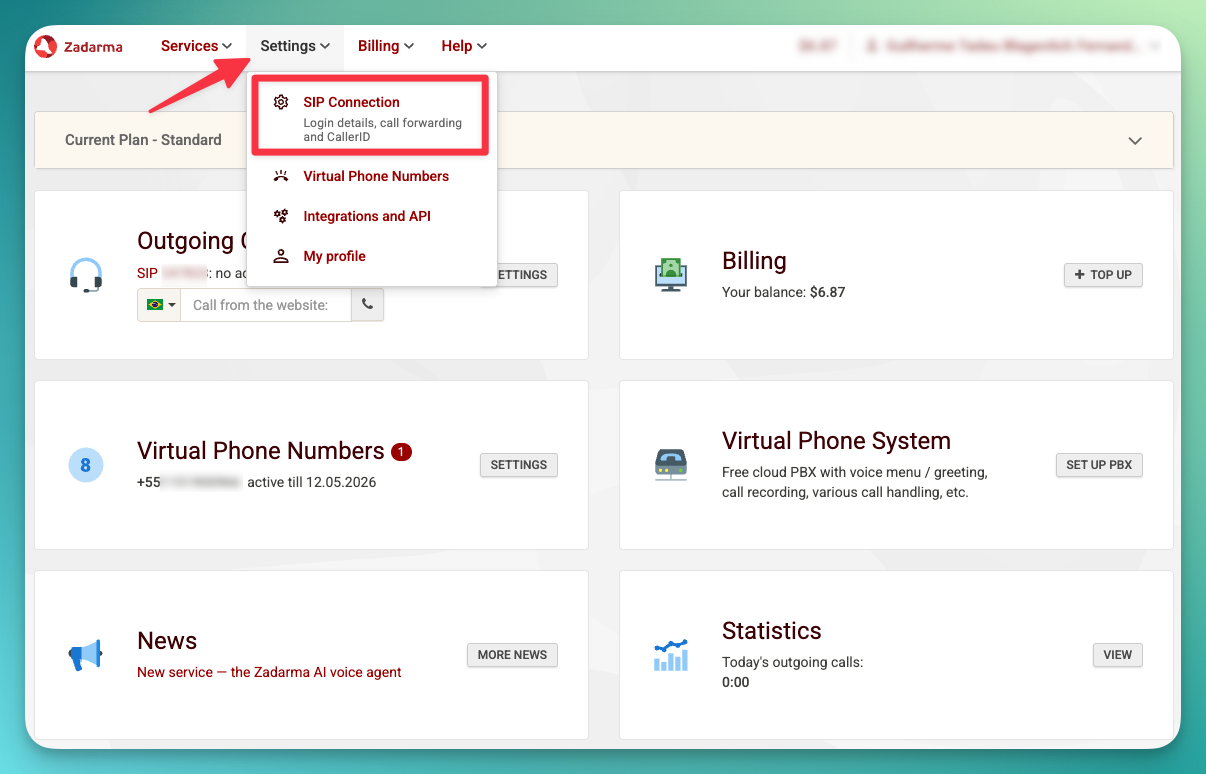
- Log in to your Zadarma Dashboard
- Go to My PBX → Extensions
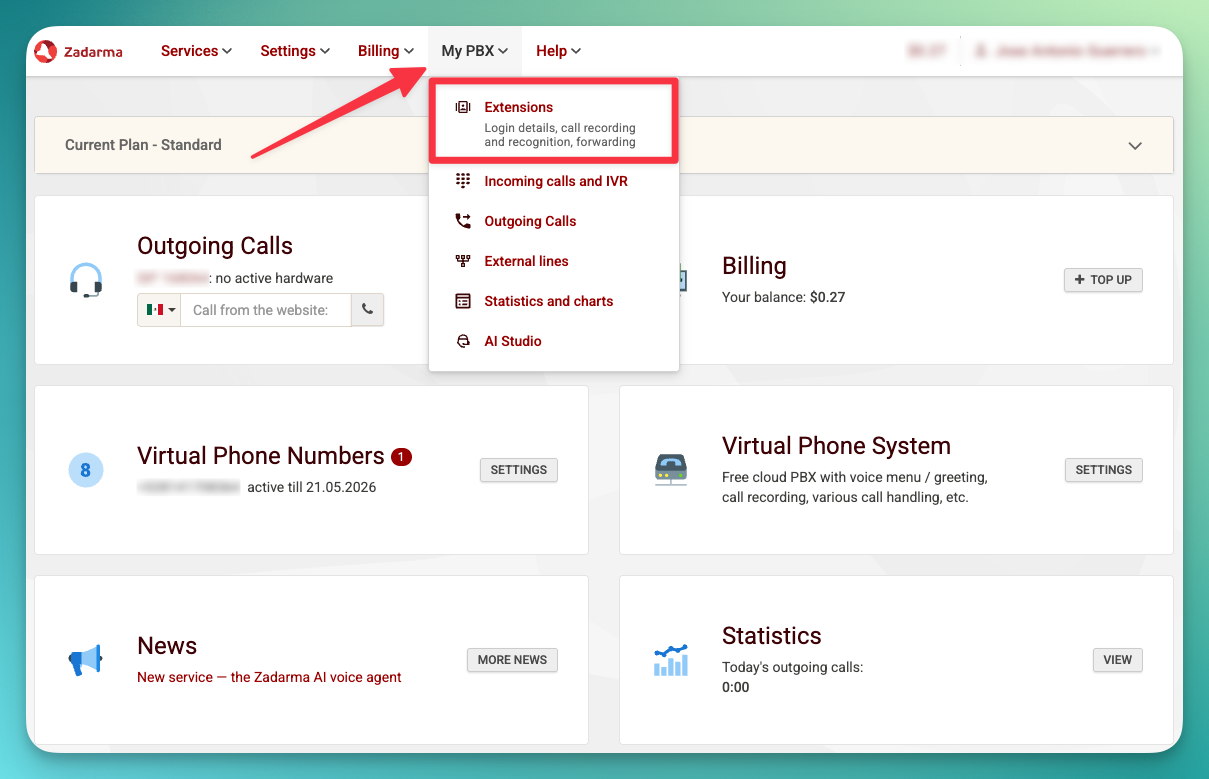
- Find your extension and note these details:

Step 2: Set Up External Server (for inbound calls)
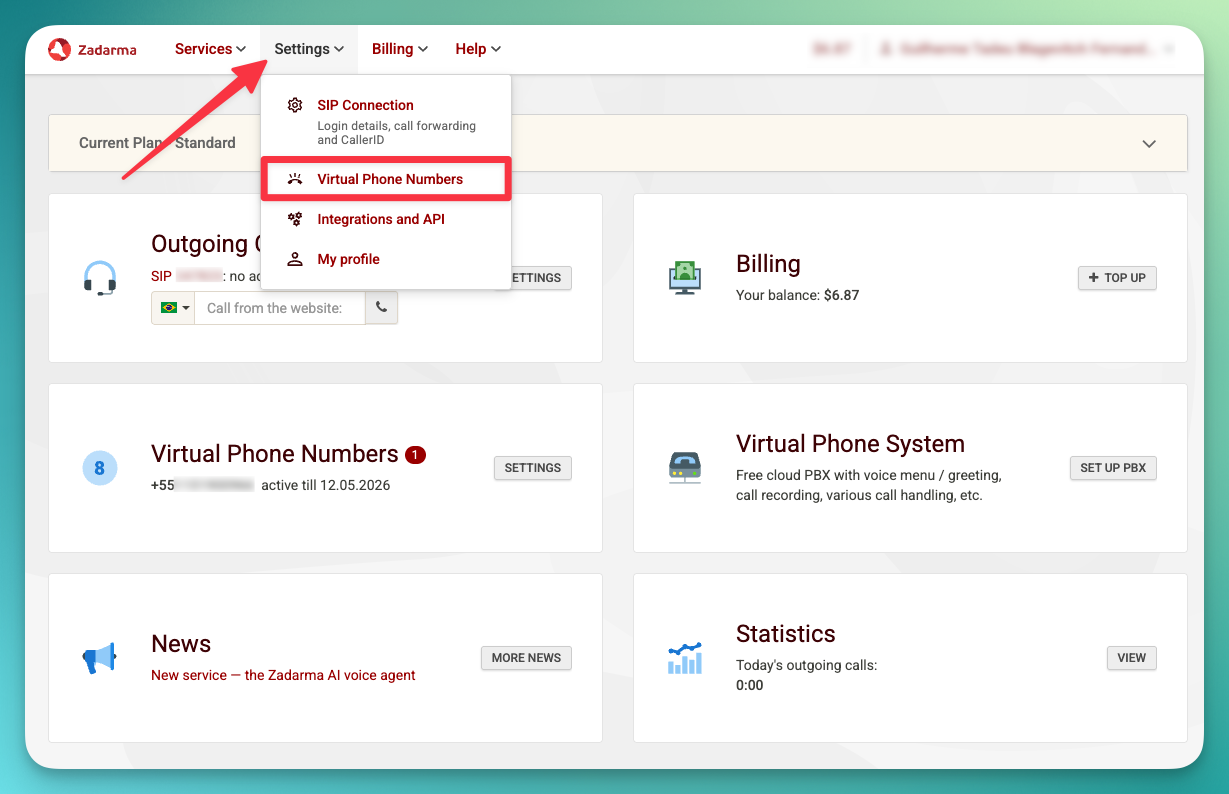
To receive inbound calls, you need to configure an External Server in Zadarma that forwards incoming calls to the platform’s SIP server.- In your Zadarma Dashboard, go to Settings → Virtual phone numbers
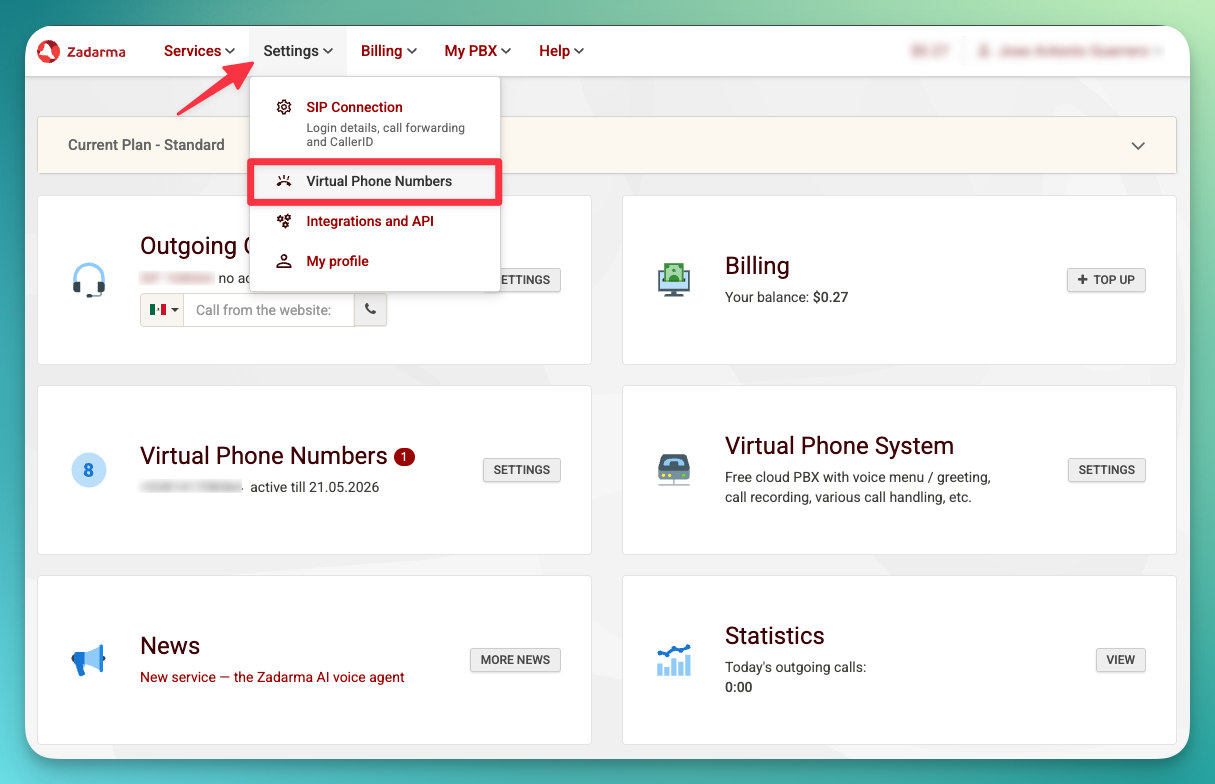
- Find the number you want to connect and click the gear icon to open its settings
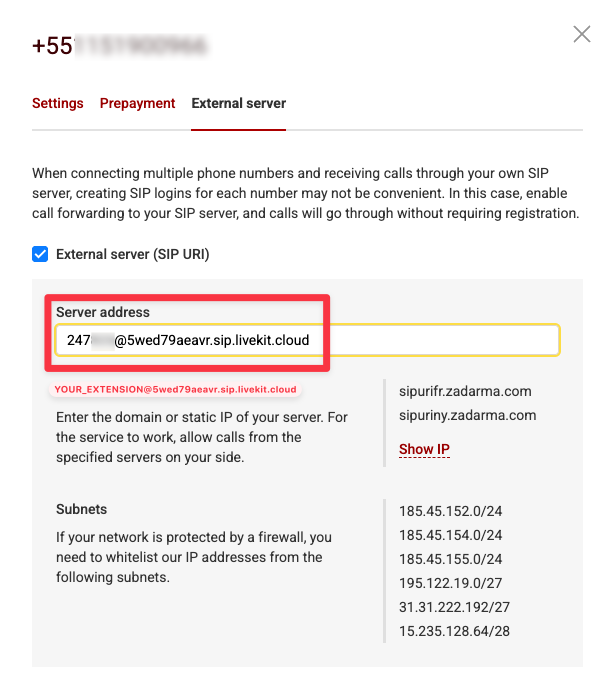
- Click External Server and enable the SIP URI checkbox
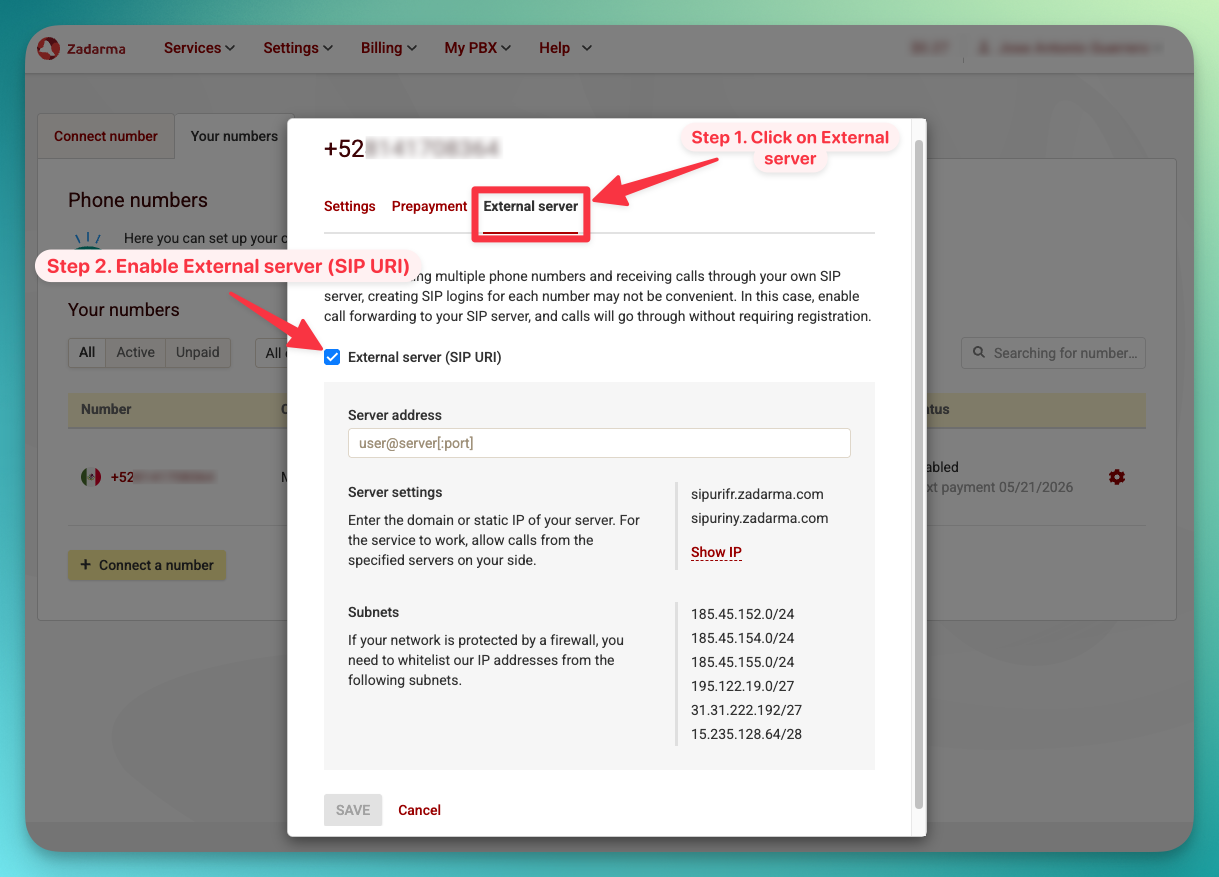
- Enter the SIP server address using your phone number with the
+prefix:
+551151900966: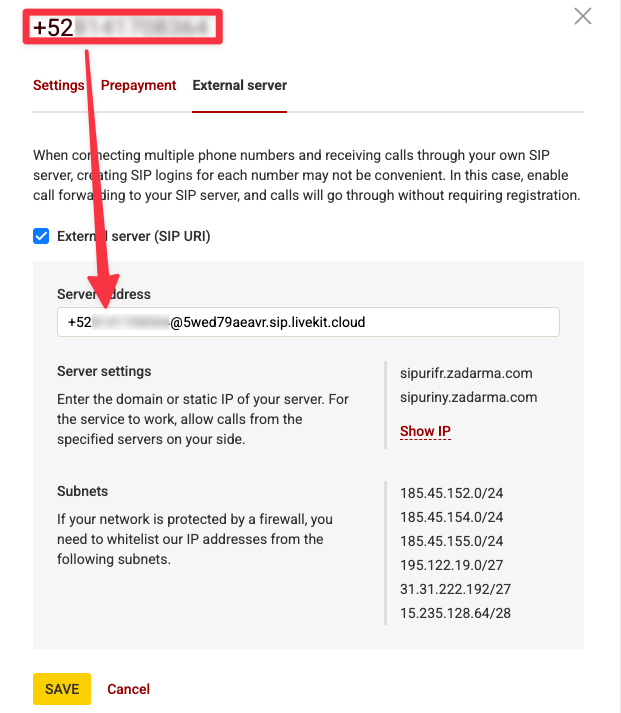
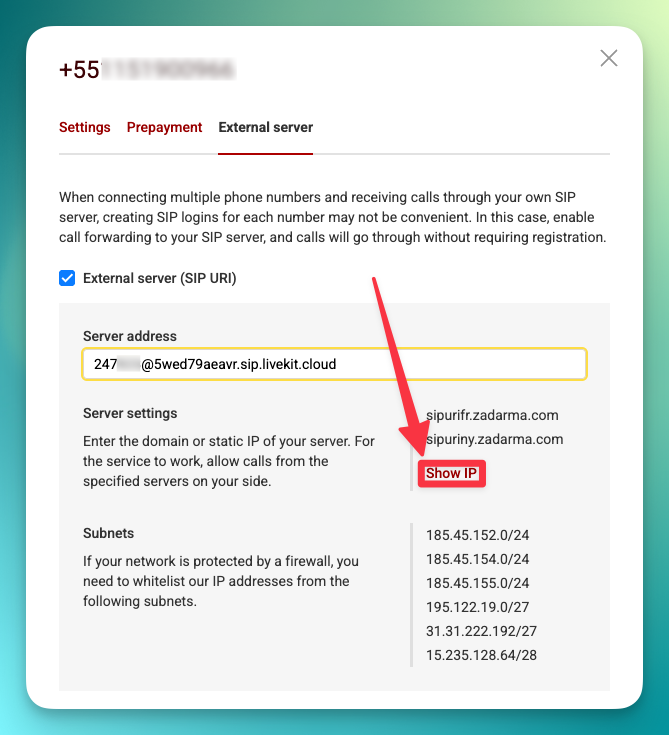
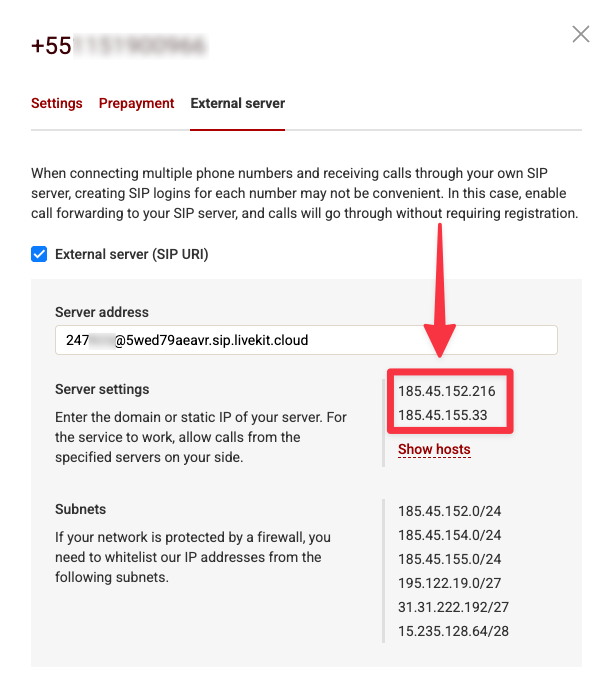
- Click Show IP below the server address to reveal Zadarma’s IP addresses (e.g.,
185.45.152.216,185.45.155.33)
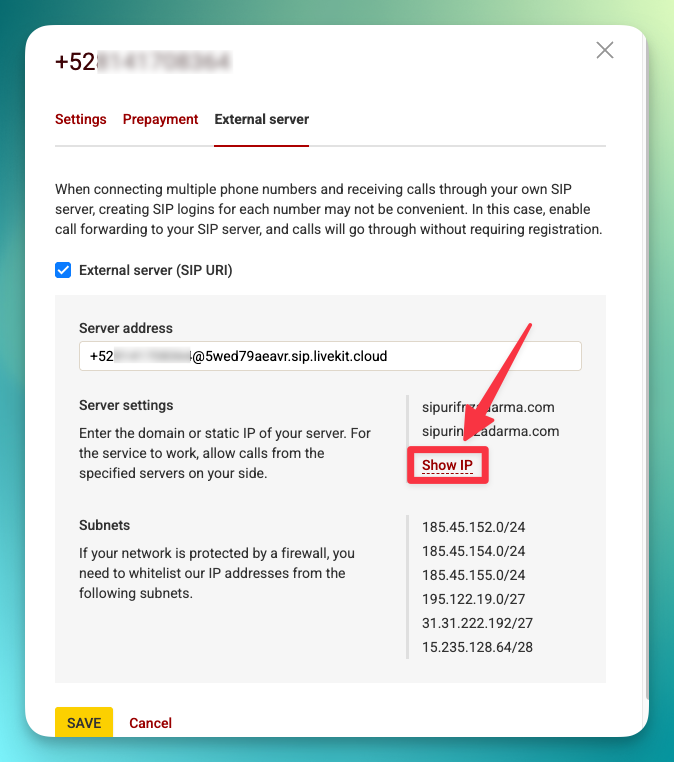
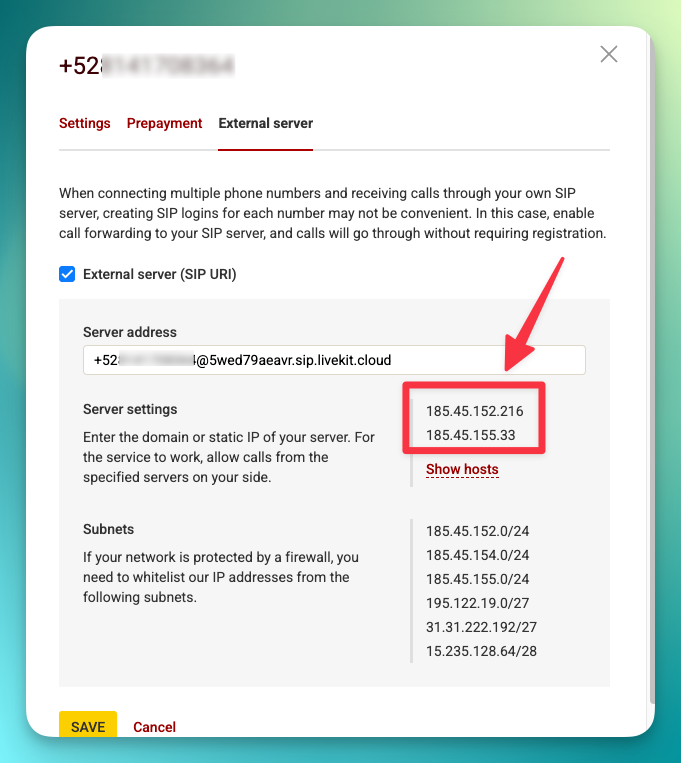
Save these IPs — you will need them in Step 3 when configuring inbound authorization in the platform.
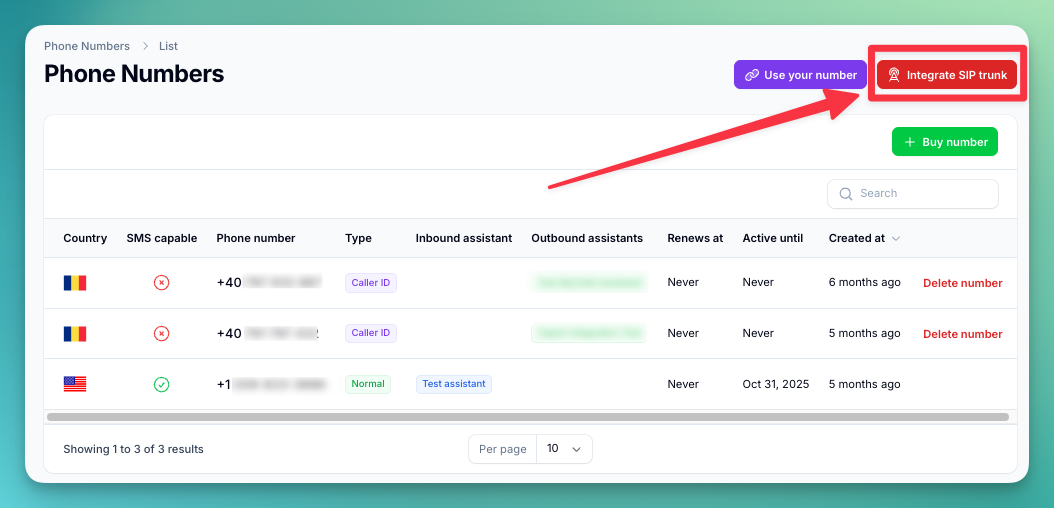
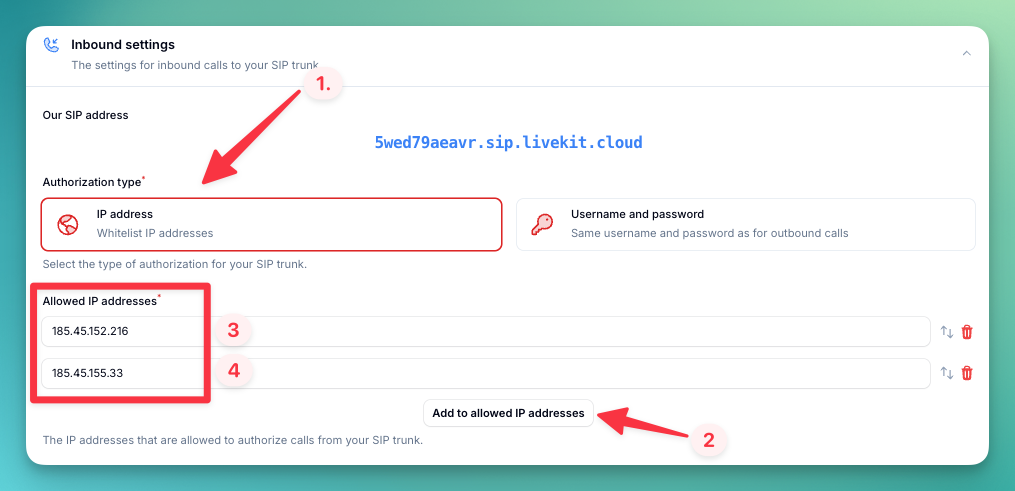
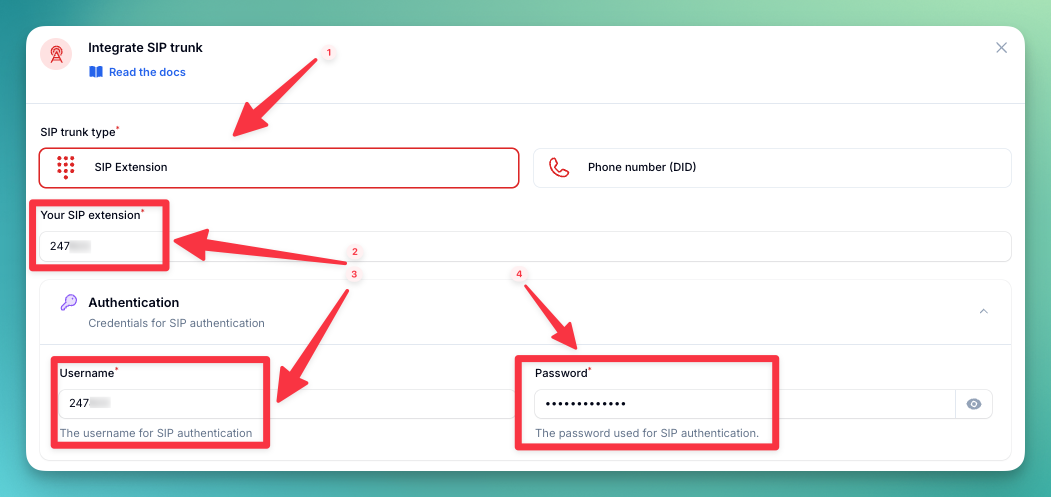
Step 3: Import Numbers to the Platform
Now import the number so the platform knows how to route calls.- Go directly to the Phone Numbers page in your dashboard: https://app.autocalls.ai/phone-numbers If it takes you to the login page, log in first — it will automatically redirect you to the Phone Numbers page.
- Click “Integrate SIP trunk” (top-right corner of the page)
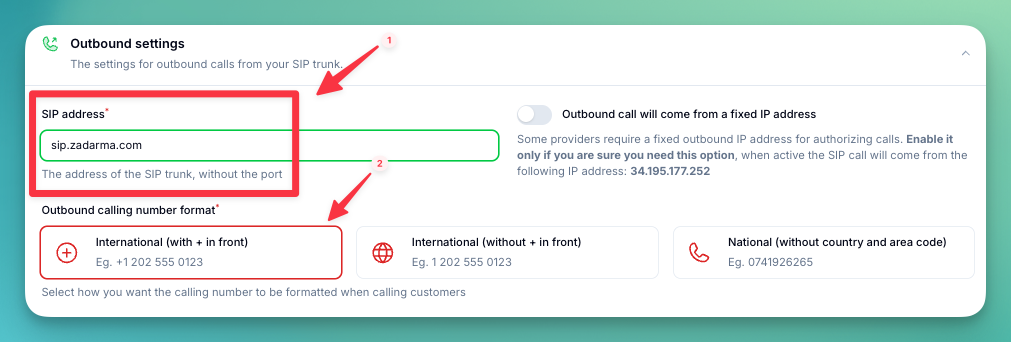
- Fill in your phone number and SIP credentials:
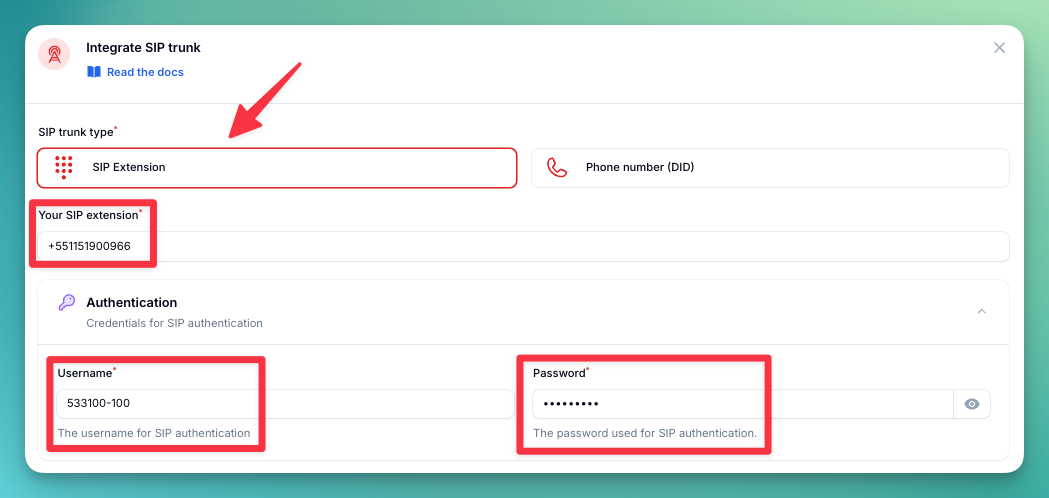
- Enter the Server address for outbound calls:
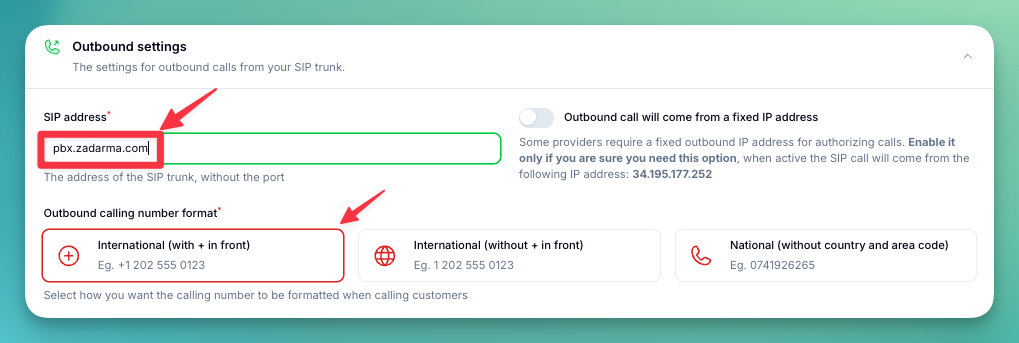
- Select the Authorization type. Select IP and add the Zadarma IP addresses you noted earlier from Show IP in Step 2.
- Select the country where your SIP trunk is located.

Step 4: Verify Setup
- Make a test call to your number
- Check that the AI assistant answers
- Use the test call feature to verify outbound calling


Security Requirements
Your SIP credentials need to be secure:- Username: Your extension number or provider-supplied username
- Password must have:
- 12 or more characters
- Numbers
- Upper and lowercase letters
- Special characters recommended
Call Transfer Limitations
Common Issues
Inbound calls are not working
Inbound calls are not working
- Check your External Server address — make sure the format matches your connection type:
- PBX:
+YOUR_PHONE_NUMBER@5wed79aeavr.sip.livekit.cloud(phone number with+) - SIP Direct:
YOUR_EXTENSION@5wed79aeavr.sip.livekit.cloud(extension number)
- PBX:
- Verify the External Server is enabled in Zadarma’s settings
- Check that the “Your SIP Extension” field in the platform matches: phone number for PBX, extension for SIP Direct
Outbound calls are not working
Outbound calls are not working
- Check the Server address — it should be
pbx.zadarma.comfor PBX orsip.zadarma.comfor SIP Direct - Verify your credentials — make sure the username and password match what’s shown in your Zadarma SIP settings
- Check your Zadarma balance — outbound calls require sufficient credit
Cold transfer is not working
Cold transfer is not working
Zadarma does not support SIP REFER. To enable cold transfer:
- Go to your assistant’s Transfer Phone Call tool settings
- Enable “Custom SIP transfer” (under Advanced)
- Set the SIP URI to
sip:+DESTINATION_NUMBER@sip.zadarma.com
+.Which connection type should I use — PBX or SIP Direct?
Which connection type should I use — PBX or SIP Direct?
- PBX is recommended if you need multiple extensions, call routing rules, IVR menus, or other PBX features in Zadarma
- SIP Direct is simpler if you just need a single number connected without PBX features
Need help setting up? Our support team specializes in helping customers
integrate their phone systems. We’ll guide you through the entire process,
ensuring a smooth setup with your specific phone system configuration.