MCP servers let your AI assistant pull live data and trigger actions in
external systems — like HubSpot, your internal APIs, or knowledge tools —
right in the middle of a conversation. Connect a server once, assign it to any
assistant, and its tools become available to the AI automatically.
What is an MCP server?
The Model Context Protocol (MCP) is an open standard for exposing tools to AI models. An MCP server is simply a remote HTTP endpoint that speaks this protocol. You don’t install anything — you paste the server’s URL (and optional authentication headers), and the assistant can call its tools while talking to your customer.Why use MCP servers?
- Add whole toolsets (e.g. a HubSpot or Notion integration) in one step instead of building tools one by one
- Tools, descriptions and parameters are discovered automatically from the server
- Works across voice calls, the web widget, and chat
- Reuse one server across many assistants
Mid-call tools vs. MCP servers
Both live under the Tools page. Use whichever fits:Mid-call tools
A single custom HTTP endpoint you define by hand (URL, method, parameters).
Best for one-off calls to your own API. See Custom Mid-Call Tools.
MCP servers
A remote server that exposes many tools at once, discovered
automatically. Best for connecting to a platform or a shared integration.
Connecting a server
1
Open the Tools page
Go to Tools in the sidebar and switch to the MCP servers tab, then click New MCP server.
2
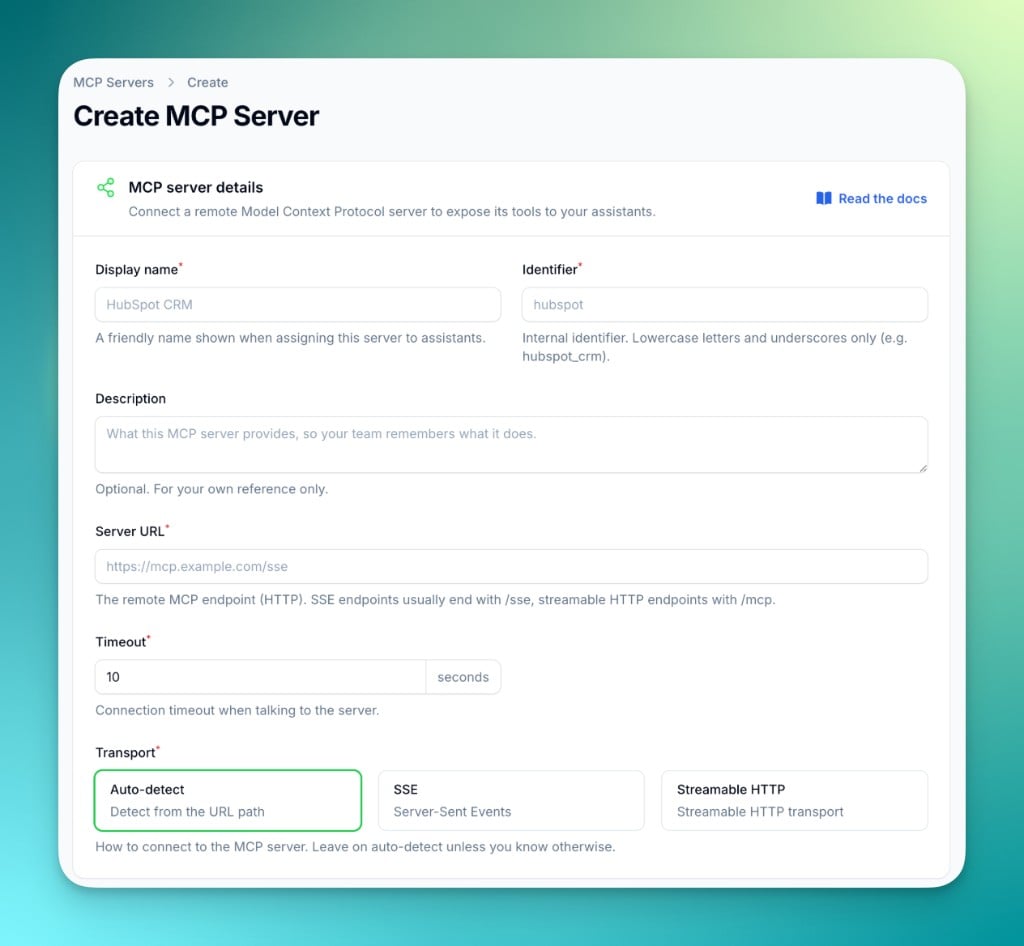
Fill in the details
- Display name: a friendly name shown when assigning the server (e.g.
HubSpot CRM) - Identifier: an internal id, lowercase letters and underscores only (e.g.
hubspot) - Description: optional, for your own reference
- Server URL: the remote MCP endpoint
- Timeout: how long to wait when connecting to the server
3
Choose the transport
Leave this on Auto-detect unless you know otherwise. Auto-detect picks the
right transport from the URL:
4
Add authentication headers (optional)
If the server requires a token, add it as a header. Headers are stored encrypted.
Try it for free
Connection status & discovered tools
Each server is shown as a card with a live connection status.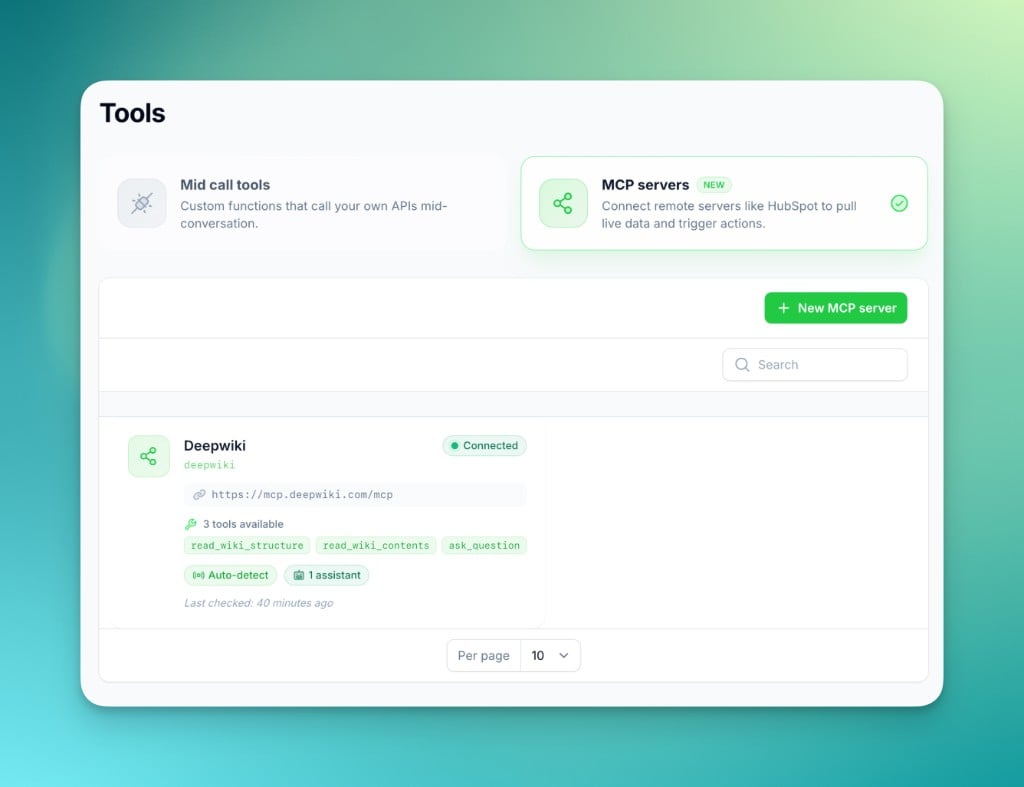
Connected
The server is reachable. Its available tools are listed on the card.
Disconnected
The server couldn’t be reached. The error is shown so you can fix the URL or headers.
Not tested
The server hasn’t been checked yet.
Choosing which tools are exposed
By default, all of a server’s tools are available to your assistants. Open Manage tools (on the server’s edit page) to view each tool’s description and parameters, and enable or disable individual tools.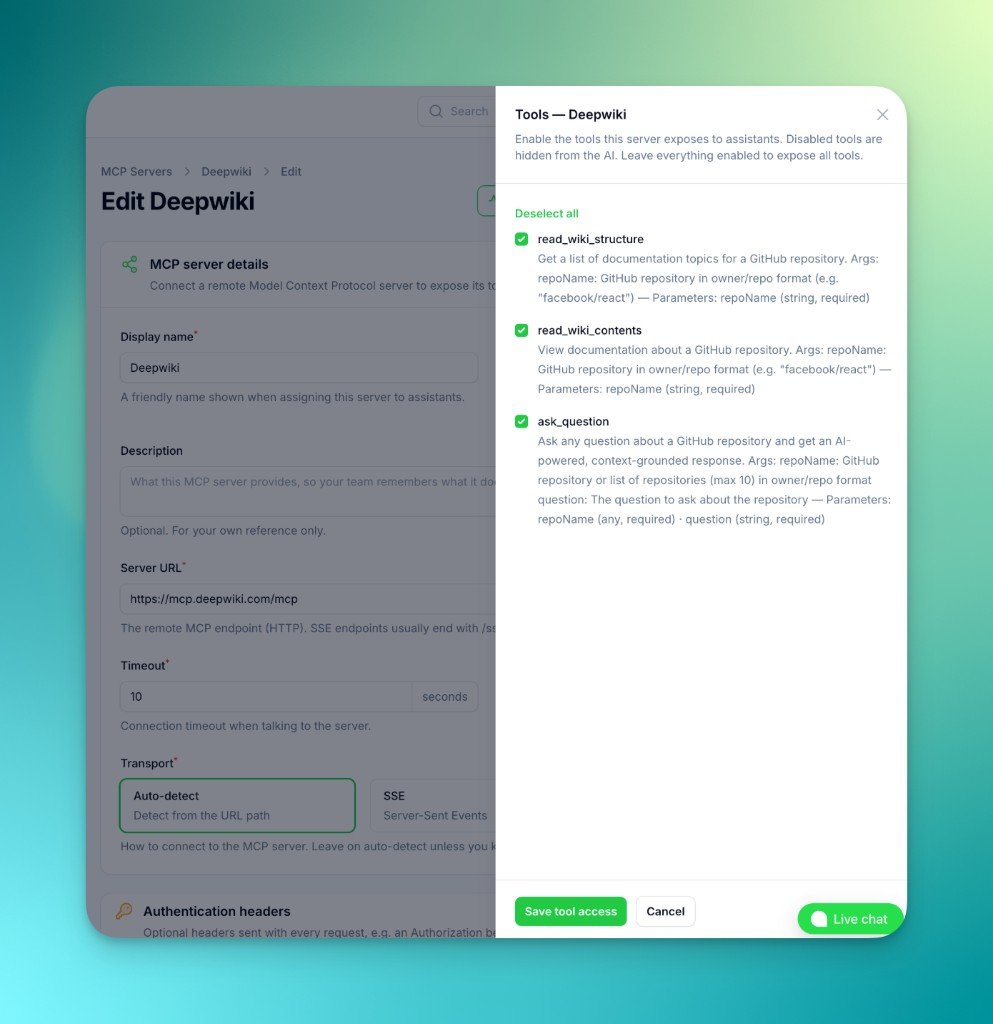
Disabled tools are hidden from the AI. To expose no tools at all, simply
remove the server from the assistant instead.
Assigning a server to an assistant
1
Open your assistant
Edit an assistant and go to the Prompt & Tools step.
2
Assign MCP servers
In the MCP servers section, select one or more servers. The list shows
each server’s connection status and tool count.
3
Save
The assistant can now use the server’s enabled tools during voice calls, the
web widget, and chat.
Authentication
The integration sends static headers with each request. It does not perform an interactive OAuth login.Real-world examples
Documentation lookup (DeepWiki)
Documentation lookup (DeepWiki)
CRM access (HubSpot-style)
CRM access (HubSpot-style)
Best practices & security
- Keep tokens scoped to the minimum permissions the assistant needs.
- Use Manage tools to expose only the tools an assistant actually requires.
- Give each tool a clear name and description on the server so the AI knows when to use it.
- Mention the available capabilities in your assistant’s system prompt so it uses them at the right moments.