Purchase a Phone Number
Log in to your DIDLogic dashboard at app.didlogic.com and go to the BUY tab. Search by country and area code, add a number to your cart, and complete checkout. Your new number will appear under the PURCHASED tab.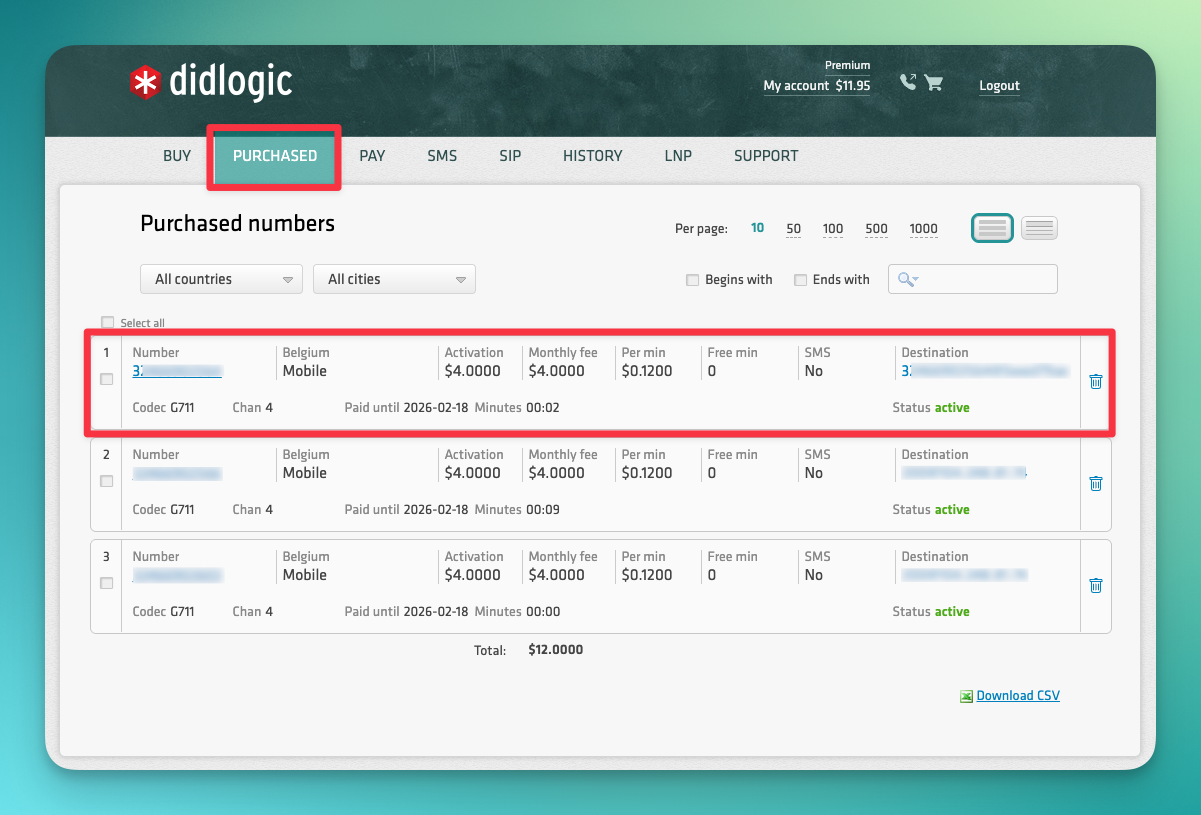
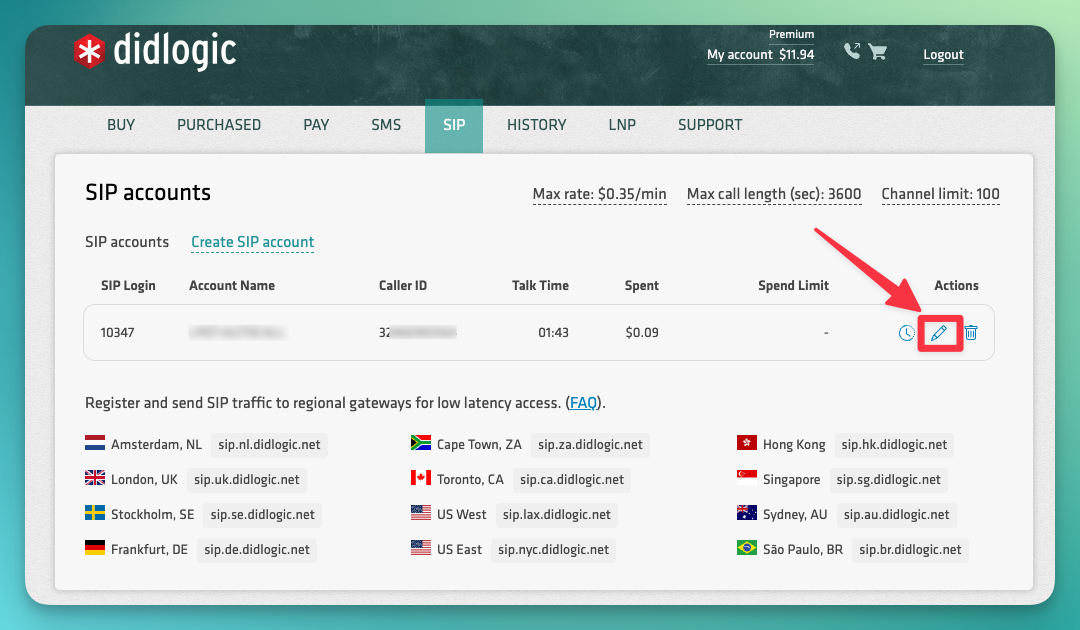
Configure Your SIP Account (Outbound)
Go to the SIP tab and click Edit on your SIP account.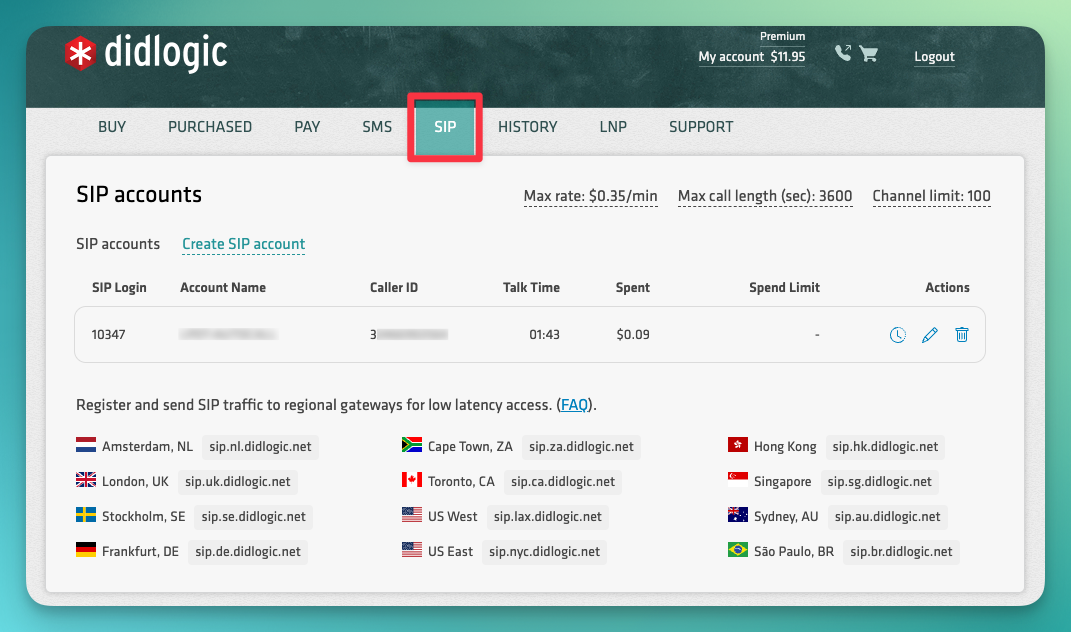
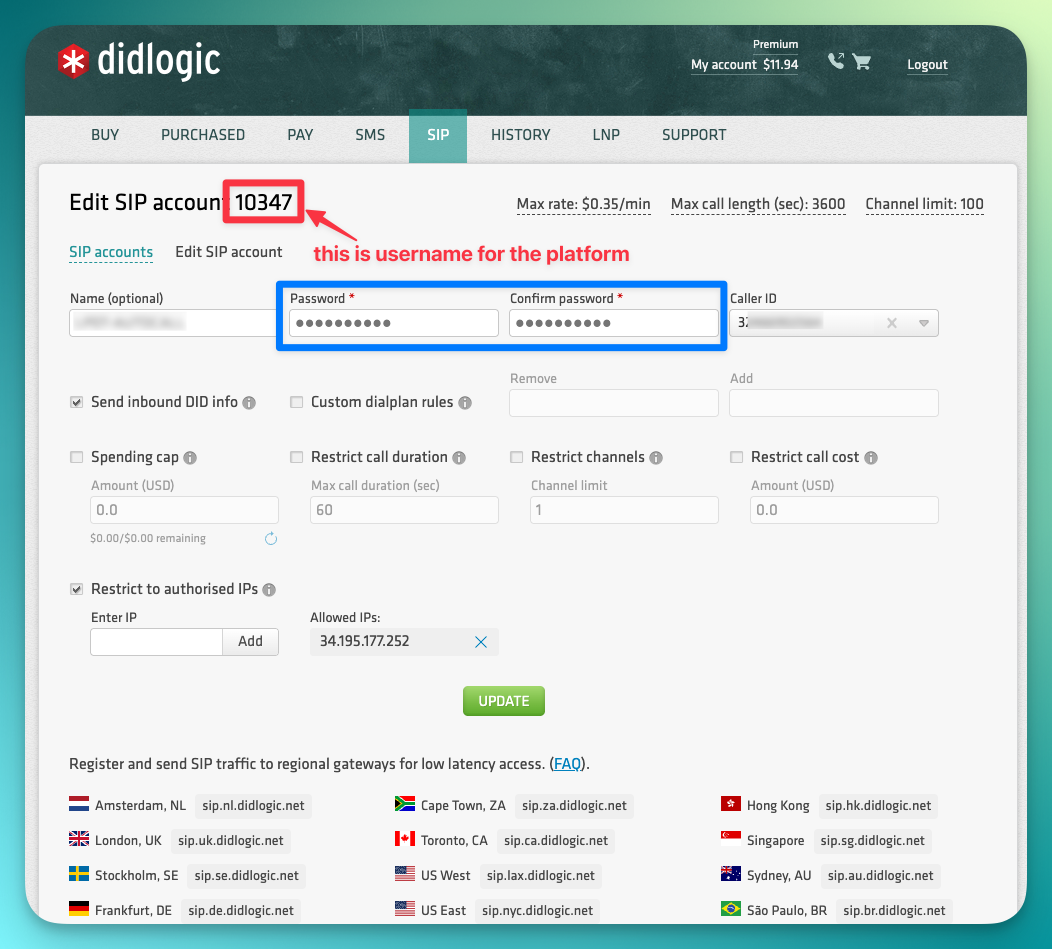
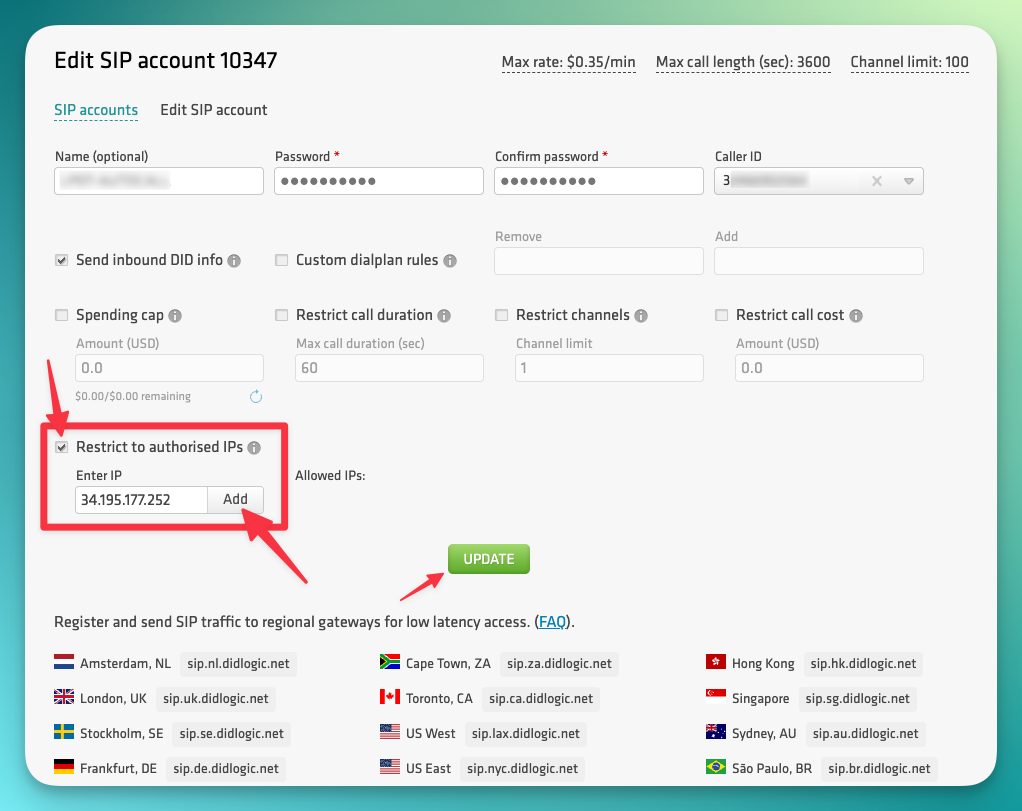
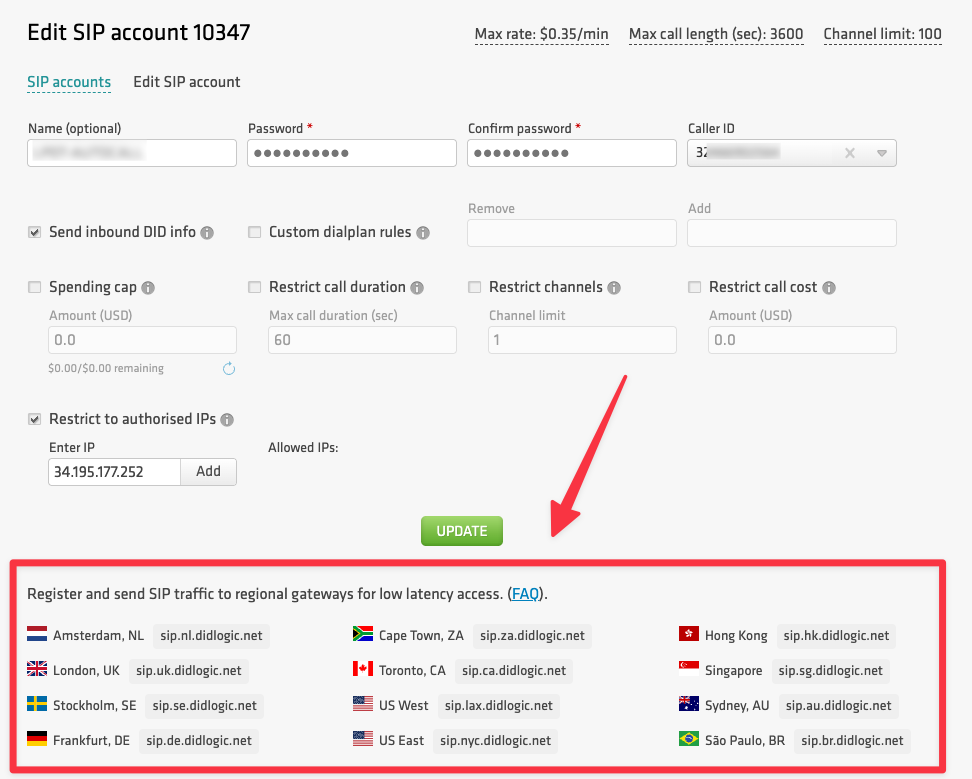
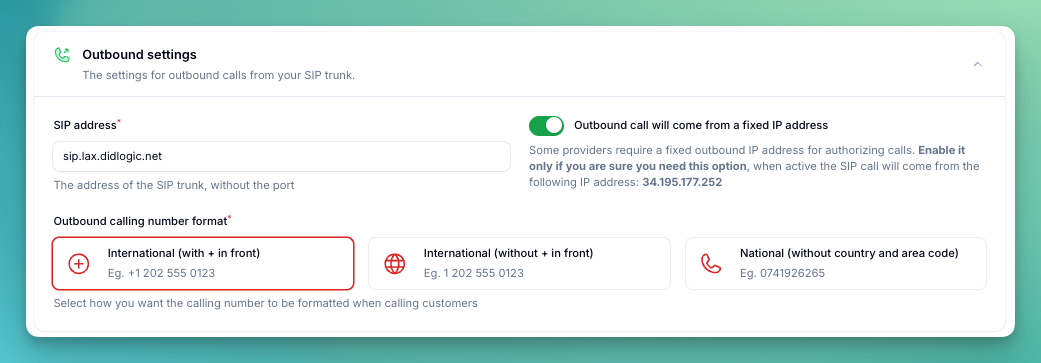
12345) — this is your username that you will use in Autocalls. Set a password in both the Password and Confirm Password fields — you will use this same password when importing the number to Autocalls.34.195.177.252, then click Add and Update.Configure Inbound Routing (in DIDLogic)
Go to the PURCHASED tab and click Destination next to your phone number.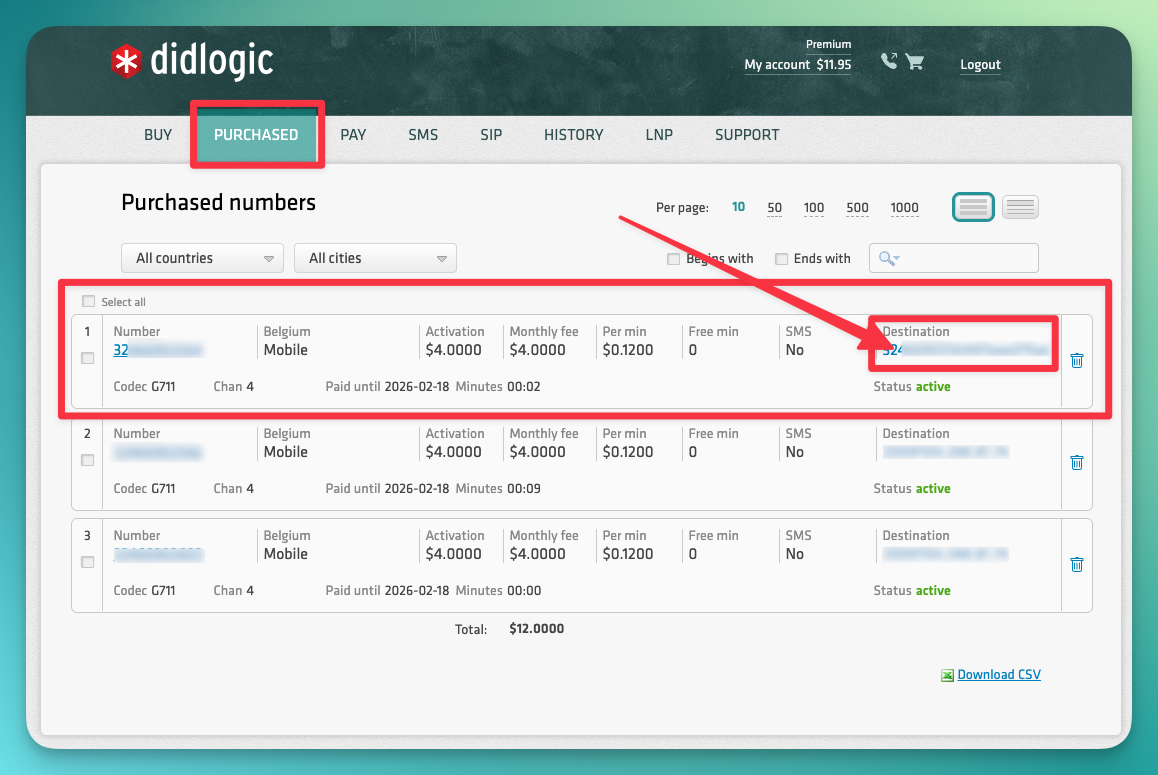
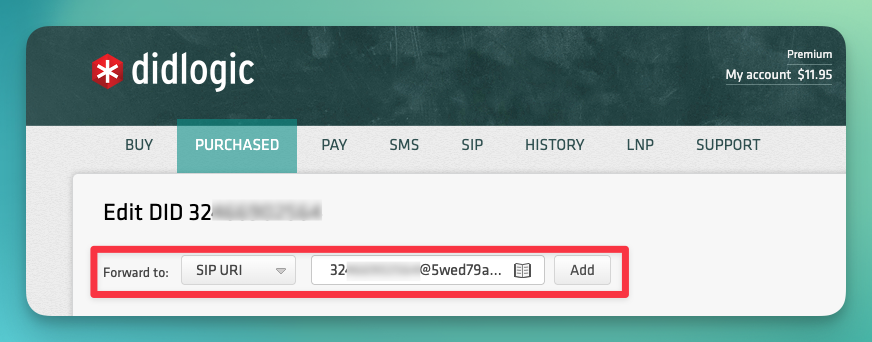
+15551234567, enter:Import Number to Autocalls
Go to your Autocalls dashboard → Your Phone Numbers → “Integrate SIP trunk” and fill in your details: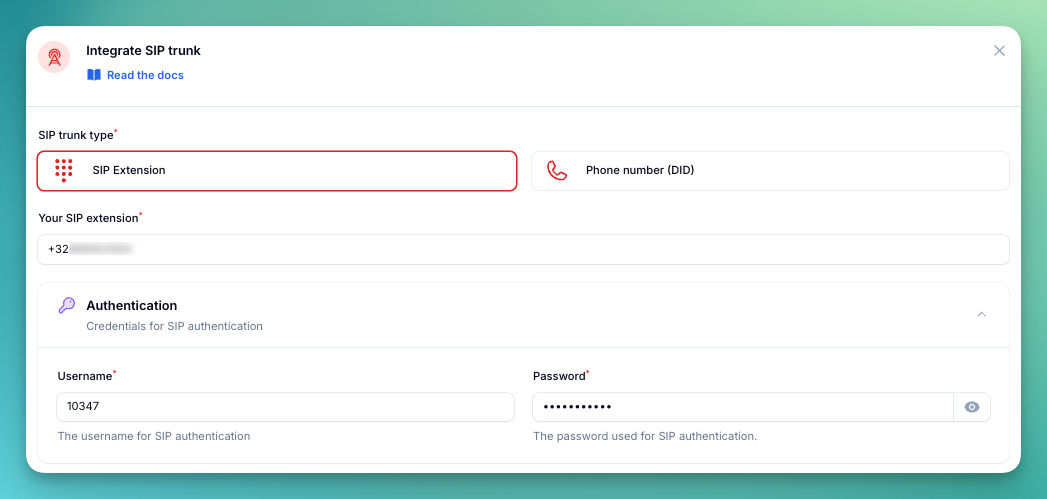

| Gateway | IP Address |
|---|---|
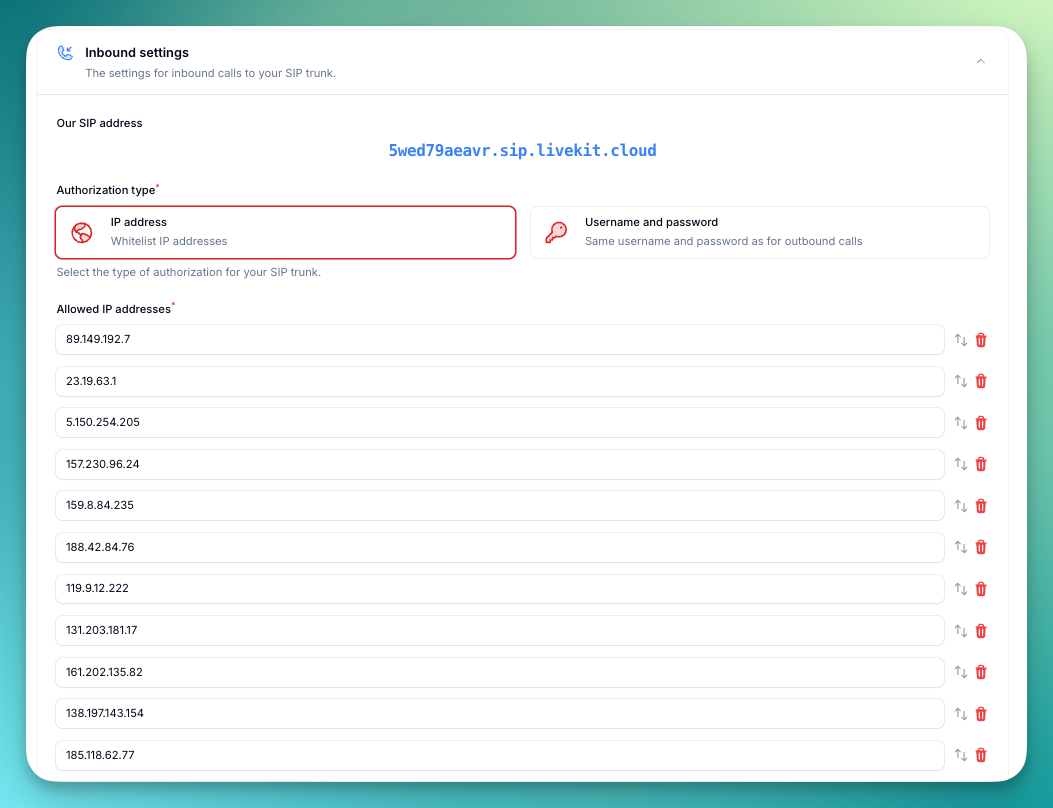
| sip.nl.didlogic.net | 89.149.192.7 |
| sip.uk.didlogic.net | 23.19.63.1 |
| sip.se.didlogic.net | 5.150.254.205 |
| sip.de.didlogic.net | 157.230.96.24 |
| sip.fr.didlogic.net | 159.8.84.235 |
| sip.hk.didlogic.net | 188.42.84.76 |
| sip.sg.didlogic.net | 188.42.84.76 |
| sip.au.didlogic.net | 119.9.12.222 |
| sip.nz.didlogic.net | 131.203.181.17 |
| sip.ir.didlogic.net | 161.202.135.82 |
| sip.ca.didlogic.net | 138.197.143.154 |
| sip.lax.didlogic.net | 185.118.62.77 |
| sip.nyc.didlogic.net | 192.241.183.87 |
| sip.za.didlogic.net | 102.130.116.205 |
| sip.br.didlogic.net | 169.57.132.146 |
Security Requirements
Common Issues
Outbound calls not working?
Outbound calls not working?
- Verify the SIP URI — Make sure you copied the correct regional SIP URI from Step 2. Remove any trailing spaces.
- Check your username — The username is the numeric SIP account number (e.g.,
12345), not your email address or account name. - Check your password — Ensure the password in Autocalls matches exactly what you set in the DIDLogic SIP account settings.
- Verify IP whitelist — Make sure
34.195.177.252is added to the authorized IPs in your DIDLogic SIP account.
Inbound calls not working?
Inbound calls not working?
- Verify the SIP URI destination — In DIDLogic, make sure the destination is set to SIP URI (not SIP device) and the format is correct:
<number_without_plus>@5wed79aeavr.sip.livekit.cloud - Check the IP whitelist in Autocalls — Make sure the IP address you added in the Autocalls inbound settings matches the regional gateway you are using. Refer to the gateway IP table in Step 4.
Need help setting up? Our support team specializes in helping customers
integrate their phone systems. We’ll guide you through the entire process,
ensuring a smooth setup with your specific phone system configuration.